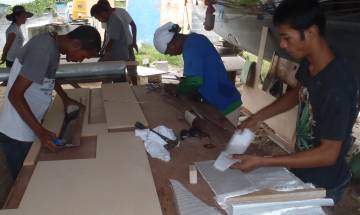
Busy day in the workshop, cutting & fitting fiberglass & foam
22 New Bows
 Busy day in the workshop, cutting & fitting fiberglass & foam |
Summary: A productive week. Both bows had 7 strips of foam bonded on, which was shaped to sharper points than before and eventually covered with 7‑8 layers of biaxial glass. The salon sub‑floor under the nav‑station was rebuilt in glassed in foam, with cute foam and fiberglass supports. Six big hatch‑covers, 4 from the cockpit and 2 from the chain lockers, were ground back and had foam and 2‑3 layers of biaxial glass stuck on underneath. This has strengthened them wonderfully. The outer hulls were sanded and the hole by the starboard forward portlight was filled, then the guys started sanding the inner hulls and under the bridge‑deck. The speed and depth transducers were removed and their through‑holes checked and cleaned. Boy started repairing the aft cockpit seat with glass and foam on top of the backrest, and we moved our workshop out from under the neighboring catamaran and into a small tent. The 2 forward ports in the salon were removed (with great difficulty) and much of the area in front of them had to be opened up as the drain‑pipes for the grab‑rails have leaked, but we found 2 big stainless steel tanks that we didn't know we had!
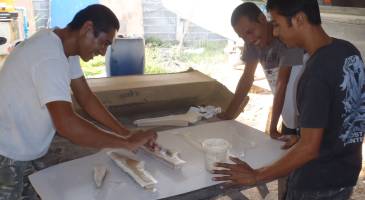 Golf, Baw, & Max glassing the new floor supports |
Monday, March 19:
An interesting and productive day, despite rain falling on us twice. Max put up a bunch of
plastic walls inside the salon and proceeded to
grind a scarf into the salon floor where we'll attach the new section of flooring. Then he continued
building the foam supports for the floor, gluing them together to make double‑wide supports, and
cutting out bits of fiberglass for the edges. It's actually the fiberglass that will take the
floor loads, and each piece now has 2 layers of biaxial glass epoxied on each side. When the supports
get installed, they'll get more glass.
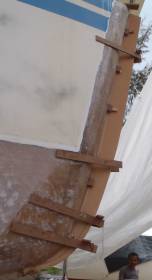
But the really interesting work was happening at the bows. Baw (usually our varnish guy) had taken a specially shaped length of foam and slit the end of it repeatedly, so it could bend. Then he and Houa stuck little strips of wood onto Ocelot's bows with super-glue. The wood was used to correctly position and hold the foam while it was epoxied to Ocelot's bows. This foam ridge will now get more foam glued to either side before being shaped into somewhat sharper bows. Then everything will get several coats of fiberglass to give it strength. We were amazed at how easy they made it look, and how quickly it all went! Both of Ocelot's bows now sport new foam marking where the new pointier bows will be.
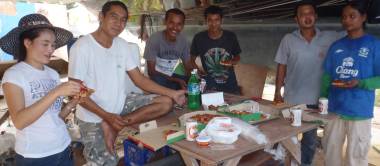 Pizza party! Mia, Golf, Baw, Handsome Max, Boy, & Houa |
Boy continued grinding the gelcoat off the underside of our hatch‑covers, and finally finished the remaining 4. Then he cut out and shaped 2 pieces of foam for the 2 smaller hatch‑covers, and before the day ended those were epoxied down to the undersides of the hatch‑covers. Tomorrow we'll cover the foam in 2 coats of fiberglass (which is what really adds the strength).
Jon decided it was time to attack the speed and depth transducers in the starboard fo'c's'l. We want to check the hull where the transducers go through, to make sure it's suitably reinforced and completely waterproof. First the fo'c's'l had to be vacuumed out, as it had lots of fiberglass dust inside. Then Jon got down into the very bottom of the hull and using a big wrench loosened the 2 big nuts holding the transducers into the hull. The depth transducer then came out pretty easily, but we'd rebedded the speed transducer fairly recently and it took more ... persuasion. The transducers are well sealed in with silicone, but we don't want a leak to cause a problem.
Today was also Handsome Max's 23rd birthday, so we had a bit of a celebration after work. Golf brought some excellent pizzas (delivered by scooter!), sodas, and beer (although our crowd doesn't drink much beer). We all sang Happy Birthday and there was much laughing and joking. We gave Max a DVD with some music, as he seems to like listening to music on his laptop, even bringing it to the yard sometimes.
 |
 |
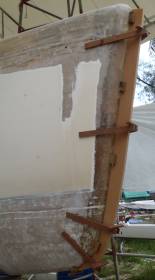 |
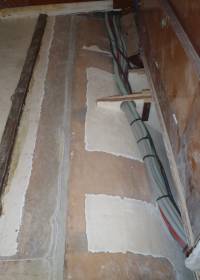
| Where new salon floor will go | Foam on Ocelot's bows (starboard, port) | |
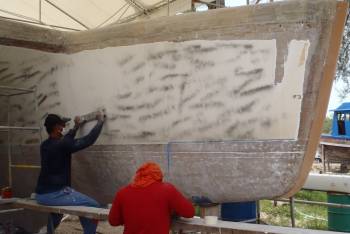 Long-boarders working on the insides of the hulls |
Tuesday, March 20:
Another good day. The guys long‑boarding the hulls moved to the inside of the hulls.
We don't think they're actually done with the outsides, but we'll see.
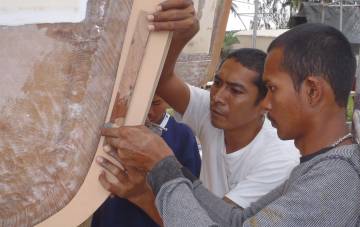 Golf & Baw fitting foam to Ocelot's starboard bow |
Baw was working all day on our bows (which seems completely appropriate![]() ).
He cut and shaped several pieces of foam and then stuck them onto the sides of the central piece
that they'd stuck on yesterday. Jon requested that they put some fiberglass between the layers
of foam (instead of just epoxy mud) but we think only 2 bits of glass were actually put in, one on either
side of the central piece. Originally Golf had said that they'd screw the foam sheets on, and
just remove the screws later, but in fact they clamped the foam together, which probably pulls it
together more tightly. Our starboard bow is now well foamed, but Baw has only just started
shaping the foam for port.
).
He cut and shaped several pieces of foam and then stuck them onto the sides of the central piece
that they'd stuck on yesterday. Jon requested that they put some fiberglass between the layers
of foam (instead of just epoxy mud) but we think only 2 bits of glass were actually put in, one on either
side of the central piece. Originally Golf had said that they'd screw the foam sheets on, and
just remove the screws later, but in fact they clamped the foam together, which probably pulls it
together more tightly. Our starboard bow is now well foamed, but Baw has only just started
shaping the foam for port.
Houa spent much of the day trying to get our port forward hatch out of the salon. He pounded on the corroded bolts with Jon's impact screwdriver for several hours without much success. Jon even tried heating the frame with his new blowtorch, but to no avail. Houa will probably just cut the heads off the bolts in the morning, and we'll then try to renovate the hatch. We haven't found a supplier of Goiot hatches here in Phuket, so we better make that one work.
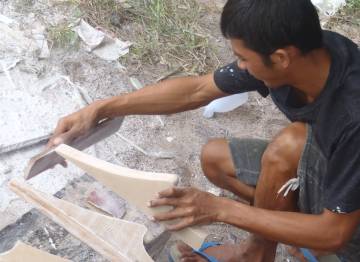 Max shaping & glassing the salon floor supports |
Jon also spent time cleaning up the holes where the speed and depth transducers come through the hull. The area looks fine, with no signs of water having gotten in. Now he needs to clear all the junk out of the port fo'c's'l. The guys have been using it as a storage locker for bits of deck hardware, like hatches. Once the junk is out, it can be cleaned (it's full of fiberglass dust grindings) and he can cut a hole in the bottom of Ocelot(!?!) to mount the other depth transducer.
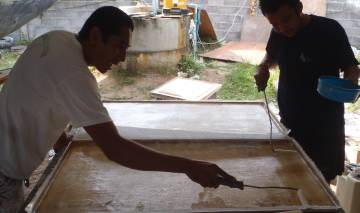 Golf & Boy laying biaxial glass before putting down the foam |
Max has been having fun creating us the cutest little floor supports. He's done them in fiberglass covered foam. They're not big, but this sort of meticulous attention to detail can't be done in the production environment Ocelot was built in. That part of the sub‑floor will probably be slightly higher, but the floor itself, about an inch above the sub‑floor, will obviously be level. Since there are a ton of (usually inaccessible) wires going under the floor, Jon ran 2 strings through, so he could pull wires through that area in the future if he needs to.
Boy cut and shaped the foam to go under the last 2 big cockpit hatches, and late in the afternoon we got them epoxied down, so now all of the hatches have foam under them. He then put 2 layers of glass over one of the small hatches we'd foamed yesterday. Hopefully tomorrow we'll be able to glass the 3 remaining hatches.
Our neighbors Richard and Susannah on Ultimate Dream are also extending their bows (and sterns!) but by much more than we are. It will be interesting to see how they do it, as they've got a fair‑dinkim boat builder helping them.
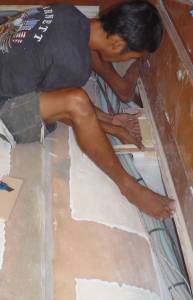 Max fitting floor supports over wires |
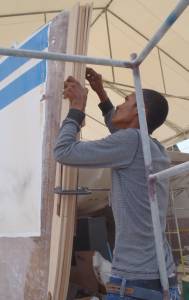 Baw fitting foam to bows |
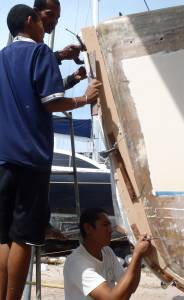 Clamping foam in place |
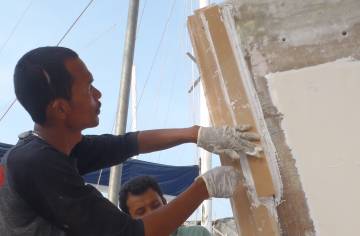 Baw epoxying more foam on Ocelot's bow |
Wednesday, March 21:
Lots of action today, but not all of it forward. When we got to the boatyard, Baw had started
fairing the foam on the starboard bow, trimming off the lose bits and extra fiberglass so we can see what we've
got. Later he epoxied 3 sheets of cut foam to each side of the central foam spine on the port
bow. He'd screwed the sheets of foam together, but it was still a bit of a mess. We were
concerned that the foam wasn't right up against the bows, which it has to be if the bows are to have
any strength.
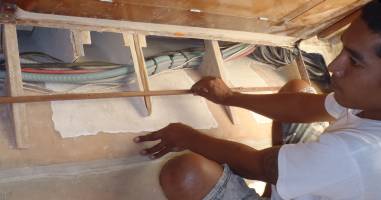 Golf checking the new floor supports in the salon |
Baw may have been trying too hard. A better way to epoxy more foam onto the central spine piece might have been to do them one at a time. This would have allowed Bow to put a sheet of glass between each sheet of foam, strengthening them considerably. Carve the foam to fit, lay a sheet of glass on the foam you're attaching to, put some epoxy mud on to take up any gaps, and screw the new piece of foam in place, making sure that the foam is securely bonded to the bows. Then go work on the other side, repeating the process. After an hour or so, the epoxy is tack‑free so you can pull the screws out and do the next sheet. In 4 hours all 6 pieces of foam are securely bonded on, with glass between each sheet.
Golf and Max spent much of the day installing Max's new floor supports in the salon, under the nav‑station. They had marks for the approximate locations for the supports, but not the exact final locations. They gooped up the bottom of the supports with epoxy mud, all except for a small area near the tip. Then they lined up a support until they got it just where it was supposed to go. When they had it lined up perfectly, they put a few drops of super‑glue under the tip and held it down for a minute until it was hard. Then they could spread the epoxy mud and give each support a nice fillet, knowing it wasn't going to move. It took them a few hours, but we now have 4 shiny new floor supports under the nav‑station.
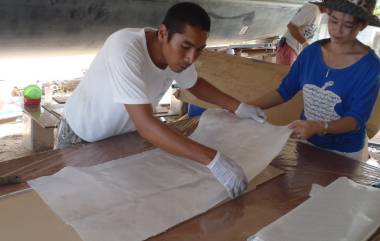 Golf's wife Mai helping Golf lay up the new salon floor |
The step sideways was something we already knew about, but it still wasn't pretty. When we
started finding wet balsa, we went around the whole boat, tapping the fiberglass and listening for a
distinctive hollow thunk (instead of a nice solid
klink ![]() ).
So we knew that some of the areas up at the very front of the cabin had problems. This area is
actually in front of the salon, and is really more decorative than structural, but we still want it
fixed. When Houa cut out a patch of glass to explore the area, water dribbled out. The
wood underneath was saturated. <sigh>
).
So we knew that some of the areas up at the very front of the cabin had problems. This area is
actually in front of the salon, and is really more decorative than structural, but we still want it
fixed. When Houa cut out a patch of glass to explore the area, water dribbled out. The
wood underneath was saturated. <sigh>
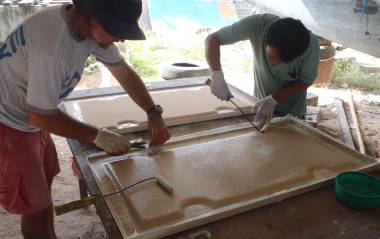 Jon & Boy laying the final sheets of biaxial glass over the foam |
In the end, Houa cut out several small sections of fiberglass in that area. Some had badly saturated balsa, but most just needed a bit of the balsa replaced with foam, and a couple just needed to be re‑glassed as the balsa underneath was actually fine. We still need to do a bit more cutting to determine the extent of the problems, which will probably happen tomorrow.
Much of this extra work wasn't in Golf's original quote, of course. He recently gave us a supplementary bill: To repair the entire helm area, the steps leading down to the entryway, the entryway itself, and the salon floor with new foam coring, several layers of fiberglass, fairing everything in and applying gelcoat to make it all look new, he wants about $3,000. More than we wanted to spend, of course, but actually a very fair quote considering all the work it will take to put it all back together. We've impressed on Golf that he has to be happy and we have to be happy, if we're going to make this work. And we're both committed to making it work. Other people who've gotten quotes for work often try to bargain the quotes down, but we feel that maintaining a good working relationship is more important than the few bucks we might save. [Ed: This was probably a mistake. The Thais respect a bit of bargaining, and think that folks who don't are easy marks.]
In the afternoon, Jon spent much of the time helping Boy epoxy down the final sheets of fiberglass to the undersides of the 3 remaining hatch‑covers. Boy would mix up the epoxy and Jon would roll it into the glass. Boy had precut all 6 sheets of biaxial glass so it all went pretty smoothly but it took several hours - especially since the boss (Golf) kept stealing our epoxy (he was laying up the salon floor next to us)!
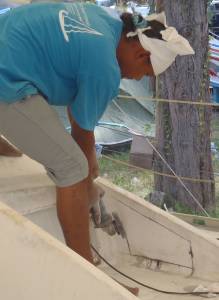 Houa cutting into wet balsa |
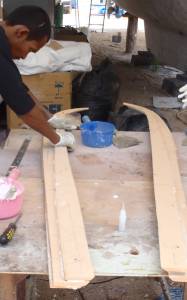 Baw assembling bow foam |
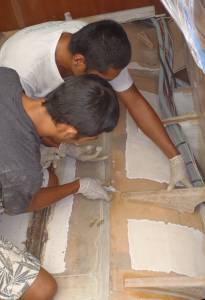 Super-gluing floor supports down |
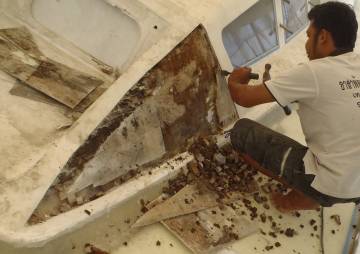 Boy chiseling out wet balsa from in front of the salon |
Thursday, March 22:
Got good things done in the morning, at least. We arrived to find Boy cheesing wet balsa out
of the areas that Houa had opened up. Most of them will be fairly straightforward to fix, but a
couple of areas need to be opened up more. Golf assures us that repairing it all is pretty
easy for him, even though it gives us the willies to be cutting Ocelot's skin open like this.
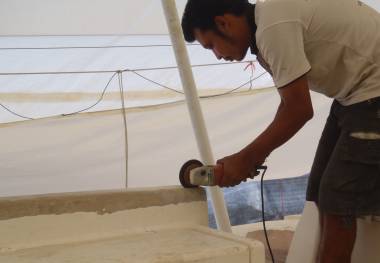 Boy cutting the top off the aft cockpit seat to remove the balsa |
Boy had taken the 4 hatches that we've been working on for the last few days and put them in their correct places, 2 in the cockpit and 2 up forward, over the anchor‑chain lockers. It's really amazing how strong these are now. When they took the teak off several months ago, the hatches all bent somewhat alarmingly whenever anyone stepped on them. We added 10mm (3/8") of foam and 2 sheets of fiberglass and suddenly they're so stiff you can't really feel them flex under you at all. They still need to be painted (says Sue, although Jon would rather leave them natural so he can see any problems early) and have their gaskets put around the undersides, but that will happen later with the other cosmetic repairs.
Then Boy took the top rail off our rear cockpit seat. This had a single bolt going through it for the backrest support, but that was enough to let water in, which affected the balsa. In truth, we'll be glad to get rid of as much of the balsa as possible and replace it with foam. Foam may not be as strong as balsa, but it probably lasts longer, especially in a marine environment.
Inside the salon was where the good stuff was happening. Max was fitting his small bits of glass‑covered foam under the nav‑station, gluing them in with epoxy mud. These will support the outer edge of the new sub‑floor. Yesterday afternoon, Golf had put a layer of biaxial glass on one side of the foam that's to be the sub‑floor, covering it with peel‑ply so it would have a smooth finish. As soon as the supports were in place they gooped all of the supports in epoxy mud, gooped the glassed side of the sub‑floor in mud, and put the sub‑floor in! WOOT! It all went very smoothly and they finished just before lunch.
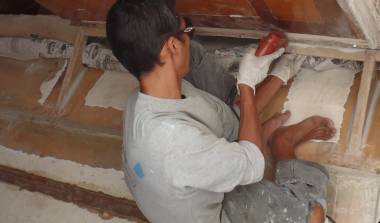 Max installing his sub-floor supports under the nav-desk |
After the epoxy mud had hardened, Max put 2 strips of fiberglass down each side of the foam sub‑floor, where the high loads will be, then coated the whole thing in 2 layers of biaxial glass. He wants to take Friday off to visit his family in a distant town, and wanted to finish "his" project before he left. We can't wait to see how strong it is tomorrow morning!
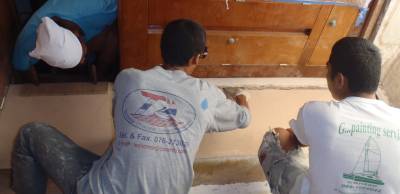 Houa, Max, & Golf putting down the new foam in the salon floor |
Baw was sanding and shaping the foam on our bows. He used a straight bit of wood with a hacksaw blade attached, rubbing the wood along Ocelot's hull as the hacksaw blade scored the foam. Then he could sand the foam until the hacksaw grooves were gone. Neat trick!
E‑U was back working for us again, running the team of 3 guys sanding the bottom of Ocelot's bridge‑deck. This is hard work, as you have to hold a heavy, vibrating sander above your head and push it up hard. These guys must have arms like gorillas! We get tired just watching them.
In the afternoon we found out that we're being evicted from our workshop. That is, we setup our workshop under a neighboring catamaran, and the nominal owner might come for a visit, so we decided we'd better clear out.
This catamaran has a convoluted history. One of 4 cats built in Langkawi out of aluminum, they ground the welds back too far (probably for cosmetic reasons) and on her maiden voyage she split open and almost sank! Apparently there was a court case about it (suing the builder) in Kuala Lumpur just a few days ago. But although the boat was bought as a partnership, only one man actually held title, and he recently died in a motorcycle accident, so actual title is in limbo. Sounds like one of those situations where only the lawyers get rich. In the meantime, it's sitting alone and unloved (well, we love it, but mainly as a rain shelter and a place to hang our rigging wire).
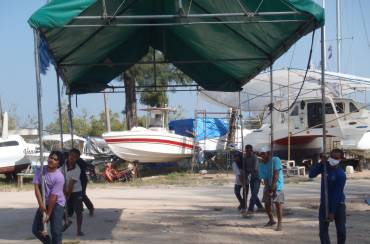 Golf's team moving the new work tent |
For the last few days the power has been essentially unusable for much of the day, with the voltage so low that nothing works right. Since Golf's team couldn't do much, he had them go get a work‑tent and move it in front of Ocelot. Then they tidied everything up and moved all our stuff to the new tent. It's much smaller than the catamaran, but if we keep things organized it should work. And with some creative rope‑work we could even join the 2 tents with tarps if we need to. The problem here isn't rain (yet) as much as sun - everyone prefers to work in the shade if possible.
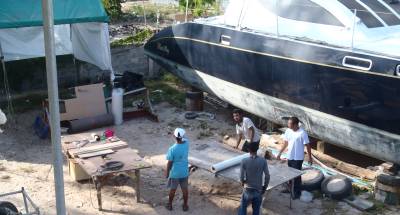 Moving from catamaran (right) to new work tent (left) |
Seeing as things are moving along, Jon decided to finish stripping the mast of the last 3 diamond stays. Two of the turnbuckles were gummed up enough that they didn't want to unscrew, and one of the toggle‑pins was held fast in the (corroded) mast tang, but with a bit of ... persuasion, they all came free. We hung one of the diamond stays up with all the others, under the neighboring catamaran, but then Golf told us that we'd have to move them, so we left the other 2 on the mast for now.
Tomorrow we're hoping to move the tent that's over Ocelot. It's a bit too low for us if we want to replace our bimini (cockpit shade) and it's not centered over Ocelot. A couple of weeks ago we had to move it over several feet so the boat next to us could be moved, and we've never bothered to put it back. Tomorrow we'll put it back where it belongs, and raise it up a few feet as well. Then we'll move all of our diamond stays that are hanging under the neighboring catamaran and hang them from our tent instead.
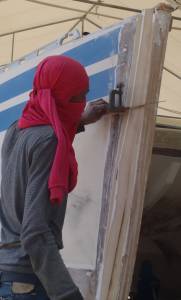 Baw measuring where to sand |
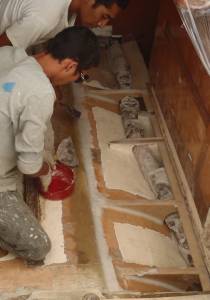 Golf & Max mudding subfloor supports |
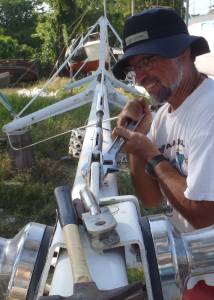 Jon removing the diamond stays |
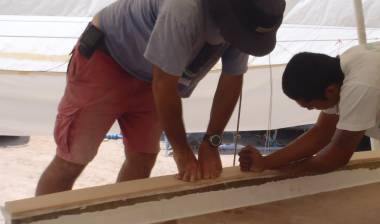 Jon & Golf squooshing epoxy mud out from under the foam |
Friday, March 23:
We had 7‑8 folks working today, so lots happened. The first thing we did when we arrived was
to check the new sub‑floor in the salon. It feels great, and even with only 2 layers of
biaxial glass on each side it passes the "thump" test (standing on one heel while you thump down
with the other heel). There's a bit of movement right in front of the steps down to the
cabins, but it's about the same as the other side. One job down, 493 to
go...![]()
We had 3‑4 guys sanding under the bridge‑deck. By the end of the day they'd pretty much gotten to the whole area. Pretty tough work... Another guy was grinding off the paint on the forebeam, but he found cooler work in the afternoon when the sun came to that side of the boat.
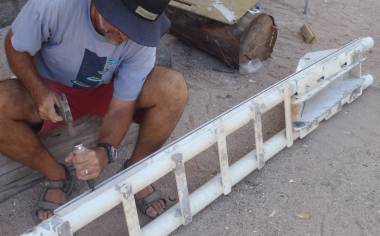 Jon, spending quality time with his impact screwdriver |
Boy made the most progress as he started rebuilding the aft cockpit seat. He got 2 layers of biaxial and a sheet of foam down on the top ridge of the seat, where he'd ground the old balsa off yesterday. As soon as it was cured, Jon removed the water‑jugs we'd used to hold it down and cut a circle out of the foam for the central support of the backrest. This bolt‑hole was probably what caused much of the water‑damage to the seat. We'll fill it with epoxy‑mud before we put the glass on so even if it leaks, the water won't get to the foam.
We've asked Golf to work on the cockpit seat because it has to be repaired before we can glass over the foam we put down behind the seat, on our aft‑deck. That foam has been open and exposed for several weeks now, and we're concerned that the foam might be getting damaged by all the traffic. It has boards and plastic bags over it, but everyone who comes onto Ocelot walks on part of that aft‑deck foam, and it's not made for that.
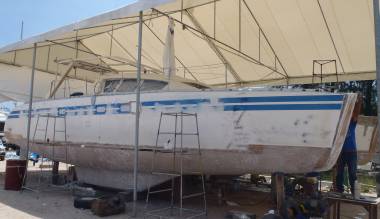 Ocelot sitting under her shady tent, being worked on |
Baw and Ben arrived after lunch, just as Boy was leaving to visit his family in a remote village. They were put to work adding a bit more foam to the port bow, and shaping the foam on the starboard bow. Starboard is looking very nice, and Golf hopes to start glassing it soon, possibly tomorrow.
Golf didn't move our tent today, so we've left our diamond stays hung up under the neighboring catamaran. This meant that Jon couldn't finish stripping the mast, so he went looking for other trouble to get into. What he found was the support that goes out to our forebeam from the centerline of the hull. This teak and aluminum structure holds the insides of the 2 trampolines. The anchor chain runs across the top of it and the anchor roller is at the end, just before the forebeam. The trampolines are held on with steel slides running in 2 aluminum sail‑tracks, one on each side. The sail‑tracks are each held on with 25 stainless steel bolts, which have long since corroded into the aluminum. This gave Jon a chance for some quality time with his impact‑screwdriver, removing all 50 bolts. There must be a better way to hold these on...
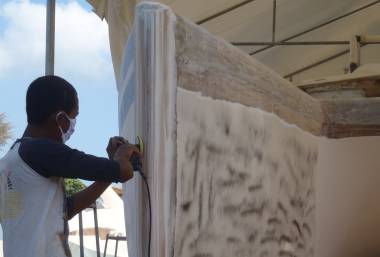 Baw fairing in the starboard bow - might glass it tomorrow? |
Houa was still chasing wet balsa up in front of the salon. The good news is that we think we know where the water is coming from. Ocelot has grab‑rails on each side of the top of the cabin, running the full length of the cabin. But instead of mounting a stainless steel grab‑rail on the cabin top, the builders decided to get cute. They sunk a trough into the top of the cabin, about the width of a fist, with a teak board to grab mounted flush with the cabin‑top. The problem with this design is what to do at the front where you want to end the trough, because it tends to fill up with water when it rains. So they put a short copper drain pipe at the end of the trough that comes out by the top of our forward opening ports.
But copper isn't the best material to use here, as it corrodes in our moist, salt atmosphere (plastic would have been much better). Apparently the copper pipe on port side has been leaking for some time, saturating the balsa around its forward end and actually filling a small, hidden compartment with water (which we drained out, of course). Starboard side has a bit of wet balsa, but it's not nearly as bad.
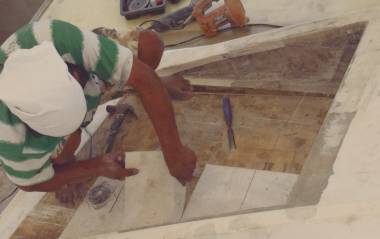 Houa removing Ocelot's glass skin, exposing the balsa |
We think (hope) that we've found all of the wet balsa now. Reconstruction of the areas we've taken apart will require a bit of thought, as some of the fiberglass is fairly thick and appears a bit structural, but none of it presents any real problems for Golf and his team.
We're still thinking about what we want to do with the grab‑rail. We certainly don't need it to be sunk into the cabin top, which is actually a bit far from where we usually walk when going up forward, so not that easy to grab. And we certainly don't need a teak grab‑rail either. So we might just fill the trough with foam and glass it over, and then put a strong, durable, stainless steel grab‑rail on each side of the cabin‑top, where it's easy to grab. It turns out that there's an area here that's solid fiberglass (not cored) so mounting a stainless rail should be easy. We Shall See...
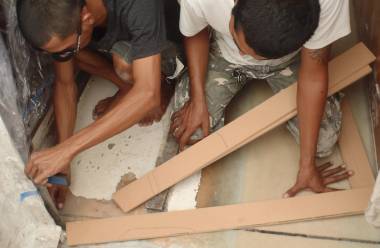 Max & Golf designing the entryway door supports |
Saturday, March 24:
We didn't get picked up until almost lunchtime but it looked like morning was mostly preparation of
the bows and sanding under the bridge‑deck. They also smeared some more epoxy mud around
the waterline, which will be sanded smooth.
The big news came after lunch. The guys were able to put 7‑8 layers of biaxial glass over the new foam they've been shaping on Ocelot's starboard bow! Not only that, but later on they glassed in the port bow as well! WOOT! Nice to see so much progress!
Up on deck, Max was working on supports for our entryway door. He's making a box‑section beam out of bits of (inorganic) foam to replace the rotten wood that was there originally. This afternoon he put 2 layers of biaxial glass on each side of all 11 of his carefully hand‑crafted bits of foam. Presumably they'll be trimmed and then assembled with epoxy mud and then glued in place.
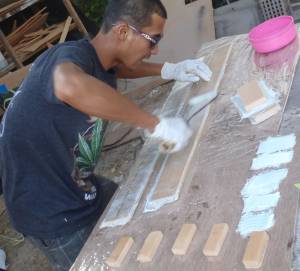 Max glassing his hand crafted foam door supports |
Houa was chipping out old balsa, so we both helped him. It's a long, tedious job with hammer and chisel. The wet balsa comes out very quickly, of course, but very little of the balsa is still wet. Much of it has been wet at some time in the past, but it's still pretty strong, and it's often well adhered to the underlying fiberglass. And since we usually peel the fiberglass skin off until we get to good balsa, the edges are always pretty strong. This effort will probably go on for a few days...
We mentioned earlier that we've always had a pair of deck water fills that have both been disabled - where you put the winch‑handle in to unscrew the cap has been filled with epoxy. Now we've seen that there are actually nice stainless steel tanks under those fittings. There are some hoses going to the tanks, but the bottom outlet from the tanks is not connected to anything. There's also a fair amount of storage area next to the tanks. Why were they sealed off? Why are they unused? What were they supposed to be for?
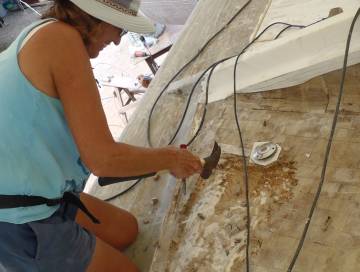 Sue chipping out old balsa above the new tank area |
These tanks are right in front of our forward windows, where we're currently removing old balsa. The fiberglass under the balsa is so thin that we're not sure it's worth saving. Which brings up lots of interesting possibilities. If we put some hatches over those 2 areas then we could plumb the tanks into our systems and also use the storage space. Ocelot has 2 huge (100 gallon or 400 liter) water tanks under the forward bunks, and 2 small (46 gallon or 170 liter) diesel tanks back by the engines. Since we have a watermaker, we don't need such huge water tanks, but you never want to have just one tank. We accidentally contaminated one tank with salt water when the watermaker went sideways in 2007. But we've always wanted bigger fuel tanks, and perhaps this is the opportunity. These new tanks aren't huge, but they're probably each 15 gallons or 55 liters.
Since Sunday is voting day here in Phuket, and since the guys have worked the last 3 Sundays, they won't be in tomorrow. But glassing in the bows certainly gave us ample reason to celebrate, so we brought out beer, sodas, and chips after work. Max was taking on all comers at Checkers, although what they play is a bit different to the version we know, as their kings can move as far as they like.
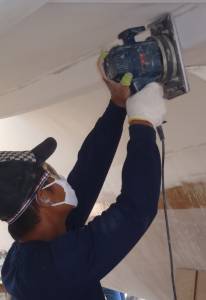 Sanding under the bridge-deck |
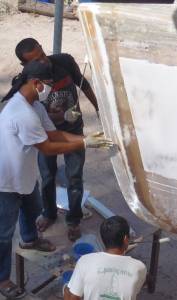 First glass on starboard bows |
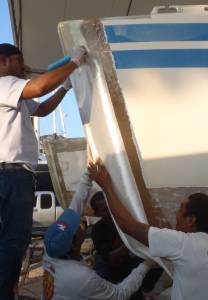 Laying glass on port bow |
Thai Refit:
Ocelot Pages:
Top Level: Home | Destinations | Cruising Info | Underwater | Boat Guests | Ocelot | Sue | Jon | Amanda | Chris | Site Map | Make a Comment
|
If our information is useful, you can help by making a donation |
Copyright © 2000‑ Contact: Jon and Sue Hacking -- HackingFamily.com, svOcelot.com. All rights reserved.