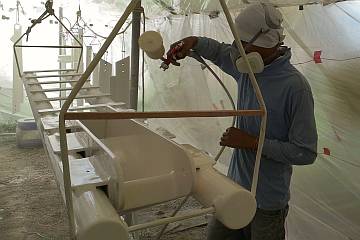
The final topcoat goes onto the anchor platform & spreaders
106 Prepare Mast
Summary: The main thrust of the week focused on preparing the mast for painting, but lots of other good things happened as well. Accomplishments this week include:
|
 The final topcoat goes onto the anchor platform & spreaders |
Monday, November 11:
Holy Mackerel Monday. Where does the time go? Seems like it was just Saturday.
Sunday was a buzz of family phone calls, brunch, then organizing our thoughts for the coming weeks.
There wasn't much doubt about the main thrust of today. Baw, Heru and Chambron met in the spray tent first thing and began wiping down the spreaders, prod and anchor support. By 9:30 Baw was kitted out, the International Interthane 990 (tinted Ocelot White) thinned and in the pot. He spent about 45 minutes spraying on 4 layers of top coat. This was a very tricky set of items to spray, given all the nooks and crannies and odd shapes and long thin shapes of the hanging (sometimes swinging) spreaders. When he was done he was happy with his coverage and requested that we call it good. Meaning, let's not spend another day sanding and preparing and spraying again. It works for us. The big spars, like the forebeam and the boom and the mast will all benefit from two top coat events (3 coats each time) but these items will be fine with one good heavy one.
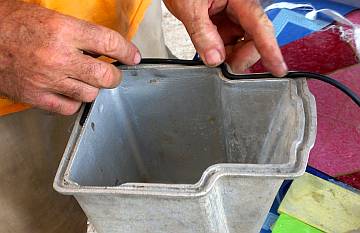 New gasket for the anchor winch motor housing |
Inside Ocelot, Lek and Pla played sandman again in the salon. Today was the final sanding of the teak under the salon seats and inside the navigation station lockers, and on the big bulkheads. It took until mid‑afternoon to finish the sanding, wiping and preparing, then they used foam brushes to apply the third and final coat of gloss polyurethane. Next step, we get to decide what, if anything, we leave glossy, and what we spray with Epifanes satin varnish as a top coat.
Houa was (surprisingly) absent today and he never answered his phone so we're not sure what's up. Yard manager Cris told us Houa had been working overtime everyday all last week, and when we had dropped by the yard on Sunday to measure our tent, Houa was hard at work on a project for Cris. Maybe he just burned out. Unfortunately, without Houa's guidance, our young woman worker, Bo, was left pretty much to her own devices. Which means that she probably didn't get much work done on sanding the floor stringers on port side.
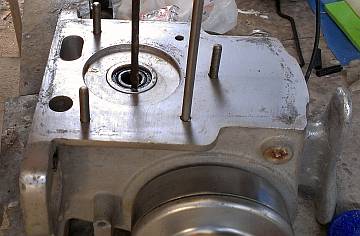 Installing a new oil-seal in the anchor winch drive socket |
Jon and Sue examined the windlass and decided that it would benefit from a new gasket for the motor housing, and a new oil seal. We carted the bits down to the old table beneath Ocelot and Sue spent an oily, grubby morning with strong detergents, scrubby pads, razor blades and other assorted tools trying to get through years of grime and muck. End result: a cleaner looking windlass and a somewhat oilier Sue.
Two machinists from AME arrived late morning with the 6 stainless steel bits for the bimini legs - long polished tubes for the main legs, and some odd‑looking shapes that are to be attached to the bimini at the top and Ocelot's cabin‑top at the bottom of the legs. The tubes were fine, but the other 4 pieces needed to be modified to fit. After some cutting, rewelding, bending and trimming they fit much better. Jon showed them where to put the bolt‑holes into the bimini and they took the bits back to their shop for final welding and polishing. They should bring them back tomorrow to tack the pieces together (they will be difficult to polish when they're all welded together).
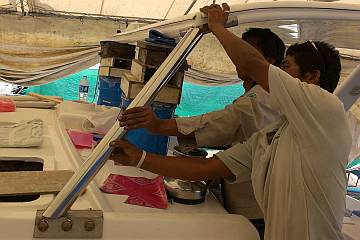 Test fitting the bimini support leg components |
Sue took a short lunch and scootered off to Phuket town for her appointment with Mr. Peh, the owner of Chamnasin Upholstery up near Boat Lagoon. It's a tiny hole‑in‑the‑wall, but one of the most highly recommended marine canvas and upholstery shops around. Sue laid out the 3 main projects we're interested in. First was a new dodger (windshield) and side curtains for the bimini, which will be somewhat more complex and enclosing than we had before. Unfortunately, Mr. Peh is booked up with other projects through the month of November and begged off coming to see Ocelot until the first week of December. With luck he'll be able to start our project right away, which still gives him enough time to get the canvas work done.
The next project was the new 4" (10cm) foam for the bunks. We want this firm and high quality. Mr. Peh had a sample of just what we had in mind, which he orders direct from Bangkok. So he quoted for foam only (cut to our templates) and also to cover the foam with cloth that we provide (Sue already has some nice cotton/polyester in mind from Phuket town) with plastic zippers. The foam is not cheap (about $200 per bunk) but the sewing cost only adds $60 to each bunk (each with 2 pieces of foam). Sue could also sew it up, but does she have the time and energy?
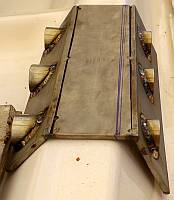
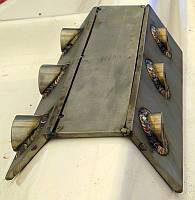 Before & after shots of the portside bimini leg lower bracket |
The final project involves the salon cushions. We think we'll retain the foam as it's only 10 years old, bought in Venezuela. The foam has survived well but the seats are 2 layers thick. To make them firmer we'll put a sheet of thin plywood between the layers of foam. So what we need is a bunch of Sunbrella (our preferred indoor upholstery) and someone to sew up the 10 bottom and 10 backrest cushion covers.
Sue returned to the boat to find the neighborhood had changed. Gone was our spray tent on Ocelot's port side. Baw and the Indonesians were busy erecting a bamboo and PVC pipe scaffolding over and around the 60' (18m) mast, which was already off its support drums and hanging from metal scaffolds. Sanding the mast will begin tomorrow, with an eye to spraying primer and white mid‑coat later this week.
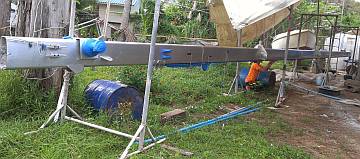 The mast off its supports and suspended from scaffolds |
Jon, seeing the 6‑page detailed list of Tasks to Finish Ocelot that Sue worked up over the weekend, has decided to request some changes in the work force. He spoke to Baw and Heru, asking that they be available to work with him, maybe on projects that they've never done before, but that he needs them to help with. He wants them to PLEASE ask questions if they don't understand, so we don't go too far down a wrong‑way street. To this end, he has asked that Baw only work on things that ONLY he can do (such as the actual paint or varnish spraying) and to let other men take on the more standard jobs. We didn't get to implement the new policy today, as Baw was supervising the building of the mast structure, but tomorrow we hope to have Baw and Heru assisting in assembling the deck hatches. Certainly other men can sand the mast!
Jon got more deck hatches sorted out and assembled, then he turned to Sue to cull out the two worst hatch "bottoms" so that we are ready to pair the tops and bottoms up with hinges. Jon also grabbed the scooter and whisked into town. At Bangkok Aluminum he found a better‑shaped gasket for our sliding aluminum door. At G. C. Huat, the Chinese chandlery/hardware store in the center of town, he found 2 replacement oil‑seals for the windlass and a hose‑barb for the engine cooling water.
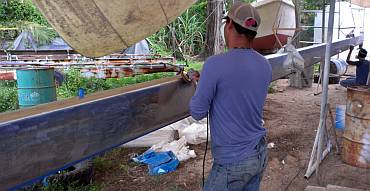 Heru & Baw worked on the mast all day - almost ready to paint |
Tuesday, November 12:
Another beautiful day in paradise, and more check marks on the To‑Do List.
The major work‑in‑progress involved the mast. Heru and Baw (and sometimes Chambron) spent all day out in the field on the left side of Ocelot. Here they used power grinders with woolen wheels to rough up the surface of the aluminum mast. Jon caught them resting several times and reminded them that Amanda could (and did) do this all day long! They have more work tomorrow, but they got really close to finishing the sanding today. All the winches and line‑locks are already taped off and Baw wants to spray both primer and mid‑coat later this week!
Lek tackled the last bits of varnish preparation. He sanded the polyurethane gloss on the rounded doors, getting them ready for a satin Epfanes spray to match the rest of the salon. He also put a fourth layer of polyurethane gloss on the starboard bulkhead in the salon, the one that had been stripped back to bare wood. We want to finish building this panel up before we spray the satin topcoat in the salon. Pla also worked in the salon, sanding all the galley and nav‑table areas that were still shiny with gloss polyurethane, getting them ready for the final satin spray. With luck that will happen soon.
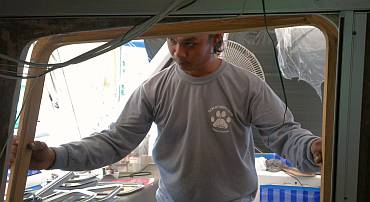 Checking the teak door-frame with the aluminum frame in place |
Houa was back today, having taken a day off for a pulled neck muscle. His sidekick, Bo, showed up at 10, and we told her (through Houa) that we were only paying her for half a day, as starting time is 8am, not 10 or 10:30 (like Tuesday a week ago.) To our surprise, Houa told her to leave for the rest of the morning and return after lunch. He wanted to get some work done on the aluminum sliding door. He assembled it in situ, put in some screws, and then checked the alignment of everything with the teak door frame. He will be cutting back some of the teak frame so that it nestles carefully and closely up to the aluminum. We certainly don't want any gaps that might allow water in. Houa and Jon discussed the drainage system for the door, knowing that it needs to be improved over the old system. It was poor drainage that killed most of the teak frame around the door, and resulted in our needing to re‑build the entire thing and re‑build much of the balsa‑cored walls of the companionway.
Houa seems quite fond of Bo. In the afternoon he showed her how to paint the floor supports with epoxy to waterproof and seal them, and then let her continue the work. OK ... As long as he keeps an eye on her.
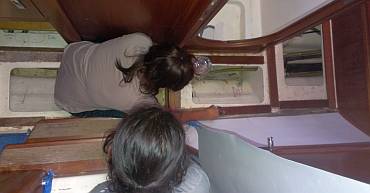 Houa watching Bo epoxy seal the floor supports down portside |
Sue spent the morning on the scooter getting several meters of sandpaper, plastic rope, duct tape, and alcohol for wiping down the varnish. She and Jon visited the store room to search for any leftover bits of starboard (an expensive, dense polyethylene board) that could be used to build the spacer under the anchor support on the bow. We didn't find the old scuba locker shelves (which had been starboard, and heavy, so we'd replaced them with foam and glass). But Houa knew we were looking and found a big piece of one of the shelves in his workshop that had been cut up a bit. Hmm. Hind sight says it's important to be clear that items that come off the boat, even if they get replaced, still belong to the boat owner. At least Houa seems happy to use it and is not wedded to the idea of making a teak pad, which was his initial suggestion.
The big check on the To‑Do list was that Ben and Chambron each tackled a fo'c's'le. They hand sanded the hulls, bilges and shelves where we had painted on a white International Primer, Interseal 670, some months ago. Baw mixed up 2 batches of Jotun Penguard 2‑part Enamel and the men got both fo'c's'les painted top to bottom. They want to repeat the process tomorrow so each fo'c's'le will have 2 good coats. This stuff is supposed to be very resistant to fresh and salt water, oil, and chemicals. We are mainly concerned about water, as in the bottom aft bilge of each fo'c'sle are the speed and depth transducers which go right through the hull. When we pull them out to clean or check them, we get water coming in.
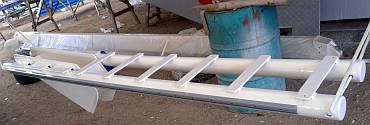 Silver trampoline supports bolted to the anchor platform |
Jon spent some time draining our Lowfrans Tigres windlass and refilling it with a liter of 140‑weight gear‑oil, but we couldn't find out the oil capacity, and the little glass viewing window is too old and stained to let us see the oil level. More internet research needed.
Jon took advantage of the anchor support hanging at waist height to get the 2 trampoline tracks bolted in place, with lots of Duralac to minimize stainless/aluminum corrosion. Ironically, our carefully painted and color‑matched Ocelot White top coat now has silver trampoline tracks (which were white before we powder‑coated them). Guess a bit of contrast is okay. Jon chose to replace the old bolts as he doesn't like their allen heads. He replaced them with new Philips head bolts from the local mini‑hardware store we call "The Chinaman". They carry a good selection of stainless steel hardware, but say it is not the preferred 316, nor the more common 304, but some variant they call 308. No doubt from China. It's not magnetic, so that's a good start. We shall see how the hardware holds up after a year out on the ocean.
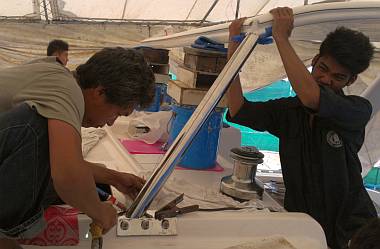 Booglia from AME tack-welds the portside bimini leg |
Wednesday, November 13:
A busy, cool and humid day, so luckily no painting was planned. We made some forward progress
and found more obstacles.
We had all the workers except Chambron, and even though it feels like we're about to run out of things for the men to do, we always manage to keep everyone busy. Lek was a one‑man show down under Ocelot. We found some more locker bases that were never thrown in the polyurethane pile, so he set to work sanding those. Unfortunately he began sanding the tops of the hanging locker shelves (again) before we could stop him, so they have to get another coat, now, even though we don't think they need it.
Inside, Yando sanded the starboard bulkhead once again, and we HOPE it's now ready for a satin varnish spray, along with the rest of the salon. But the spraying involves Baw, as the lead guy, so we have to wait for him to finish his other big project, which is the mast.
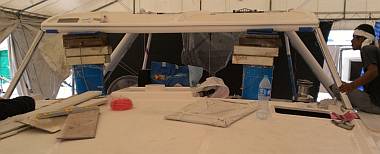 The 2 bimini legs tacked together in their nominal final positions |
Out on deck things were humming along, as the machinists from AME spent the day fitting, grinding, and tack‑welding the bimini legs. These legs are very complex shapes, having to meet at weird angles both at the top and the bottom. So the men were up and down off the boat, to their little ground base where they could grind and weld without hurting the boat. Finally they got the shapes as close as they are going to get, tacked them together with little spot welds, and we got our first real glimpse of what the legs will look like. Then they left to weld them properly back at their shop. Mike says he wants to bring them down to check one last time before they are put with our collection of other stainless steel and sent off to Bangkok for electro‑polishing.
Jon divided his day among many different tasks. We did get to put a big Finished check mark next to the trampoline track mounting. Jon had to drill and tap a few new bolt holes for the tramp track on the anchor support because some of the old threads were stripped. Then he got the 2 smaller pieces of track mounted on the forebeam, without having to drill new bolt holes.
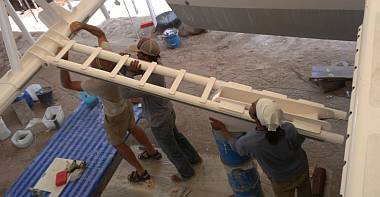 Heru & Lek help Jon mount the anchor platform to the forebeam |
The next step was to mount the anchor platform in place. Heru helped Jon lift the forward end up to the forebeam and they got the 2 pins pushed into place with only a minimum of persuasion. But the bracket at the aft end (which bolts to the foredeck) was not in a mood to behave. You would think that since we took it all apart it should all go back together, but remember that we've swapped the anchor platform end for end, cut the anchor well off, and had it re‑welded facing the other way. This was to minimize weight in the ends of the boat, thereby minimizing the tendency to "hobby‑horse" in short seas. So it's not too surprising that things have moved.
In the end Jon had to move one hole in the mounting bracket slightly. The best tool to do this would have been a lathe or a milling machine, but we don't have one of those so Jon improvised, using a round ("rat‑tail") file mounted in his hand‑drill and pushing the far end (which was doing the cutting) with a shifting spanner (crescent wrench to the Yanks).
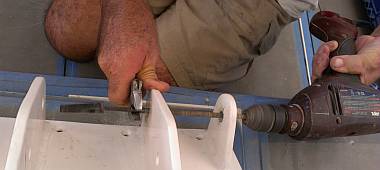 Jon machining a hole out on the anchor platform bracket |
Jon worked more on the anchor windlass, and learned that the chain stripper will have to rotate a bit more than we expected to fit into place under the corner of the windlass. To make it fit better, he ground a bit off of one corner. The 3 big wires that drive the windlass are a bit stiff and difficult to work with, and the insulation is broken on one. At first he thought he'd pull them out and replace them, but that's a very difficult job (they're threaded through a tight‑fitting tube) so he'll repair the insulation and just use the old wires, which are otherwise fine. We do have 2 new continuous duty 100 amp solenoids to replace the old ones.
Sue was the gal around town, and the handy‑lady where needed. One distressing discovery is that we don't seem to have the correct gaskets for our 10 deck hatches. We had put so much time into choosing, ordering, and waiting (not to mention paying a premium) to order the stuff from Goiot in Europe, but there's no question we got the wrong size gaskets. We got 2 sizes: one fits the smaller port lights and the other fits the big salon hatches and the fo'c's'le hatches. We are now facing a run to Boat Lagoon to prowl the stores to see if anyone has a ready-made gasket material to fit our small hatches. Another set back, right when we were ready to start gluing them in.
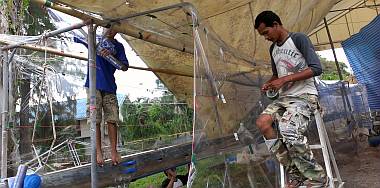 A spray-tent sprang up around our mast! |
Baw, Heru and sometimes Yando worked on setting up the spray tent for the mast. They finished the mast sanding in the morning, and then put the last bits of blue tape where it was needed to protect the fittings that we've not taken off. The tent itself is made of cling wrap plastic so that lots of light can get through for Baw to see what he's doing. Its supported with steel angle sections tied to the big scaffoldings that are hanging the mast. There are bamboo poles overhead so that the tent can be fully enclosed. Even though most of it is under our huge side flap, there are holes in the awning and some rain can get through. Weather permitting, the men may be ready to spray on the green MaxCor primer tomorrow!
The other big Finished check mark of the day was that Ben and Pla finished sanding and painting the fo'c's'les. Pla took on the major work, checking on Ben's sanding and fixing some places that were not good after yesterday's painting. Then, with full face mask and the extractor fan going, Pla got another gallon of 2‑part Jotun Penguard Enamel rolled into both fo'c's'les. They look all bright and shiny white now!
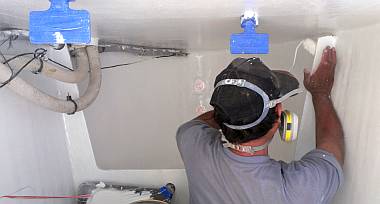 Pla painting the starboard fo'c's'le in a 2-part "enamel" |
Houa and Bo worked in the starboard cabins pulling up yet more water‑damaged floor supports. Once the new strips were glued down with Hartford epoxy glue, Bo was given a cup of epoxy resin (mixed by Houa) to brush on. This was never done when Ocelot was built and it should keep the wood much more waterproof.
Houa's main job of the day was the meticulous fitting, sanding, routing, and planing of the wooden door frame. Some new foam and glass supporting the aluminum sliding door frame had to be trimmed back, but once he had the aluminum door frame mounted correctly in place, he could see how the wood and aluminum would fit together. He had some tweaking to do, but each action resulted in a closer and closer fit.
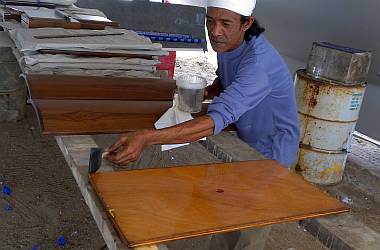 Lek got a final(?) coat of polyurethane on some stragglers |
Thursday, November 14:
A crazy busy Thursday, that seemed to have us going in a million directions at once.
The best part of the day was that it both began and ended with the mast. Baw's first job of the morning was to rally a couple guys and get the big plastic spray tent finished over the whole 60' (18m) length of the mast. He was hoping to spray the green MaxCor primer on in the early afternoon, so they were moving fast. Once that was done (and Sue had scootered out for a few big cheap paint brushes) the men mixed up a solution of oxalic acid to give the aluminum an acid wash. Then, using drinking water from a 20 liter jug, they rinsed and dried the mast with clean rags. Gloves were donned, and the mast got a final acetone wipe‑down. Before lunch Baw asked for gasoline money and by 11:15 he had the compressor started. He sprayed for a half an hour, and got a nice pale green MaxCor coating on the whole mast. Because this primer is not to be put on thick, the sprays go faster than when he puts on epoxy primers or topcoats where he wants thickness.
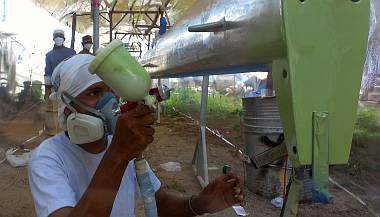 Baw sprayed a coat of MaxCor primer on the whole mast |
Meanwhile, Sue was rallying the men to have the final 3 "odd" aluminum pieces ready for primer as well. Her idea was that while Baw was spraying, they could take a tiny bit in a cup and brush it on the 2 mast spreader ends and the mast step (mounted to the foredeck). It didn't work out that way, but luckily Baw had not used up all the primer that they had mixed, and there was enough left over after the spray. So Chambron spent an hour or more hand and finger sanding the mast step. Once he had it all sanded and acid washed and rinsed, he and Yando began covering the foredeck in plastic. Oops. Overkill. We had no intention of spraying anything green up there! Baw agreed (luckily) and they prepared to brush on the primer, instead. Yando and Ben finished preparing the spreader tips, and Heru hung them in the spray tent, but then ended up brushing the primer on them as well. Ta DA! We now have completed the primer on the last of the mast project! We thought that was a pretty good accomplishment for the day.
Jon took off late morning for Boat Lagoon, 30 minutes north, with a list of several things to find. At AME he succeed in finding a sample light fixture for the heads, 2 bronze ball valves for the engine raw water (and a promise from Wiwat to machine some custom fittings), and some "O" rings for the water and diesel deck fills. What he couldn't find was appropriate gasket material for the Goiot hatches. Oh dear. We may have to sand down a larger gasket to fit. That's a big and fiddly job given that we have to do 33' (10m) of it.
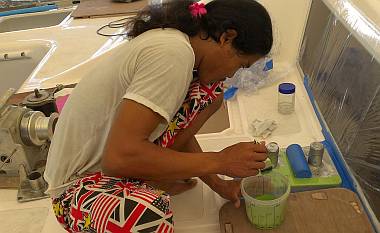 Chambron sanded & then brushed primer on the mast base |
Seems like gaskets were the bane of our existence today. In the afternoon, Houa got the aluminum frame for the companionway sliding door mounted (temporarily), and when he tried to close it, it took 2 men to move it! Not good. So he disassembled it all, and we tried greasing the new gaskets with silicone grease but it was still too hard to move. Jon changed out the gasket for a smaller, softer one, the final one he had coaxed out of Bangkok Aluminum Shop in Phuket Town. Houa did another temporary assembly of the whole door and we tested it again but it was still too hard to move. Discouraging. But we have another trick to try tomorrow...
Houa interspersed his aluminum door work with fitting the teak frame perfectly to the shape and space, so that it snugs into the boat and the aluminum. After more sanding, and a bit of planing and some router work he declared it "Perfect!" His other job was working with Bo on the floor supports at the bottom of the interior companionway steps. Not surprisingly, they were also delaminating from too much water damage over the past 19 years and needed to be taken out. Bo did most of the removing and cleaning up the spaces, while Houa made new plywood supports.
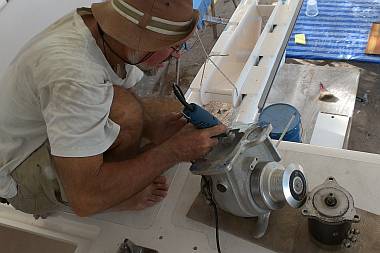 Taking off some sharp edges where the anchor-winch wires run |
Jon was concerned about the sharp edges on the anchor windlass where the wires have to go, so after repairing some abused insulation he used his Dremmel to round off the edges. He also cut the hole in the deck for the chain to go through, now that he knows about where the chain‑stripper has to go. This whole project was interrupted many times throughout the day so he didn't make as much progress as he wanted.
Sue went in a hundred directions all day, running errands, trying to get her own projects done, keeping track of what was needed, what was happening, and what needed to happen. She left home with a list of 4 things to attend to, and retuned home at 5pm with the same list, untouched. Oh well. What she did get done was to help with the windlass project, make sure the odd aluminum spar bits got primed, made sure the salon lockers were sanded so that they can get satin varnished, and got the salon port‑light openings all chiseled back, scraped clean of epoxy and ready to have the port‑lights positioned.
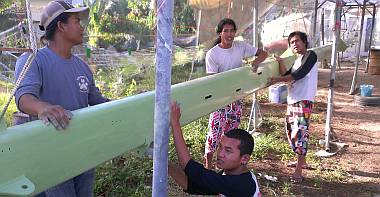 Our Indonesians had fun sanding the mast in the afternoon |
Baw was quite head‑achy after the morning spray so we suggested he go home, but not before giving the men things to do! Ben and Pla sanded of the 4th coat of polyurethane on the salon bulkhead and inside the nav station. To our surprise we found Heru, Yando and Chambron in the spray tent with 320 grit sandpaper, lightly sanding the primer! By day's end they had completed the whole mast so it will just need a quick wipe‑down tomorrow morning and Baw can spray on a mid‑coat of Interseal 670. Nice -- Two mast achievements in 1 day!
Friday, November 15:
Fabulous Friday, with 3 fairly major accomplishments and a great feeling of moving along!
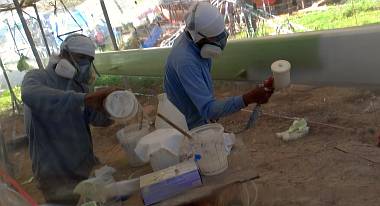 Baw spraying the mast while Lek does support, mixing the paint |
With the guys having sanded the green primer on the mast yesterday, Baw arrived at work bright eyed and ready to spray on the mid‑coat. Pla was sent out to pick up 6 liters of gasoline, Sue headed out for new mask filters for the men, and by 9am Baw was suited up, with Lek as his side‑kick assistant, ready to spray white International Interseal 670. He sprayed for about 2 hours, and was dead beat at the end of it. He gave the men their assignments and he and Ben went home. So now we have a white mast. Tomorrow it will be sanded and any dings or blemishes filled and sanded and prepared for the top‑coats.
Pla began the day by sanding the insides of the salon lockers, but once they were done he gestured to us that he needed work. Sue jumped down in the starboard engine room and showed him the naked fiberglass patches all around the rudder shaft, where we'd reinforced the rudder‑tube. Pla repeated the instructions: clean, sand, clean with acetone, paint with Penguard HB. Got it. We would like to have the entire engine rooms painted, but the first step was to get the new fiberglass sanded and primed, so that the area is uniform for whatever else we want to do with it. Not sure if we'll get to the next full‑painting event down there, but at least now the entire engine rooms are white, and there is no more exposed new glass. Pla finished just after lunch and we asked him to sand the beam of teak that is under the aft deck, to which we attach our aft locker covers. It's a small job, but will look great with just a few hours of work.
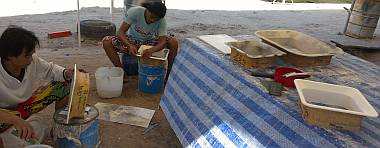 Yando and Chambron polishing up the interior hatch coamings |
In the morning, while Baw was setting up for the spray, his brother Ben shrugged his shoulders and Baw said, "Too many men." "No problem," said Sue. "We have work." She lead Ben to the storage room where they retrieved the 10 interior hatch coamings for the small deck hatches. Having seen how beautifully the new ones polished up, we set the men up to remove the green corroded screws (that used to hold the mosquito netting) and work some magic on them. They filled the old screw holes, cleaned and sanded the gelcoat surfaces. They will work up through 400, 800, 1200 and 2000, then polish them. They had strict instructions not to get acetone on the outside edges where Jon had written where each one came from. At first glance they all look the same, but laid out on the table we could see a considerable difference between them.
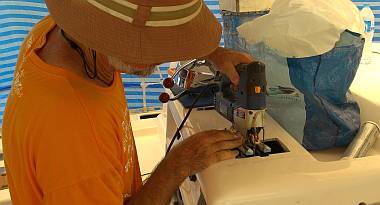 Jon cutting the hole for the engine controls (behind the jigsaw) |
Walking into the yard this morning, Jon realized that slicing the new rubber weather stripping on the sliding entryway door would make it weaker, which would let the door slide more easily. He tried it with Houa and it worked! The door is still stiffer than it was originally, but it's manageable, and it will wear into being easier. So Houa was anxious to install the door immediately, so he could install his teak door‑frame. But having the door out makes it much easier to work on the helm controls and instruments, so Jon asked Houa to hold off for a few hours so he could mount the engine controls. This is known as the "Domino Effect" (or, as Sue prefers, the Imperative Effect).
Jon already had a template for the engine controls, so he laid it out (a bit further from the edge than it was, to improve access to the instruments) and then cut it out with his jigsaw and a carbide blade, with Sue holding the vacuum down below to suck up the fiberglass dust. We sorted out which of the 4 cables went where (port/starboard, engine/gearbox) then started hooking up the cables to the Morse controls. This is a difficult process, as the portside cables aren't quite long enough to completely clear the top of the helm station, so some finicky screwdriver work ensued while Sue held everything just so. But once the cables were attached, the 2 halves of the controls were bolted together, the area was masked off, some silicone was laid down to seal the controls to the deck, and the whole shebang was bolted down. So we now have engine controls!
|
Silicone sploobs out as Houa mounts the aluminum door frame |
Which meant that Houa could proceed with mounting the door. He rallied several men to lift the heavy door and hold it in place while he clamped the aluminum frame to the fiberglass hull. He applied LOTS of silicone under the door frame, saying "Little bit no good. Water come for sure." We were happy to have him use a lot of silicone if it means it will keep the water from finding its way down the inside the door. By late afternoon all was in place and Houa declared the door untouchable until tomorrow morning when the sealants are set and it can be moved on its sliders again. So tomorrow the teak frame can get mounted! Very exciting!
Saturday, November 16:
A strange Saturday that started out slowly and rose to a wonderful crescendo of accomplishments by
day's end.
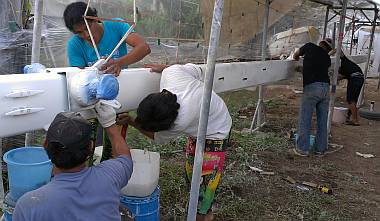 Whole lotta mast sandin' goin' on |
The morning was a bit lopsided in that Baw commandeered all 5 of the other men (other than Houa and Lek) and got them sanding the mast. This white primer, Interseal 670, was sprayed on carefully so that the men could sand it like a "high build" to smooth out any dips and crannies in the mast. Once they got started, though, Baw had some thoughts on what to spray next. What he would like to do is 3 top‑coat spray events, each laying down 2 layers, with sanding in between. On the boom and forebeam he did 2 spray events of 3 layers each, for the same total of 6 layers of top‑coat. But the mast is so much bigger it would take a really long time to spray 3 layers at one time, and the additional sandings between sprays would smooth out the mast very nicely. Nice to see Baw thinking of these things ahead of time.
To that end, Sue scootered out towards Phuket town to the TOA paint shop to get Ocelot White tint added to the Interthane 990 top‑coat. She felt very Thai, with a gallon of paint in the basket, and another in her day pack on her back. Actually to feel truly Thai she would have balanced the second gallon between her knees on the scooter.
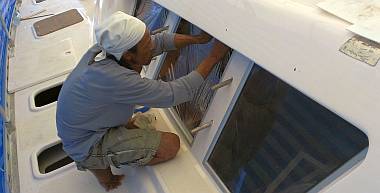 Lek masked much of the inside of the salon |
Houa hopped in and out of the boat all day, supervising Bo and her floor‑support work, and all of the bad supports have been removed now. Houa also got Bo started on cleaning and sanding the headliner supports that are under port lights in the cabins. These are at risk of getting water damaged if any port lights are left open in the rain. Bo's next step will be to brush on Epotek (Thai) epoxy resin to seal the plywood.
Lek worked alone in the salon all day, masking everything that we don't want sprayed with Epifanes satin varnish, which should happen early next week.
Jon spent the morning preparing to mount the windlass and its functional neighbor, the chain stripper. He had to make some hardware store runs (in between Sue's errands) but finally got some hefty washers close to what he wanted. Other washers were needed to insulate the stainless steel bolts from the aluminum windlass housing, so Jon used a hole‑saw to cut disks out of a sheet of scrap fiberglass. He clamped them all together and filed them smooth to end up with 15 nice‑looking fiberglass insulating washers.
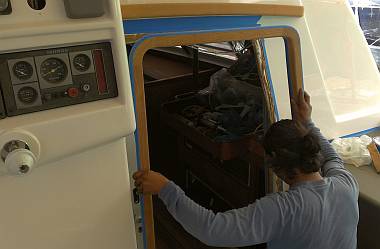 The teak door-frame goes on - a momentous occasion! |
At 3pm Sue was back from the bank and ready to get pictures of Houa mounting the teak door frame. He had specifically waited, working on other projects until Sue could be there to take pictures of his precious baby. He and Bo cleaned everything with acetone, then Houa brushed Sika primer onto both surfaces and waited about 10 minutes for it to dry. Using his big gun he sploobed on brown Sikaflex and nestled the teak up into the entryway door. A series of clamps completed the installation!
With Sue's door photography finished, Jon engaged her on the foredeck to help mount the windlass! He ran some fat beads of silicone on the deck and pushed the chain‑stripper into its niche before they wrestled the 3 heavy electrical wires through the gearbox housing and positioned everything, dropping a bolt through both the windlass and the chain stripper to define their locations. A good shot of silicone into each bolt hole and each bolt was pushed through with a finger over the exit hole to spread the silicone throughout the hole. With Jon scrunched inside the chain lockers, he and Sue tightened the big deck bolts securely. Jon mounted the motor, connected the wires, and bolted on the motor housing. He turned on the circuit breaker and pushed the winch control button -- The lovely smooth hum of a happy motor was a welcome new sound in the boat yard! Windlass installed and operational. A great end to the week!
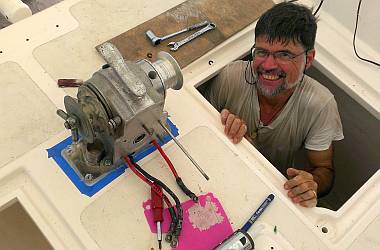 Jon tightened the big winch bolts from inside the chain locker |
But not to be outdone, Baw announced at 5pm that the mast was all sanded and ready for its first top‑coat spray. Tomorrow! "But tomorrow is Sunday," we said. "No promplem, Madam. I come to yard tomorrow. Color can spray!" Baw apparently has some "overtime" work to do on another boat, and was planning to be at the yard anyway. He arranged for 3 men to join him, with the proviso that we pay a normal day's wage, but that they are free to leave after the mast spray. One more day speeding up our progress is good, so we agreed.
Sunday, November 17:
In the middle of a nice Skype conversation with Amanda at 9:15 we got a phone call from Houa
relaying the message that Baw was at the yard and about to spray. So Sue hopped on Scooter and
arrived to find Heru, Lek, Chambron and Baw all set up for the topcoat spray. Chambron was
sanding the small spreader tips. Heru and Lek were adjusting the inner plastic tent. Baw sat
in concentration watching the clouds. "I check weather, Madam," he said. "Okay
or not?" Sue phoned Jon who jumped on the
Phuket Weather Radar website.
Lots of big clouds and rain to the northeast, but hours away. Enough to let us spray.
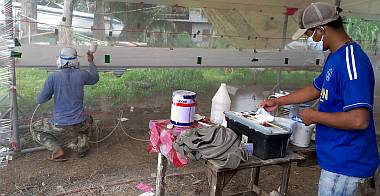 Baw sprayed while Heru looked after mixing and refilling the gun |
By 9:20 Heru and Baw were mixing 2‑part Interthane 990 in a graduated mixing jug, then adding in the recommended volume of thinners. Sue stayed long enough to be sure things were under way with the compressor and the spraying and to make sure the guys knew to sand and top‑coat not only the spreader tips but the mast step (on deck) and the very top of the forebeam, which needed a touch‑up. The rain held off all day!
Thai Refit:
Ocelot Pages:
Top Level: Home | Destinations | Cruising Info | Underwater | Boat Guests | Ocelot | Sue | Jon | Amanda | Chris | Site Map | Make a Comment
|
If our information is useful, you can help by making a donation |
Copyright © 2000‑ Contact: Jon and Sue Hacking -- HackingFamily.com, svOcelot.com. All rights reserved.