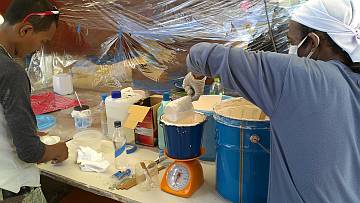
Weighing out the gelcoat & mixing it with monostyrene
97 Cabin-top Gelcoat
Summary: Rain delayed us for a few days in the middle of the week but we ended up getting in three gelcoat spray days, shooting the entire cabin‑top and foredeck (without Mike's oversight). But we had a major problem with the 2 curved and very visible (and somewhat irreplaceable) locker doors in the salon. The team's accomplishments this week include:
|
 Weighing out the gelcoat & mixing it with monostyrene |
Monday, September 9: Another gelcoat shoot day!
A good start to the week, with bright sunlight and a beautiful motorbike ride down from Ao Po in
the cool morning air.
The men were already at work when we got to the yard. The gelcoat on the starboard side of the cabin‑top was well cured, and they had already sprayed black paint over it (a visual aid in finding holes and defects for the initial sanding). They had taken off the vinyl covering the nonskid, and covered the whole newly coated area in plastic to keep it clean. The plan is to spray, spray, spray, until the deck is done, and then do the sanding. This will make the sanding a bit tougher at the start, as the gelcoat cures harder and harder for about the first week, but it will eliminate the crazy back and forth of doing one job, then stopping and preparing for another.
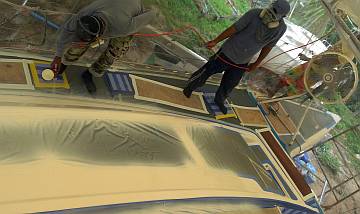 Baw worked steadily from the back to the front |
With the weather looking so good we moved ahead with preparations for another cabin‑top spray today. This was to be a duplicate of Saturday's, but on the port side of the cabin‑top. The port side has already had hours of cleaning and sanding attention, and now it was gone over once again with acetone and final sandpaper touch‑ups. The guys checked that the blue tape around the nonskid edges was pressed down hard. They changed the fan and extractor fan positions so that the prevailing breeze from Ocelot's bow entered the paint tent and was sucked out the stern. Heru created an elaborate extractor fan water trap so that the atomized gelcoat went into a trashcan and was trapped with spraying water.
Once the deck preparations were done, the guys set up the gelcoat mixing station under Ocelot. With the increased heat (the sun was out) we figured we'd reduce the catalyst by a bit but leave the monostyrene and mono‑wax percentages the same as Saturday. Seven kilos of gelcoat were weighed and the appropriate amounts of monostyrene and mono‑wax were added and the whole mixture was mixed and filtered through a nylon stocking. We were all ready to go by 11:00 but knowing that the spray would take about 1.5 hours, we took an early lunch and planned to meet again at the boat at 12:30.
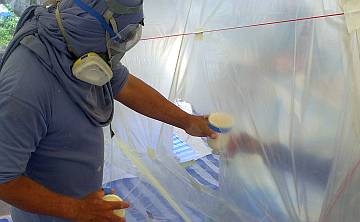 Lek refilled the gun from the far side of a hole cut in the tent |
The weather held, and the spray was Good to Go at 12:30. Lek moved the mixing station to the starboard foredeck, just outside the portside spray tent. Chambron stood on the port bow to guide the air hose and Heru was below watching the compressor. Jon, Pla and Baw were inside the tent with breath masks and bright socks to protect their feet from the sticky over‑sprayed gelcoat. Sue sat outside the tent, upwind on the starboard bow to record pot fills and pot numbers. Jon again let Baw know which pot number we were on, and how much time had elapsed since the last pot, and where he should be spraying to be sure to lay enough gelcoat down on each of the pre‑marked square meter sections.
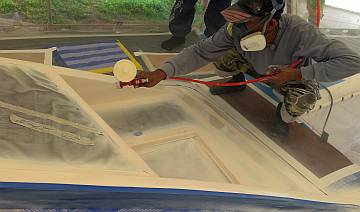 Shooting the tricky "eyebrow" area up front |
Baw started at the aft end of the cabin top for this spray, so that the fan would be blowing the over‑spray back onto new gelcoat, not onto untouched areas where it might harden before it got sprayed for real. This allowed him to walk forward to get to Lek where the pot would be filled, catalyst added, and then stirred in. Like Saturday, he sprayed with the 1.8mm nozzle gun, filling the pot with 330cc of gelcoat each time and about 1% catalyst. On Saturday we were only able to get 20 pots out of 7kg when we were expecting 21, but today we got 22 pots out of the same amount of gelcoat. Not sure what happened there - maybe Lek was filling them a bit fuller on Saturday. Again, it took 3‑4 minutes to shoot a pot, and another minute to refill it.
Unfortunately, the tent really heated up and the gelcoat in the gun was getting viscous, so Baw had to pause about half way through for a quick gun cleaning. Normally this consists of just shooting a bit of acetone through the gun, but after doing that twice Baw was still not getting the spray action he wanted, so we decided to do an emergency strip and clean of the whole gun. This added another 6 minutes to the whole spray, but he seemed happy with it afterwards. Surprisingly we had a short tropical rain shower about half way through the spray, but the humidity stayed below 75% so we weren't too concerned. And the tent is so well built that there wasn't a drop of water or even mist in the spraying area. The whole spray took about 1:45 plus some clean up time afterwards. By late afternoon they had already sprayed on the "sanding" black paint and pulled off the masking vinyl, which is much easier done on newly gelled gelcoat than 1‑day old gelcoat.
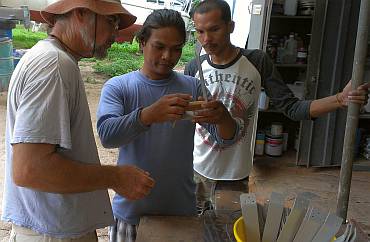 Houa showing off his teak pads for the aluminum mast steps |
Houa worked down in his wood shop where he was shortening and sanding the teak pads for the mast steps. At first he had just copied the old ones, but then we realized they were too long for the new aluminum steps made for us by AME. A fiddly but time‑consuming job.
Houa's next job for us (while this spraying is going on) is to help reassemble the deck hatches. To this end, we pulled out the salon Goiot hatches and realized that they are irretrievably scratched, and one is cracked. So after the gelcoat spray, Jon jumped on Scooter with a sample of the acrylic, and headed for Phuket Plastics in Phuket town. He returned just after 5pm with 3 rough‑cut acrylic pieces, which were 8mm thick instead of the 7 we'd had before (this is not a problem). They are also a darker shade of smoky which we're not sure about, but in the long run will allow the salon to stay cooler when we have to close up the boat during the day. We just hope it doesn't make the salon too dark on rainy days, but that's what LED lights are for!
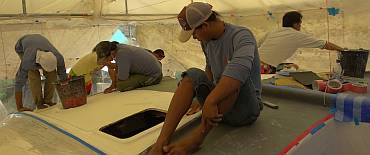 The team sanding and preparing the cabin-top for gelcoat |
Tuesday, September 10: Rained out.
Wet pavement, cool air and high gray clouds sort of defined the day. The Phuket weather radar
showed massive dense rain showers all around us, coming and going in no really unified direction.
This is typical of the transition period between southwest and northeast monsoons.
Yesterday's gelcoat looked and felt great this morning, so the guys removed the masking and covered the area in clear plastic. Then moved right into cleaning, sanding and finalizing the actual cabin‑top for its spray. We had Yando back, so we had 6 men at work. They are all very meticulous, follow Baw's instructions, and are cheerful to be around. What a great change from the crazy mad‑house we had last January when the same areas were being prepared for gelcoat, but by a bunch of guys who really didn't care or else didn't have good skills. We feel lucky to have found these guys!
Sue had done a pre‑clean on much of the cabin top, but of course not under the blue tape, so there was more to be sanded and cleaned. Once the protective vinyl was off, the men were very careful to keep the nonskid clean, wiping it often with acetone and stepping on clean rags to keep their feet off it.
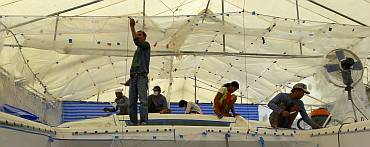 Baw decided to rebuild the front of his plastic spray-tent |
Baw has an interesting challenge here, in that parts of the deck between nonskid have already received a coat of Ocelot White gelcoat (well, it all did, but not all of it stuck). So he will be blending in the areas where it was chipped off and the areas where it stuck. He wants to be sure we have a uniform look to the color of the deck. To this end he has been spraying a bit more over the peeled off areas, to build up the color, and he also makes sure to use the edges of curves, corners, ridges, etc as the breaking point from one spray to another. Joining two batches of paint or gelcoat, even if they are factory matched colors, is always problematic as your eye can perceive minute changes in color (several million different colors). By joining his sprays at rounded corners and edges, it tricks the eye into not noticing any potential or real color shift, as the shadows and light change on the corners and edges anyway.
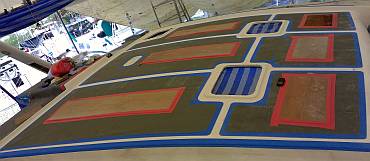 The cabin-top re-masked, with plywood stepping pads |
Rain came in with a vengeance by mid‑morning and stayed with us all day, so we all knew there would be no spraying today. But we all kept at the preparations. Jon measured out the area to be sprayed, adding up all the narrow "gutters" between nonskid and came up with a surprisingly larger area than we would have guessed, at 3.5 square meters (38 sq‑ft). Then he and Baw discussed the strategy for this spray so they could keep track of each square meter in order to get at least 1kg of gelcoat on each one, and also to plan how to keep wet edges when there were so many long skinny strips of deck to be sprayed.
Sue was watching and photographing, and noticed that some of the deck had a definite shine to it between the nonskid. So she asked Baw what grit sandpaper had been used. He told her that the finest he had gone was 220, and that 220, 240 and 320 all DO make the gelcoat look a bit shiny, as those are the numbers that are used to start the polishing process. (Sue called Mike to get assurance that one could spray new gelcoat on old gelcoat with a 220 grit surface, and he said he preferred 180, but that even 240 was OK if sanded just before spraying.) Sue kept cajoling and teasing, being serious and probably annoying, and Baw countered saying that the finer grit (like 220) allowed the old and new gelcoat colors to blend in better. Sue countered (all with a smile, but serious tone) that the color was not as important as making sure the gelcoat didn't come off. Baw smiled and looked his most reassuring, and said, "No promplem Madam Sue." The next thing we knew, the guys were all busy re‑sanding the gutters with 150 grit sandpaper, and Baw cheerfully said that they were doing it for Madame Sue. Gotta love the guy.
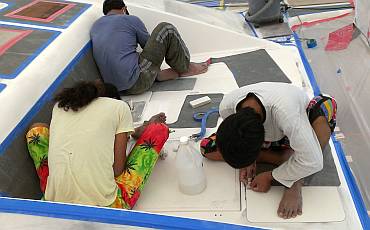 Chandron, Pla & Yando cleaning & preparing the foredeck |
Once the cabin‑top itself was fully prepared, the men moved on to sanding and cleaning the foredeck, which will be one of the smallest areas to be sprayed. We think Baw wants to do it next, after the cabin top. The trick here is the newly created indent in the deck for the chain stripper which is partly under the anchor winch. This is made from epoxy and needs a really good sanding, plus some of the deck nearby is a bit rough, and will probably get a touch of filler. Oh gads. Not filler again! But, yes, filler will be used, and we now trust Baw to make a good non‑porous filler.
Houa finished all 25 mast step teak pads, and began drilling the holes for their mounting screws. During this process he realized that the shapes of the steps are not uniform, with some being a bit wider than others, so each pad almost has to be custom‑fit to its step. Jon gave Houa his precious tube of Duralac anticorrosive to go on the aluminum, where the stainless steel screws touch it.
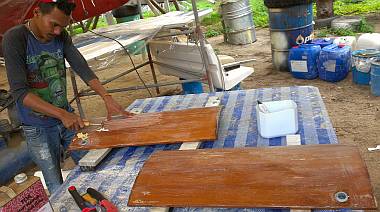 Stripping the varnish - again - from 2 salon cabinet doors |
Sue spent some time with heavy duty gloves, brush, cup and rags, checking out how well the Nyalic on the aluminum spars can be removed with xylene. It's not as easy as using paint stripper on varnish, for example, because the xylene dissolves the Nyalic, thins it, and tends to smear it around. It takes many passes with a frequently turned rag to wipe off the residue. Before we coat the spars with a zinc chromate primer (the only primer that addresses the issue of filiform corrosion) we will use sand paper to be sure we've removed the last of the Nyalic.
Towards the end of the day we brought up a difficult subject with Baw. The rounded doors that go on the end of our galley peninsula just don't look very good. They originally stripped the old varnish off them before building the varnish back up, but they didn't get it all or something, because the doors are no longer a uniform color. Baw was probably expecting us to comment, although we're surprised that he didn't bring it up himself, as he's usually more concerned with beauty than we are. But he said he's got a solution and immediately started stripping the varnish again. One problem is that the doors have epoxy as their first layer under the varnish, which will be tough to sand through. And the teak is just a thin veneer. It will be interesting to see how Baw effects this particular repair.
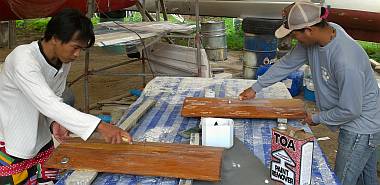 Yando & Heru continuing work on the rounded cabinet doors |
Sue also enjoyed sitting on the sugar‑scoop steps with notebook and measuring tape, trying to calculate the total area that needs to be gelcoated back there. With all the complex curves, diminishing width walls and rounded corners it came down to a bit of guestimation at times. But best calculation says that each sugar‑scoop area to gelcoat is about 6.76 square meters (73 sq‑ft). Wow. We would not have guessed so much. That means we'll probably aim to put 7 liters on each side, for a total of 14. Oops. We'll only have 15 liters left after the cabin top spray, and we still have to do both side‑decks and the bimini edges. Time to order another $300 drum of gelcoat.
Wednesday, September 11:
Wet, wet, wet. Probably the wettest day so far this season. It didn't just rain all day,
we had some pretty good squalls come through packing 40 knot winds.
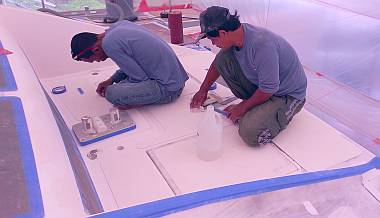 Baw and Pla finalizing gelcoat preparations on the foredeck |
Baw and Lek continued building their new plastic spray‑tent for the next gelcoat spray up on deck. They remained optimistic about doing it today until right before lunch. But the relative humidity refused to budge below 78% so they quit for lunch with a "We'll wait and see" attitude. Meanwhile Chambron and Pla spent time cleaning and sanding the foredeck for the future (we hope not too future) gelcoating of that small area. It's all so pristine and clean and neatly masked and laid out up there. Now we just need some time with the sun out and the relative humidity below 75%. It sure didn't happen today.
Having decided yesterday that the 2 nice rounded locker doors in the salon were not well done, Heru and Yando took up the job of getting the last of the varnish off. First they used more TOA (local Thai) paint remover, then scraped with triangular scrapers. And then they sanded the wood to try to get it all uniform. We wiped acetone on the bare wood which let us see just how the colors were going to come out. The teak looks much better, but Heru spent too long with the sandpaper on one spot and went through the thin veneer. Dang. Baw thinks he can repair it with stain but the grain's going the wrong way so it will always be visible. Putting on new teak veneer will take time and make them darker than the sun‑bleached teak nearby, but those doors are essentially in the middle of the salon. They're always visible so we'd like them as nice as possible. We Shall See...
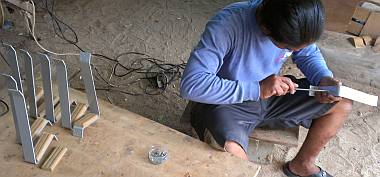 Houa screwing the teak foot-pads onto the mast steps |
So lunch time came and went, the rain never ceasing, and the next thing we know we have only 2 workers left. Houa was still back in his workshop, and Pla was still with us. So weird that the other 5 would just up and leave, without so much as a word. Well, Baw had joked before lunch that he was going home. "Very little job today," he had said. But we assured him there was plenty of rainy day work to do, and we didn't think he was serious. Silly us. We probably need to have a clear discussion of all the things that can happen on Ocelot even on rainy days.
So we set Pla up sanding the gloss varnished bookshelves so that they can receive a third coat of gloss some day. Baw had not been interested in adding them to the varnish assembly line for some reason, as though he wanted to hold out some small job for the future. But the future is here. Pla got about 6 of the 9 bookshelves sanded by end of the day.
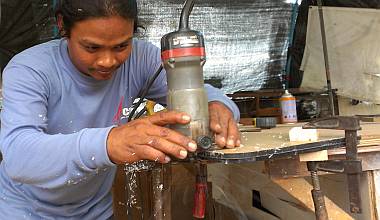 Houa cutting duplicate acrylic panes with his router |
Houa used the morning to finish all 25 mast steps with their cute little teak pads. Each one custom fit, screwed on, with Duralac syringed into the screw holes to protect the aluminum from the stainless steel screws. After that, he tackled the 3 new pieces of acrylic window material that will go into the 3 salon hatches. First job was to use the jig saw to cut the new pieces to very close, but slightly larger than the old ones. Then with the old one clamped tightly to a new one, he used the router to make the final trim. Tomorrow he'll be putting the holes in for the handles, and mounting the new acrylics in the hatches with sealant.
Jon spent the day in the dark interior with a pair of drop‑lights. First he sprayed down below to kill all the mosquitoes that seem to live down there (when we get some yeast we'll make more passive mosquito traps). Then he mounted the last of the 15 cabinet doors in the cabins. Tedious, sweaty, fiddly work, with some ambiguity as to which door goes where, but now they're done and that job can be checked off the list.
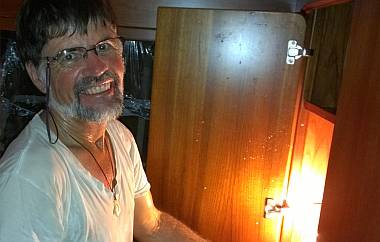 Hot & sweaty work, but that's one more door happily mounted |
Sue took out her frustration with the AWOL workers by attacking the Nyalic on the boom and mast. She used up about a kilo of rags (we buy old sheets by the kilo and rip them up) and a couple liters of xylene and 3 pairs of latex gloves. The trick is to brush the xylene on, then wipe quickly from a non‑Nyalic place towards the remaining Nyalic. If you go the other way the rag fills with softened Nyalic and is useless. Two wipes and the rag is tossed. It's easy work, but the xylene is nasty stuff, and it would be nice to have some gloves that don't eventually disintegrate in the solvent. Working in fresh air is critical, too. Perversely, Sue is almost happy to see the filiform corrosion on the areas she's working on, as it is further justification for removing the Nyalic. Of course, there's still a thin film of Nyalic on the spars, but that should come off when we sand the spars just before we paint them.
In the quiet afternoon Sue took off for the store room to do some much needed sorting of the refit boxes. Time to get all the mast and boom fittings together, the plumbing bits, the electrical bits, and the first stuff to go back, the deck hardware. We're beginning to see it come together.
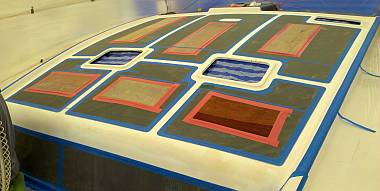 Before the shootin' started, with red rimmed plywood foot pads |
Thursday, September 12:
We awoke to a sky of blue with high clouds, but wet leaves on the palm trees. It rained hard
last night, but perhaps it had blown itself out. We were cautiously optimistic about spraying gelcoat.
Sue walked to the yard early to be sure things were all lined up for the spray. Baw and the men dove right into the final acetone wipe‑down on the cabin top. Heru set up the elaborate extractor fan system on port side, complete with the water trap at the bottom. After consulting our mini‑weather station (it read 84°F or 29°C and 76% relative humidity) we went ahead with getting out the gelcoat. These aren't ideal numbers - in fact, we don't like to spray gelcoat at more than 75%RH, but we knew the temperature would be rising, which would drop the relative humidity quickly.
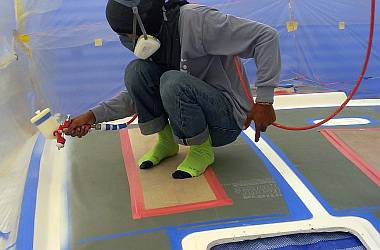 The start of the spray - Baw worked from the back to the front |
Jon scootered in, stopping at "Seven" (7‑11) for more stockings for gelcoat filtering. He and Baw went over the numbers: 3.5 square meters of deck, so 4 kg of gelcoat, with 6% monostyrene (240cc), and 0.6% mono‑wax (24cc). When the pot on the gun is filled with its 330 ml of gelcoat, Lek would be adding 0.93% catalyst (3.1cc). These are the ratios that we used on Monday (with slightly less catalyst than we used on Saturday) and that spray seemed to go well.
The actual spraying only took an hour, from 10:20‑11:20, and went off without a hitch. The temperatures were pretty high, though, ending at over 93°F (34°C) but with humidity down around 54%. Jon stayed inside the tent for some of the spray, standing on the plastic‑covered foredeck, but as Baw moved forward to spray the forward half of the cabin‑top, Jon figured he'd better get out while the gettin' was good. Like the previous days, each 330ml pot of gelcoat took 4 minutes to spray and 1 minute to reload the pot. Baw's smaller 1.8mm gun sprays slower and carries less gelcoat than the 2.5mm or 4mm guns that Mike uses, which can spray 500ml and 750ml in 4 minutes, respectively. But the smaller gun has a smaller spray‑cone, so more gelcoat ends up on target with less overspray, which means Baw has more places to step that aren't all sticky from overspray - an important consideration when we do the narrow side‑decks.
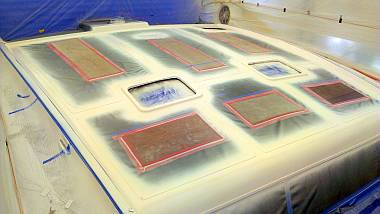 After the spray - note the overspray around the "gutters" |
We now have a white cabin top! After lunch we moved back into wood and varnish mode. Baw brushed a third coat of gloss varnish on the 9 bookshelves. These had been sanded yesterday afternoon by Pla, and then touched up again during the gelcoat spray by Chambron and Yando, who weren't needed for the spray event.
Sue and 2 men retrieved 5 of the 6 slatted wooden floor boards from the store room. We found the 2 from the galley, but only 3 that go in the heads. Luckily, Baw and Houa remembered there were 2 more slatted floors hiding in the workshop, and dragged them out. Whew. Really glad we didn't lose those! These floor boards get a lot of abuse and water, and we decided that they should be stripped, epoxied for water protection, and then coated in polyurethane for UV protection. Baw didn't see how we got UV in the boat, until we pantomimed sunlight coming down through open hatches.
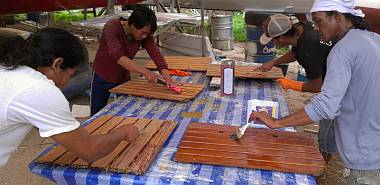 Removing old varnish from slatted galley and head floors |
Up on deck, Baw pulled off the vinyl covering the nonskid as the gelcoat was hard. He and Jon spent the last few hours of the day with razor blade cutters, cleaning up the bits of overspray on the edges of the nonskid. In retrospect, we probably should have sprayed more than 4kg for 3.5m2. We've ordered another 20kg of of our special gelcoat so we've got lots now. By measuring bits chipped off the overspray, we found thicknesses of only 0.5‑1mm. We really want a bit more than 1mm, so we end up at 1mm after they polish off 0.2‑0.4mm. Also, we have to tell Baw to look at the height of the gelcoat relative to the edges of the nonskid as he's spraying. Some areas are virtually level with the nonskid, indicating almost 2mm of gelcoat, while others have much less.
Houa spent the day on the salon hatch project. At first he cut one of the 3 new acrylics to fit the hatch frame a bit too tightly. Not sure what the point was, but we asked him to make it the same as the old, with plenty of space around the edges. This allows for different thermal expansions, and also allows the silicone sealant to grab hold of the sides as well as underneath. He began removing the old hardware/plastic handles, but ran into trouble with one that had a broken bolt head. End of the day found him doing the fun job of getting the old silicone out from the edges of the aluminum frame. He jokingly suggested we call Amanda, in America, to come help. He remembers how much she hated dealing with silicone.
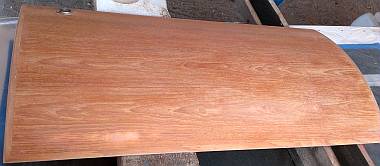 Problem curved door - hole in veneer is at bottom, left of center |
We took another look at the curved cabinet doors and decided that we should take advantage of Houa's carpentry skills and the abundance of teak, and see about replacing the veneer fronts. Houa said he could do it, using 1mm veneer which he would epoxy to thin plywood as a backing for it to hold the curve. But we would like a thicker veneer if possible, say 2‑4 mm so that we don't have the problem of someone sanding through again down the line. Houa will check if such a thing is available or not.
Pla worked on the foredeck all afternoon, sanding the area around the cut‑out for the chain stripper, right next to where the windlass goes. For some reason the deck was uneven there, with dips and hollows. Baw says he can fix it after the gelcoat spray, but we would prefer to have the dips filled up a bit before the spray. We are out of polyester resin with which to make a quick filler, and epoxy takes too long to cure. So at first Baw suggested a gelcoat filler, and we said "Gelcoat okay. But no filler with gelcoat!" Then we reminded him that we don't want filler in our special gelcoat. Last time it was tried was a disaster, on the whole starboard topsides back in February or so. So Pla sanded the dips and hollows very well and then smeared pure gelcoat into the problem areas. Tomorrow he'll sand it flat and we can proceed with the spray.
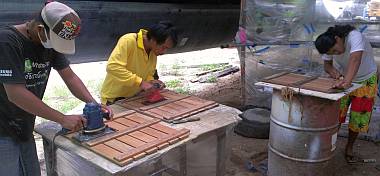 Heru, Yando & Chambron sanding the teak slat floorboards |
Friday, September 13:
TGIF! Oops. False alarm. It's not yet the end of the week. Still one day to
go, but today was a good one. Didn't spray gelcoat but things got done that we didn't expect, so that's okay.
We expected light rain all morning, and indeed it was sort of muggy and overcast, so much so that Baw decided not to spray gelcoat. We think he was secretly pleased to get a day's break from the spraying, which is exhausting and stressful, and headache‑inducing with all the polyester fumes. Baw and his men seemed quite happy to work on nice solid teak (as opposed to veneered) boat bits all morning. The 6 slatted floor boards for the heads and galley all got stripped of their old varnish, then sanded to a lustrous bare teak. The guys were able to scrape or sand off the old epoxy from the bottoms as well. The painstaking, slow bit was getting the varnish scraped off and sanded from between each of the slats. If we don't sand it back, then the new varnish will begin to peel from contact with the old, and we'll have wasted all this effort. We had hoped to get around to putting epoxy on the boards, but they weren't ready, so that will probably happen tomorrow.
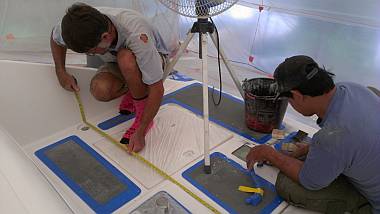 Jon measuring the foredeck while Pla prepares it for gelcoat |
Lek and Yando prepared the 9 bookshelves for their third (and hopefully final) coat of gloss varnish. Once they were carefully checked for sufficient sanding, and ready to be alcohol‑wiped, we banished the floor board guys, Baw, Chambron and Heru, to the downwind side of Ocelot, and they took shelter under the neighboring boat. No way did we want fine teak sawdust blowing into the new varnish. After lunch Lek got the third coat of Epifanes gloss varnish on all 9 bookshelves and let them dry under Ocelot.
Pla was up on deck making sure the foredeck is absolutely clean, sanded and all ready for tomorrow's gelcoat spray. We would really have liked to spray today, and probably could have, but Baw had a medical appointment in the afternoon, and only worked half a day (he apparently suffers from headaches from a scooter crash long ago). He says that we can spray tomorrow morning if the weather allows. That would mean finishing the week with the whole center of the boat sprayed and maybe some re‑masking begun for the side decks. We can hope.
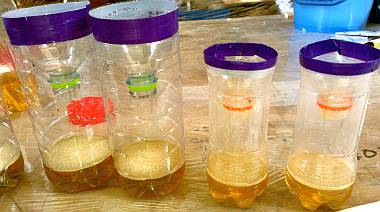 Mosquito traps: sugar-water with yeast on top to make CO2 |
While Pla sanded, we got out the tape measure to calculate the area of the foredeck so we know how much gelcoat to mix. Jon had the great idea to measure the whole foredeck (which is pretty rectangular) and subtract out the rectangular 4 nonskid pieces and 2 hatches (which will be removed for the spray). This gave us an area to be sprayed of 3.5 square meters - about the same as the cabin‑top, but much more compact. Jon also allowed extra area for the 3" of overspray that will go onto the masking but still has to be accounted for in determining how much gelcoat to mix. We hope to get a good thick layer on this heavily walked and worked area.
After the hot work inside the plastic spray tent, Jon pulled out the port engine‑room blower, which is one of a dozen little jobs on the To Do list. Most of the other ones require access to the boat, which is awkward with it all closed up for the gelcoating. After pulling the blower out he found that it actually worked just fine, which means that there's a problem in the circuitry that turns the blower on - a much more difficult problem to trace right now as he can't get at the electrical panel. So Jon turned his attention to building 7 mosquito traps and deploying them inside Ocelot.
|
Sue scrubbing silicone out of the hatch-rims |
Sue ran a bunch of scooter errands, including the requisite end‑of‑the‑week bank run. She decided at the last minute to pop into the Jotun Paint store that is under our apartment to ask about primer paints for aluminum. Unfortunately, the store keeper spoke no English, but was able to understand phoning the technical support folks in Bangkok, who spoke good English. Getting paint to stick to aluminum is difficult so we've usually used zinc‑chromate as a primer for aluminum but we can't find any here in Phuket. Jotun doesn't carry a zinc chromate primer either, but recommend an epoxy based, 2‑part primer that can be over‑coated directly with a topcoat. While looking for the technical sheet for the Penguard SEA, Sue found a sheet on an etch‑primer for aluminum and steel with phosphoric acid. Time to do more research. We may have to compromise and not use a zinc‑chromate primer, as it seems all the big companies have stopped making it.
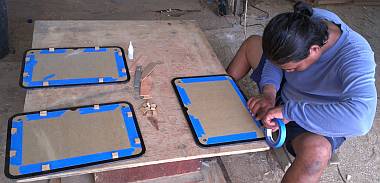 Houa preparing the acrylic - note positioning blocks glued to tape |
Houa got the old acrylic out of the third salon hatch and then began to remove the silicone. Silicone is a problem, because it won't stick to old silicone and it's very difficult to remove completely. When we told Houa that we have a chemical for loosening silicone his face lit up. He raised his hands in a deep "wei" (respectful salutation) and said "Thank you. Thank you," while handing us the hatch frames. The meaning was clear ‑‑ we were to do the silicone removal. So Sue and Jon set up silicone shop on the scaffolding beside Ocelot and got to work. Two hours of scrapping, rubbing, dousing in Silicone Off, more scrubbing with a wire brush, and we had 2 of the 3 hatches ready for Houa. Meanwhile he had taped up the acrylic and positioned small blocks on the "back side" of the acrylic to allow him to place each piece exactly in the center of the opening. After a good acetone wipe down of the aluminum, and a sanding of the acrylic edges, he got the first of the 3 acrylics embedded with clear Sony silicone. The next frame is ready for him for tomorrow morning, but the third still needs some work.
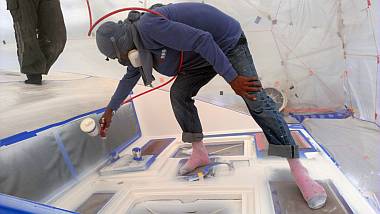 Baw spraying gelcoat on Ocelot's foredeck |
Saturday, September 14:
A good end to a good week, with a hot, sunny day and low humidity, so we got lots done.
The foredeck gelcoat spray was the big event of the morning, with the guys getting everything ready without much discussion. Pla did the last minute cleaning and acetone wipe. Lek and Heru assembled all the bits and pieces we need: rags, acetone, spray gun, syringes (for measuring small quantities), latex gloves, socks (for the men on deck), breath masks, stirring and mixing pots and buckets, stirring sticks, kitchen scale, silicone spatula (a new addition and very useful for getting the last of the gelcoat from the tub), mono‑styrene, mono‑wax, catalyst (what our workers incorrectly call "hardener"), and gelcoat.
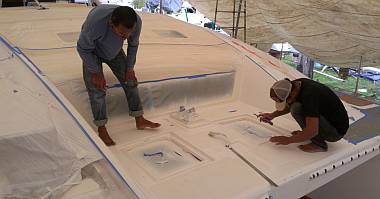 The after-shoot inspection - looking pretty good! |
Baw consulted with us on the area to be covered, and we decided to increase the gelcoat per square meter ratio from 1:1 to 1.25:1. So for the 3.2 square meters of foredeck we decided to shoot 4kg of gelcoat. In fact, it ends up closer to 1.33:1, as we weigh out the 4kg of gelcoat first, then add 240g (6%) mono‑styrene and 24g (0.6%) mono‑wax. The catalyst is always added at the spray site, directly into the pot, and is measured with a graduated syringe. Given how hot is was, we reduced the catalyst from 0.94% to 0.9% so it wouldn't harden too fast.
By 10:15 Baw and Pla were all kitted out, moving gingerly around in the spray area. Pla mainly stayed up on the cabin top, while Baw stepped (stickily) from one little wood pad to the next. In such a small area the overspray tends to cover just about everywhere, so lifting his feet was a problem. Lek was the guy who filled the pot every 5 minutes and added the catalyst. Sue stayed farther afield, but still on deck to record pot fills and advise Baw of how far along he should be. The shoot took just 1 hour and we were all happy to get down off the hot deck, but Pla stayed up for a few more minutes to drop dots of gelcoat on any holes or flaws, which saves a bunch of time later.
|
Siliconing the acrylic into the hatch frames |
Meanwhile, down in the shade under Ocelot, Jon finished the third salon hatch frame, scrubbing the last of the silicone residue from the groove where the new silicone has to go. Silicone does not bond to cured silicone, so the old stuff has to be entirely removed - a difficult job as it's tenacious stuff. Houa then got both the second and third salon hatch acrylics siliconed into place, with a beautiful bead around the edge, and plenty of sploobing out the underside so we know it filled all the spaces. The new acrylics and silicone sat all day, weighted under jugs of sand. By late afternoon they were cured enough to remove the weights and pull off the tape. They look great. Houa says he always does a water test before installing hatches. Sounds like a great idea to us.
Once the morning's gelcoat had hardened, the men went on deck to remove a lot of the plastic masking and sticky vinyl and over‑sprayed plastic from the deck. Then Baw, Heru and Jon checked the spray. We're very pleased with the day's spray. Baw did a great job of making sure the gelcoat got well sprayed against the nonskid, so that in places it is almost flush. Better than being too thin, we figure! The way the nonskid is masked, the gelcoat tends to pile up in a sharp lip around the edges. So while Jon scootered off to Phuket Tools in town to find a stainless steel wire wheel for the rudders, Sue took over the gelcoat edge trimming with a razor cutter. The new gelcoat cuts easily when it's new, so it's important to get the trimming job done now, as it will be rock hard in a couple of days.
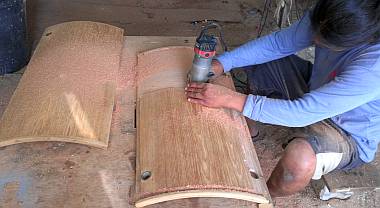 Houa removing the fronts of our beautiful curved doors - ouch ... |
With the hatches laid to rest, Houa started on the disassembly of the rounded locker doors from the salon, the ones with the sanded‑through veneer. He bought 10' (3m) of 12" (30cm) wide teak veneer, and will be able to pick and chose what piece goes where to get a nice pattern. But instead of just gluing the veneer to the fronts of the doors, the veneer will have to be glued (flat) to some thin marine plywood and then bent and glued to the doors. Baw asked him to please not use epoxy to hold the veneer to the marine plywood backing, but instead to use some wood glue that won't show. Houa has to buy it from Phuket Town somewhere, so he didn't start on any gluing of veneer today.
Having to use plywood means that about 4mm (a bit more than 1/8") of existing wood must be removed from the fronts of the doors, which is painful for us to watch. Not as drastic as the boat being pulled apart all over again, but still unsettling to see the once‑beautiful (and irreplaceable, in Phuket) doors cut down to plywood. Luckily the curve in them is well established in the underlying plywood, so Houa will be able to glue the new marine ply and veneer to the original curve. He's maintaining the curved teak frames at the top and bottom, as that would be hard to duplicate, but the straight frames on each side will be rebuilt.
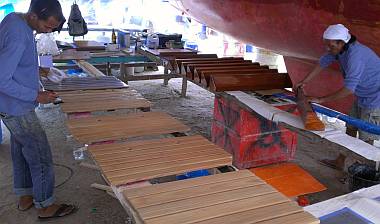 Baw epoxying the slatted floorboard while Lek sands bookshelves |
Yando and Chambron worked on the the teak slatted floorboards, getting them ready for their first epoxy coating. By mid‑afternoon all 6 of the floorboards were beautifully sanded and smooth. It almost seemed a shame to cover them with anything, but we must. They all get very wet and abused under foot in the heads and the galley. Baw got the first coat of West System epoxy on, then Heru followed up with a wet‑on‑wet approach and got another coating just before quitting time.
Lek spent the afternoon as a one‑man sanding team getting the 9 bookshelves sanded in anticipation of gloss coat #4. After that they'll get their final double coat of satin.
By 4pm we were all quite tired and ready for the drinks lady to come with her "saamlaw" (three‑wheeled scooter and side‑car) and "soda manau" (fresh lime and soda water) but she rarely comes on Saturday because workers tend to be out of money then! We bought a round of commercial iced green tea and the men seemed very appreciative of that.
Happy Saturday. Happy short weekend. We have no big plans, just rest and recuperation and Skyping the family.
Thai Refit:
Ocelot Pages:
Top Level: Home | Destinations | Cruising Info | Underwater | Boat Guests | Ocelot | Sue | Jon | Amanda | Chris | Site Map | Make a Comment
|
If our information is useful, you can help by making a donation |
Copyright © 2000‑ Contact: Jon and Sue Hacking -- HackingFamily.com, svOcelot.com. All rights reserved.