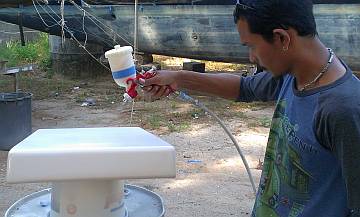
Baw re-sprayed parts of the 2 small aft cockpit doors
114 Start Headliners
Summary: Bit of a slow week, as we're having trouble finding things the guys can do with minimal supervision, so the jobs are smaller. The week focused on the headliners, touching up the gelcoat around the nonskid, repairing the gaskets for the hatches, and preparing the bimini for its new legs. Team accomplishments this week include:
|
 Baw re-sprayed parts of the 2 small aft cockpit doors |
Monday, January 6:
Bit of a slow start to the week, but maybe we have to get used to this pace, as the jobs now are so
small and scattered. We're struggling to keep the men busy so Yando not showing up was OK.
Baw spent the morning sanding and preparing the 2 small aft cockpit doors for small gelcoat re‑sprays, as there were some visibly thin areas. He put 2 coats on after lunch.
Two of our hatches have warped (or something) and don't sit down well - the starboard cockpit hatch and the port chain‑locker hatch. So Jon bought some carbon paper to tell where the hatches were touching. He'd put a sheet of carbon paper down where the hatch sits, close the hatch, stand on it a few times, and open it back up. The hatch would be marked in blue where it was touching, so Jon ground those areas back a bit. Repeat about 12 times for each hatch and they now both sit down much more nicely.
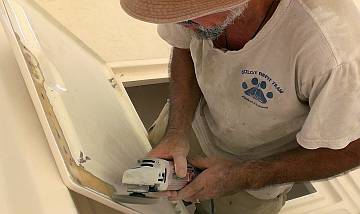 Grinding the anchor locker hatch to make it sit down flatter |
Next is to send someone into those hatches with a flashlight (torch) and a pencil to mark how much gasket is needed around each, as the gaps vary considerably. In honor of this event, Sue scootered out to buy some strips of 1mm and 5mm neoprene for gasket material (we already have 3mm) to use as gaskets.
Pla was with us only half the day (not sure why he left) but he got some good work done on the port engine. With some translation help from Houa, we were able to explain that we wanted him to locate any rusty places, sand or wire brush them, then brush with phosphoric acid (a rust converter) then rinse, acetone and primer paint. He got many small places de‑rusted and acid brushed before lunch. But since we hadn't know he wasn't coming back after lunch, we couldn't ask if he had rinsed anything.
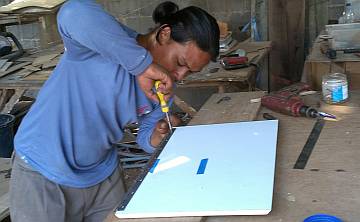 Houa screwing a piano hinge on the new head locker doors |
Sue spent a good hour in the afternoon down in the same engine room, propped against the hull, wiping, cleaning, poking and re‑wiping. So even if Pla already rinsed areas, they've been rinsed again, so all is well. But we didn't get around to the acetone clean or the primer.
Houa got the last formica edges trimmed on the head locker doors and started to mount the stainless steel piano hinges. He needed 5mm long screws but the shortest we could find locally were 10mm, so he had to grind them down lest they poke the formica on the far sides of the doors. We hope to see them installed tomorrow.
Heru cleaned up and polished the last of the 6 big stainless steel hatch cover pulls. Jon got the first one installed in the cockpit, using stainless bolts and Sony silicone sealant.
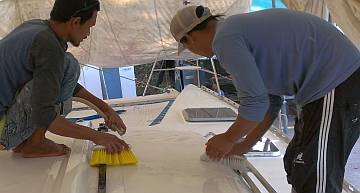 Baw and Heru washing the decks - nice that it's so easy now |
Jon's big job after lunch was to test the starboard engine. He set up the hose for cooling, and Sue hit the key and ... We had lift off! The engine started beautifully, right away. Now that was a nice sound! All gauges registered, no oil leaked, it ran smoothly through its rev range, and even the gearbox (sail‑drive) performed flawlessly. The engine shut off relay worked fine, the buzzer sounded, and the key turned it off. All was well. We could wish for more straight‑forward projects in these last weeks!
After the engine test, Jon scootered off to a car parts store for a new shut‑off relay and an oil pressure gauge for the port engine (it's never been as cooperative as starboard). Sue cleaned up the tools and closed the boat up so that Baw and Heru could clean the deck.
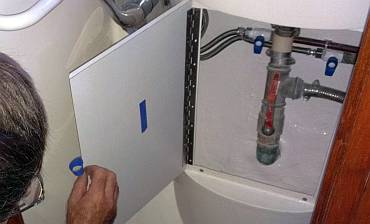 Houa's new doors for under the head sinks look very nice |
Tuesday, January 7:
It's getting hot in Thailand again, so we're really looking forward to getting on the water!
Everyday we get closer...
The engines got a lot of TLC today as Pla spent all day down in both engine rooms. On port he finished up some sanding by hand, then used a wire ball on the drill to really scour some of the tough areas. He did the acid rinse again, water rinse, and just after lunch was ready to mix up the 2 part metal primer (a sort of Rustoleum a la Thailand). The starboard engine didn't need nearly as much attention (partly because Sue had hit many of the rusty spots a few months ago). By quitting time, Pla had done the whole preparation thing and applied primer to the bare metal. Now we just have to figure out what matching gray engine paint we can put on so our engines don't look so spotted.
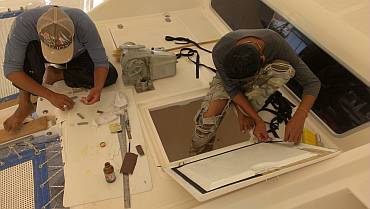 Heru made toilet bumpers, Baw laid strips of neoprene gasket |
Baw and Heru began the day sanding the cockpit doors that they had sprayed with gelcoat yesterday. The polisher came out before lunch, Baw gave them a beautiful shine, and then the men moved on to other projects.
Baw put in some time on the hatch gaskets, making a beautifully tapered gasket for the port chain locker that Jon worked on yesterday. Then he realized that the starboard chain locker had its gasket in completely the wrong place, so he ripped it off and cleaned up the hatch. Tomorrow he'll measure how much gasket is needed and glue it on.
Our hopes for Houa to mount the new locker doors for the heads today were dashed when the local hardware store that supplies all our stainless bolts and screws said they didn't have 3mm bolts, and had to order them -- Two days from Bangkok. But Houa was not to be put off. He went ahead and mounted the 4 lockers using short 3mm screws he still had, so that he could check the swing and fit of each. They look great! We probably will remove the few screws and replace them with small bolts when the store gets them, as Jon really doesn't want to risk slicing his arm when he reaches under the sink to work on the plumbing.
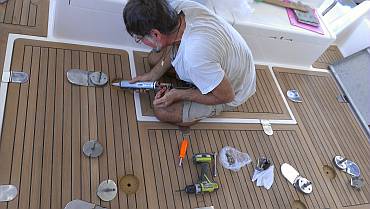 Installing the hatch handle/latches in the big cockpit lockers |
Sue followed up on the cushion upholstery job and found they still haven't received the foam. How strange that they offered to do the job in 2 days last month. Anyway, no rush, as we really don't want cushions on the boat yet, as we'd just have to wrap them up and store them for a bit.
Jon finished marking out where the last 3 handle/latches need to go for the big cockpit lockers. Then Houa came up with his routers and finished the remaining 4 holes. After lunch Sue helped Jon mount them and now we have hinges and handles on all the cockpit hatches.
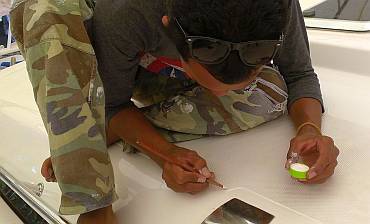 Baw putting more gelcoat around the edge of the nonskid |
Jon also got the bolt holes for the starboard side of the bimini leg all de‑cored. There's just a bit of cleaning and picking out of the old foam and fiberglass till to do. We've decided to cut the big water‑catch drain holes in each corner next, so we can mount a bit of PVC pipe in each hole at the same time that we fill the de‑cored areas with epoxy.
Baw made good use of the clean deck to do a dit‑dot gelcoat repair job on the cabin top. He's basically finding the pin‑head size places where the new nonskid edges show black fiberglass, and filling those in with color‑matched gelcoat. We've decided that some tiny globs of gelcoat will look better than lots of little dark spots.
Sue, having watched Heru build a model Thai fishing boat, decided that he's handy enough to take on a niggling little project of hers. Our Jabsco toilet seats (now all beautifully painted and renovated) are missing the rubber bumpers that screw on and protect the seat from the toilet rim. They are not available here in Thailand, although other Jabsco toilet parts are. The broken old dinghy handle from the inflatable was just sitting around, and it's made of very dense, grey rubber. We gave the handle and sample bumpers to Heru and asked for 8 bits to be made. He did a great job. Don't know how long the rubber cement will last between the piled up layers that he had to make, but they will protect the newly painted wooden seats at least until we can find these crazy little bits. Three hours of work, $9 of Thai labor, no more running around looking for little bits.
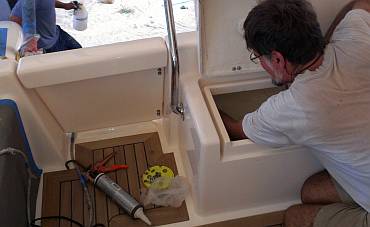 Installing the starboard aft cockpit door - it swings nicely! |
The final push of the day started at 4:15 when we realized we could maybe get the aft cockpit doors mounted. Since we'd already done a dry mount yesterday to be sure the gelcoat spray wasn't going to make them too big again, we figured they were good to go. A quick acetone wipe, some silicone gloobed on, and the door slid into place. Jon did use his Dremel to open up access to one of the nuts down in our lazarette but otherwise it went pretty well and we got the starboard door mounted by 5pm. One down, one to go!
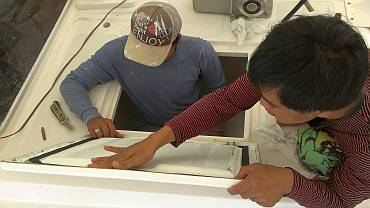 Heru and Yando putting new gasket on the chain locker hatch |
Wednesday, January 8:
No momentous action today but lots of small things done to move us along or prepare for other jobs.
Baw was absent all day, which meant Houa had to do the translating to the team and some supervision,
but Yando was back at work.
Jon tackled the starboard chain locker on the foredeck, the one Baw pulled the gasket off of yesterday. Jon used his carbon paper trick again to find the touching or binding points on the hatch edge so he could sand those spots down. He continued the treatment on the 2 new foredeck hatches into the new tank compartments, and now all 3 sit down much better and are ready for gaskets. Heru and Yando took on the gasket project in the afternoon, climbing in and out of the chain locker to check the gaps and how well the neoprene gasket was filling them. That chain locker hatch is much more level now, and feels good underfoot. Three more hatches to go, and that project will be finished.
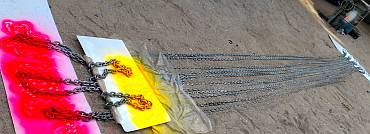 Painting our anchor chain so we know how much is out |
Sue hauled Yando, Pla and Heru over to the storage room in the morning to bring back 260' (80m) of 10mm (~3/8") chain for our main anchor, with much huffing and puffing through the soft sand. They laid it out, back and forth, in 25' (8m) runs, with the ends (turns) on future board to stay out of the sand. Heru cleaned up the chain and sprayed on a pattern of colors to our specification. We did white at each 25 foot turn, red at the 50', 150' and 250' turns, and bright yellow at 100' and 200'. It all looked OK, but when it dried and we turned it over, we realized it was junk paint. We've used spray paint to mark our chain before, and it's worked really well. <sigh> Tomorrow we'll try to buy better spray cans and just move the colors along by a foot or so.
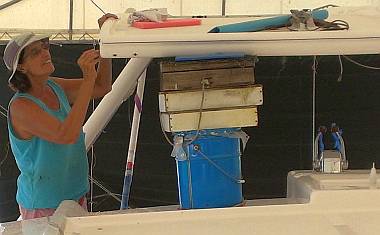 Sue picking foam coring out of the bimini with her dental pick |
Sue had a dental appointment recently and "acquired" a dental pick/scaler in the deal. Today she used it to dig out more loose foam and fiberglass from the bimini where Jon was de‑coring it yesterday. The pick, plus the vacuum, did a great job of clearing out all the loose foam. Soon we'll cut the drain holes for the water catch, fashion some PVC to fit the holes, and fill the rest of the de‑cored area with a mixture of epoxy and finely chopped fiberglass.
Pla was happy to have an outside job today after 2 days in the engine rooms. He spent most of the day on the port sugar‑scoop steps, meticulously repairing places where the gelcoat was thin (mostly on the edges of the nonskid). He then moved to the louvers on both sides, and ended the day on the port side of the cockpit where Jon had epoxy‑injected the deck to take care of a tiny delamination.
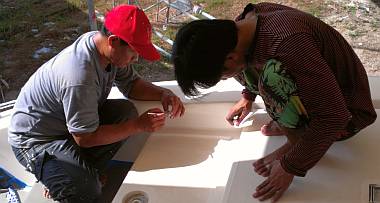 Pla & Yando prettying up the gelcoat at the edge of the nonskid |
Houa arrived with 4 nice teak "napkin ring" inserts to put in the holes that will become the finger pulls for the lockers in the heads. He'd found some chrome plated latches which could be opened with a finger in the hole, but at $7 each, he had not bought them, so we're still looking for latches, ideally plastic. Houa dismounted the 4 locker doors from the heads so he could secure the piano hinge on one half with Sika and his specially cut screws.
Heru and Yando cleaned up and filled the many small holes in the gelcoat in the heads, mostly from previous cup and toothbrush holders that were mounted on the walls. Heru and Yando did the filling, but Houa was around to supervise and oversee the work.
Jon was gone all afternoon on a mostly successful shopping run to Boat Lagoon. He was hunting for locker latches, specialty 316 stainless bolts and screws, and hoses for bilge pumps and toilets.
We had a surprise visit from cruising buddies on Que Pasa and we got the "let's go cruising" juices flowing as we chatted to them about plans for sailing south and east through the South China Sea and on towards northern Indonesia and Papua New Guinea at the end of 2014. Turns out there may be a gateway back to the Pacific from there!
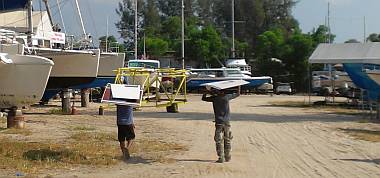 Headliner panels coming to the boatyard from our store room |
Thursday, January 9:
A hot Thailand day marked by some fun, frustration, and an unexpected setback. But we
had all 5 workers again today, which turned out to be both good and bad.
The good was that we had plenty of hands for the big, long‑awaited Headliner Parade. Yep, we've started to empty the storeroom of the dozens of vinyl‑covered headliner panels. Houa had asked that we start with panels on the port side cabins, moving fore to aft. It took awhile just shuffling through all the panels, peering around their bottoms to see the labels (if there were any), and then hand carrying them to the boat. Sue was the evil Overseer, being downright ferocious about the men wearing white cotton gloves to handle the panels. Baw slipped up early on and left his hand print and got a mock scolding from Sue, but he never took the gloves off after that.
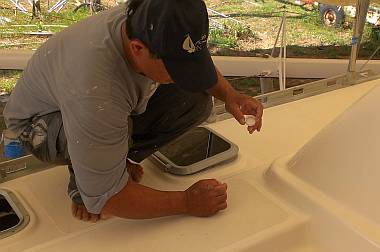 Pla did his wonderful, meticulous gelcoat repairs |
All was going well in the morning as the men pushed and prodded and tried and retried to place the panels back against the hull and up on the ceiling. Once port was as far was we wanted it to go (we have some plumbing and electrical issues still to deal with so not all the panels could go up) the men broke for an early lunch.
Pla was not part of the headliner parade, but instead continued his gelcoat work on the deck. He has a really good eye for trouble spots and carefully touched them up. Not sure if he finished the whole deck (save the areas under vinyl in the starboard sugar‑scoops where we climb aboard) but in the afternoon he was sanding and touching up the gelcoat in the 4 heads, where we filled the little holes on the shelf and walls.
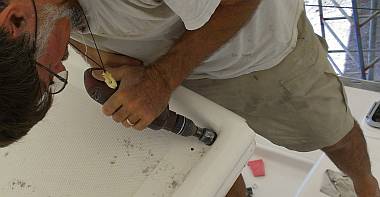 Drilling out the water-catch hole to the bimini leg |
Jon got the big rain‑catch drain‑hole drilled in the port corner of the bimini, where he'll insert a short piece of PVC pipe to direct the water from the bimini into the stainless steel leg. He used a hole saw and then one of Houa's circular sanding tools to smooth out the foam and fiberglass interior. Unfortunately, it seems that the machinists at AME left some stainless plate covering the pipe that forms the leg, where the water is supposed to go. Cutting 4mm stainless is pretty tough, and he toasted his new Dremel in trying to remove the obstructing bits. So after lunch Jon had the frustrating job of pulling apart and re‑building his new Dremel. Turns out the fan had moved on the shaft and ran into some interior plastic. We wonder where the Authentic Dremel was made. He got it fixed and was able to change tools to a more effective cutting disk, but it's still slow work as the disks are small and a Dremel isn't very powerful. And now he has to do the same to the starboard leg.
Jon's other jobs for the day included marking the placement of the pull handles for the battery compartment, so Houa can router them out and the handles can be mounted in the teak. Jon also spent some TLC on the outboard. He re‑assembled the throttle linkage bracket that we had painted, greased all the moving parts, ran the outboard through all its paces short of starting it (which we've already done) and declared it water‑worthy.
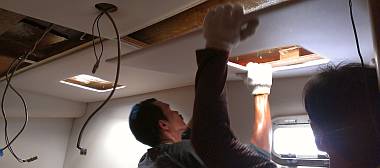 Putting the headliners back in the port aft cabin |
The bad of the day was that with 4 men "playing" with the headliners, they got overly interested in making each piece go into place, no matter what. But some areas have changed shape (like Amanda's bunk, from the whale damage repair) and when TMT, the tent and vinyl contractors, added new foam and vinyl over the plywood, they used a thicker foam than before. So some panels that were tight before are now actually too big. The end result was that 2 long panels were damaged and now need to be re‑covered.
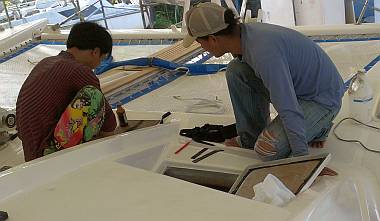 Yando and Heru putting gaskets on the new stbd tank hatch |
Sue was running scooter errands when this happened, so she was surprised on her return to see Heru and Yando up on deck on the gasket project. Jon had split the team, leaving only Houa and Baw, our best workers, to do headliners. Houa trimmed a few mm's off one of the too‑large panels which got ripped (the other just got in the way!) and we'll send it with 3 others back to TMT tomorrow.
Houa offered to go halves with us on an air powered staple gun so he can fix other panels that are too big by peeling back the foam and vinyl, trimming the wood, then stapling the foam and vinyl back in place. This would be much more convenient than shuttling panels to TMT and back every couple days. We are pleased with this, as it will certainly streamline the job. Now if he can just keep those white gloves on and keep the vinyl pristine!
Heru and Yando worked on the gasket for the new starboard tank in the foredeck. Heru complained to Jon that he couldn't get in there to see the fit of the hatch and Jon just laughed and said that he could get in there, so surely Yando could! They did, and were able to make a good gasket. Two more hatches to go.
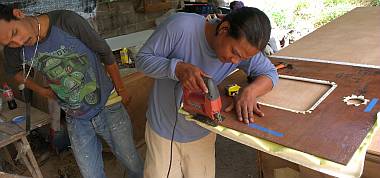 Houa trimming a headliner panel before stapling it back together |
Friday, January 10:
Nearly end of week and we're trying to feel like we've accomplished something, but we're in the
middle of lots of small to medium sized jobs.
The headliner project occupied both Houa and Baw all day, as they traipsed up and down with various panels. They seem to have taken to heart our request that the job be done right even if it takes more time. Once in Houa's workshop, Baw would pull the staples from 1‑2 sides of a panel, then Houa would trim back the plywood by some amount that he had calculated while inside the boat. Then using Houa's new pneumatic staple gun, they could replace both the foam liner and the white vinyl. From there, the panels were taken back inside and (usually) installed. The main ones not being put back right now are ones that still need hoses or wires behind them. More work for Jon, and Jon alone, so even the headliners have to get queued up.
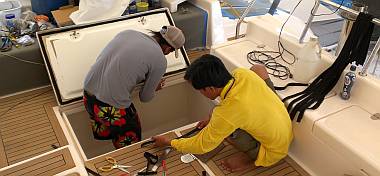 Heru and Yando's gasketing operation in the cockpit |
Heru and Yando continued their gasketing of hatches. They completed the port new tank area up forward, and the big starboard cockpit hatch, then Heru asked if we wanted them to do the port cockpit hatch. We were surprised because we had considered it finished, but pleased that Heru had taken the initiative to dive in and check for light gaps. Finding some, he suggested they fix the gasketing. Cool! So now we really are fully gasketed!
Pla was the Invisible Man all day, working alone and quietly in the 4 heads. He was sanding down the globs of gelcoat that he'd put over the filled holes on the shelf and walls. The color match is not perfect but it's good enough. It certainly looks better than a bunch of black holes! There is still some polishing to do, and we've found that that process can change the color of gelcoat as well.
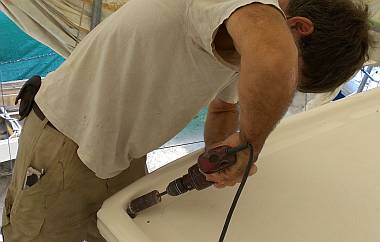 Opening up the water-catch hole to the starboard bimini leg |
Sue did her normal run around for supplies and organizing the headliner pick up from TMT to re‑cover the damaged and forgotten headliners. The rest of the day was spent with Jon on his Great Bimini Corner Epoxy Project.
Jon spent the morning on the starboard forward bimini corner, drilling and sanding out the big hole for the water collection pipe. The trick was to drill the 1.25" (32mm) hole from both directions ‑‑ down and out from the top, and up and inward from the bottom. And then have the holes meet. Sue was the spotter to try and get it all lined up. It went far more smoothly than port had, so everything was de‑cored and ready for epoxy by lunch time.
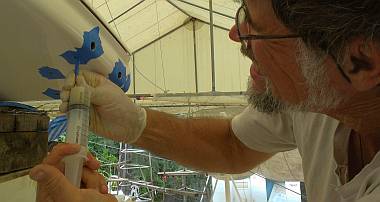 Injecting epoxy into the bimini with a syringe and a soda straw |
The plan was to fill the bolt holes with epoxy and silica mixed with shredded fiberglass, then slip the PVC water‑catch pipe in place and continue epoxying. We have a baggie of hand cut fiberglass all nicely shredded, but it had clumped, and given that Jon was gong to use a syringe to inject the epoxy mud he didn't want any solid obstacles. So we spent a prickly hour pulling and rubbing the tiny shreds of fiberglass back into fluffy, loose stuff. Jon mixed Thai Epotec epoxy and painted it onto as much of the interior foam as he could reach, then mixed up the silica and glass fibers. The first batch went in well, pushing out through the syringe until Sue saw it start to exit a bottom hole. But when Jon started on the second batch, he had a blockage in the syringe that wouldn't clear, and the epoxy started to get hot and kick‑off before even half was inserted.
So we dumped out the hot lump of epoxy and smeared the rest in with a stick as quickly as we could. We didn't finish all of the starboard side, but we can do that tomorrow. Given what happened today, we'll make smaller and cooler batches, with micro‑balloons to complement the glass fibers instead of silica. The epoxy inside got so hot that the bimini exterior got hot enough to feel uncomfortable to touch. Fearing a "boiling" of the resin, Sue grabbed a few plastic bags of ice cubes and spent the last 15 minutes of the day cooling the bimini and the epoxy inside.
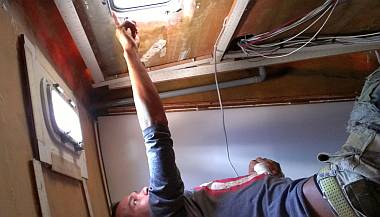 Baw spots a hatch water leak in the starboard aft cabin |
Saturday, January 11:
A surprisingly blah end to the week. We knew Houa would be gone in the morning for Children's Day
activities in Phuket town, but hadn't figured the other 4 men would want to take off after lunch. So
today's progress was measured in mini‑steps.
Yando, Baw and Sue tackled the issue of the leaking hatches over the aft bunks. The failure could be any of 3 places: the gasket, the acrylic, or the deck mounting. With Baw below watching eagle‑eyed for drips, Yando and Sue took turns dousing the (closed) hatches, or thumb‑spraying the rims. We made several water passes, with no comments from Baw. Then finally, "Ok, OK! I see it!" Turns out both aft cabin hatches were mounted with too little silicone around their rims. We could actually see up the gap in a few places. So these will need to be removed, stripped of their silicone, and re‑mounted. With LOTS of goop.
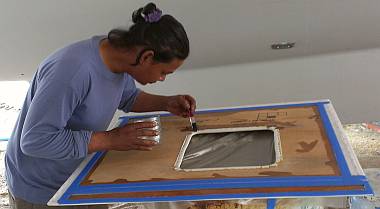 Houa epoxying the back of a headliner panel to waterproof it |
Both Pla and Yando sanded some of the new gelcoat in the heads. Baw said the repair color doesn't match the walls, so he wants to mix it right this time (apparently the men put on the gelcoat without Baw's color blessing). We're not sure it's worth it. The jury is still out.
Jon sped off to Boat Lagoon again to get some big syringes for the Great Bimini Epoxy Project, plus bits he'd not located yesterday. Meanwhile Sue was supposed to be looking for a missing fuel vent but got side‑tracked by a visit from our Swiss friends, Pierre and Valerie, who had come to see Houa about their woodwork. When Jon called to see if Sue had located the vents, he had to laugh at her getting sidetracked. He knows he does it himself.
Sue did get to the storeroom and do some much needed sorting of stuff. Back on Ocelot she created new big plastic boxes for different projects: painting and sanding, outdoor stuff to mount, indoor stuff to mount, plumbing, and finished projects. She also straightened and sorted the tools and junk in the salon to create a bit of order out of chaos. Very satisfying, but there's still more to do.
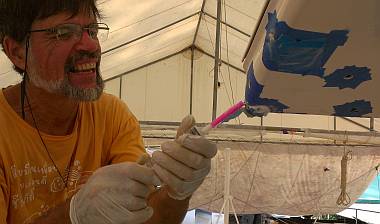 The portside bimini epoxy injections went much as planned |
At Jon's request (and instructions) Baw and Yando ran new diesel lines from the new tanks on the foredeck, down into the cabins, under the floor, and back to the last bulkhead before the main diesel tanks. No one but Jon is allowed to cut holes in the boat, so when they couldn't run the hose on starboard, they had to call it quits. But they did get the hose run to the aft water‑tight bulkhead on port.
We had a lunchtime visit by cruising friends on Boundless Tu, who had rented a car and stopped by Rolly Tasker to get our newly cleaned mainsail for us. It was all clean and white, with minor repairs to the clue, and all for less than expected. But it arrived without its sail bag or sail ties, which made it very difficult to manage. So we've got another trip to Rolly coming, but at least we can get the bag and ties by scooter!
In the afternoon Houa arrived with 5 more liters of Epotek epoxy. He spent the afternoon painting epoxy on the undersides of the aft cabin headliners (places we could see had gotten wet before) and cutting and re‑stapling the liners. This will be an on‑going project for a bit.
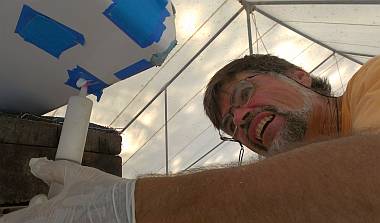 Jon's face when epoxy suddenly sploobed out the bolt-rope track |
We had our own Great Bimini Corner Epoxy Project to continue. With Houa working quietly down in his workshop and no one else on board, we could put our own music on the stereo and set to work. First Jon mixed pure epoxy resin to paint onto the exposed foam inside the port bimini corner, like he had done for starboard. Yesterday he injected a mud of glass fibers and silica but it got too hot, so today he mixed a wetter mud of glass fibers and micro‑balloons. He also mixed smaller quantities at the time.
Using a big syringe and a soda straw to extend the nozzle, Jon squirted epoxy mud into a couple of the bolt holes on port, and then into the large central cavity that includes the PVC water‑catch pipe. It all went much more smoothly than yesterday, and we finished off the portside corner without issues.
Finishing yesterday's job on starboard didn't go quite so well. When Jon had de‑cored one of the vertical bolt holes, he'd unknowingly broken through several layers of fiberglass to the forward bolt‑rope track that will hold the dodger some day. He was happily injecting epoxy mud when suddenly a big sploob squirted out of the bolt‑rope slot! Yikes! So we had some high adrenalin moments trying to clean out an area we could barely see before the epoxy hardened up. We eventually wrapped some cloth around a pencil‑like piece of wood, soaked it in acetone, and ran it repeatedly down the length of the bolt‑rope track to clean the slot. By the end of it all, the slot was as clear as we could get it, and the resin was curing, so the oozing stopped. The bimini corners look like they're having bad hair days but we'll sand it all down to look beautiful next week before we attach the bimini legs.
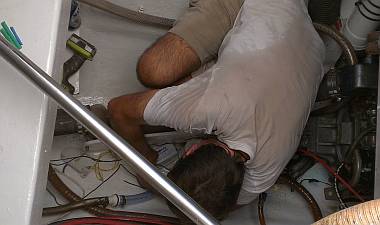 A sweaty Jon, replacing the portside engine room float switch |
Sunday, January 12:
No rest for the weary. We, the Intrepid Twosome, had our usual yummy brunch at Flints Bakery
then scootered to the yard for several hours of quiet time with Ocelot.
Jon dove into the port engine room to change the float switch for that bilge pump (one of 4 automatic bilge pumps on Ocelot). It was a nice (and now rare) mercury switch with the switching components sealed in a glass tube, and someone stepped on it. So we had to replace it with an expensive (and much less reliable) mechanical switch that depends on O‑rings to keep the water away from the electrical switch - a design that's bound to fail eventually. While Jon was down there he also re‑mounted the strainer for the cooling water, tied several bundles of hoses and wires back together and mounted them to the wall, and replaced the aluminum floor to the port engine room. The port engine starter circuit isn't behaving but the electrical connections for the starter seemed OK. The connections on the key switch seemed OK as well, but he loosened them and re‑tightened them to see if that would make the starter system happier. While he was groveling around behind the engine panels, he cleaned up a lot of the wiring, fastening it to the walls and tie‑wrapping it into neat bundles.
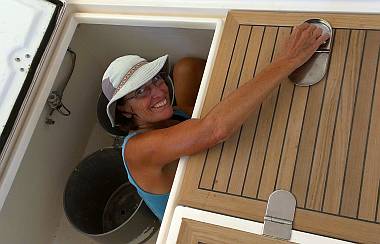 Sue working on the locking latches for the big cockpit hatches |
Sue dove into the cockpit hatches to try and fit the 6 swiveling bars that lock the hatches closed. These attach to the bottom of each of the big handles that we had already installed. As seems now par for the course, she got about 2/3 done, and then hit a snag. Four installed easily, but the last two need either some screw heads ground back where the swivel plate scrapes, or some sanding back of gelcoat under the hatch coamings where the locking bars grab.
Sue also removed some rust around the base of the Jabsco toilets, especially around the big bolts. It was a definite rubber gloves, oxalic acid, toothbrush, and fine sandpaper job.
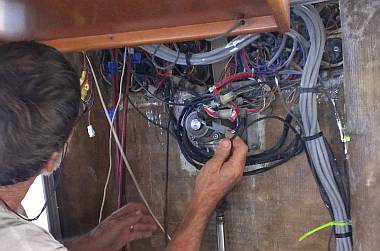 Tidying up & sorting out the wires behind the helm station |
Houa came by around noon, but was doing woodwork for another boat. He and Jon had a chance to compare the epoxy resin they both mixed yesterday (independently) and both realized that it was a bit "chewy" (you could dig a fingernail into it). It should have set up hard as glass, and it's distressing that it didn't. No big deal for Houa's resin coating on the backs of the plywood headliners, but we sure hope that all of Jon's work on filling the de‑cored areas at the forward corners of the bimini won't have to be redone. Even chewy epoxy is a real bear to remove. Perhaps we can get it to kick with a bit of heat.
But the bigger question is why didn't it cure properly? It was a brand new batch
of Epotec (Thai) epoxy from the same dealer we've used a gazillion times. Jon has not had a mixing
failure before, and he is meticulous about completely mixing resin so that "each particle of
Part A is formally introduced to each particle of Part B until they've picked life partners and
started talking about children". ![]()
The final, fun job of the day was to re‑lay the anchor chain so that we can spray paint (with better paint!) the 4‑color scheme that let's us know how much chain we have let out as we anchor. Baw wanted to remove the flaking fluorescent paint but we don't want chemicals or harsh metal brushes on the new galvanizing, so we'll just move the better color along past the flakey ones and end up a few inches out from our nominal 25' (8m) markings.
Now, can we have a weekend? Off to the market for fresh passion fruit smoothies.
Thai Refit:
Ocelot Pages:
Top Level: Home | Destinations | Cruising Info | Underwater | Boat Guests | Ocelot | Sue | Jon | Amanda | Chris | Site Map | Make a Comment
|
If our information is useful, you can help by making a donation |
Copyright © 2000‑ Contact: Jon and Sue Hacking -- HackingFamily.com, svOcelot.com. All rights reserved.