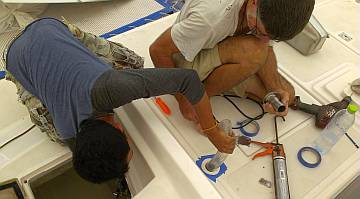
Baw and Jon install a deck fill for the forward diesel tanks
117 Furnish Cockpit
Summary: A busy week of plumbing projects, cockpit projects, dinghy projects, and headliners. We're down to about 3½ workers, but we're actually making excellent progress. Team accomplishments this week include:
|
 Baw and Jon install a deck fill for the forward diesel tanks |
Monday, January 27:
Another week starting up. Pla didn't show today, but we got good work done on plumbing projects.
Baw spent the morning squeezing into and wiggling out of the new foredeck tank lockers. Together, he and Jon got both new diesel tanks plumbed to the deck fills, and the stainless steel deck fills mounted. It took some strong arms and finesse to work the thick hose into contortions from the upward pointed fill hose barb on the tank to the downward pointed fill spout which was not in line. It worked best to push the hose up through the deck, then slide it onto the fitting, bed the fitting with silicone and screw it down, then get inside and slide on the hose clamps. Only then could the hose be attached to the tank itself.
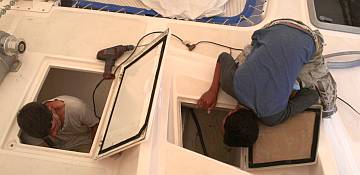 Jon & Baw drilling holes for tank vents in the forward lockers |
Unfortunately, being left‑over fittings means they say "WATER" very clearly on them, and we were joking about scratching a "NOT" or "NO" into the top. Maybe just a line through the word will do. We looked hard but could never find replacement fittings that said Diesel and opened with a winch handle like all our other deck fills.
Further to this project, Baw attached the outlet hoses to the tanks. These hoses run under the cabin floors, and Jon pushed the far ends through the watertight engine room bulkhead, past the aft diesel tanks, and plumbed them into the diesel manifold valve systems he'd installed in each engine room some months ago. Tomorrow we hope to plumb in the vents and the "sight gauges" that let us see how much diesel is in each tank.
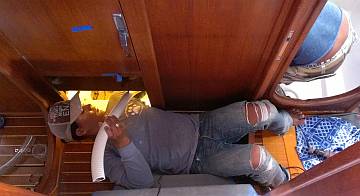 Heru and Baw wrestled the stiff toilet hoses into place |
Heru worked alone all morning on the 2 portside toilet hoses that have to loop up well above the waterline and then come down to connect to the big through‑hull fittings. He and Jon calculated how long each leg had to be, and attached the siphon‑breakers. After lunch, Heru and Baw together worked the big, stiff hoses into place. The old hoses were cut off, but the upper parts of the loops had to stay, as they're screwed to the hull up behind the freezer, so completely inaccessible.
Sue made made countless scooter trips all day, once hitting 5 different hardware stores in one go. Where is Home Depot when you need them? She also stopped by Thai Sailing to discuss the quote on the new dodger and side flaps that will attach to the bimini. We're suffering a bit of sticker shock, but they'll probably get the contract as we don't have a lot of options.
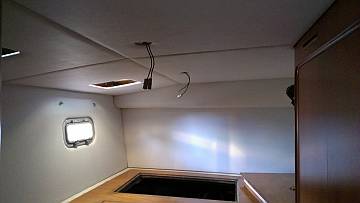 The aft cabins are looking almost finished! |
We had some much‑appreciated help from Strummer Roy once again as he waited for the tide to come up so he could get out to his boat. He very willingly jumped into the cockpit locker drain project. Jon started this months ago by adding 6 new drains to the cockpit lockers but the hoses connecting the upper and lower parts had never been put in. After retrieving our hoses from the storage unit and a shopping trip for connectors, he got them put together quickly!
Sue then introduced Roy to her toilet seat project. With all the new and old hinges and rubber bumpers, the screw gun and screws, he soon had 2 full seat sets assembled (but not yet mounted on the toilets). The downer of the afternoon was that Sue couldn't locate the 3rd newly painted toilet seat. All 3 sets have been in the salon for weeks, so it's got to be here somewhere!
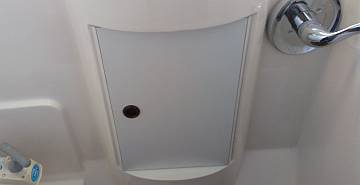 The first of Houa's cabinet doors for the heads |
Houa finished up cutting, fitting and re‑covering all the headliners in the starboard aft cabin and it looks great. He got the first of 4 new sink locker doors mounted in the starboard aft head. With the heads all newly gelcoat‑repaired and polished we can now carry on with finishing up these areas.
Jon and Roy tested the port engine, and learned that the shutoff relay doesn't seem to be getting power. So Jon has another electrical situation to deal with. He found a connector block that had corroded away, so he's likely to just solder and shrink‑tube all the wires together. The only reason we ever open those connectors is to see if they're corroded, and soldering them will remove that problem. Jon felt that he was thrashing much of the day without getting much done. In truth, he was the very important hands‑on boss all day, helping/guiding/overseeing Baw and Heru's tough plumbing work.
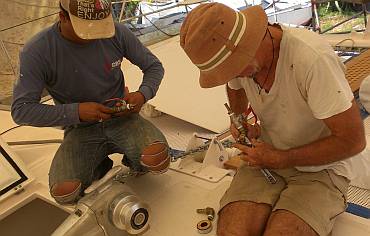 Heru and Jon rebuilding the forward diesel manifolds |
Tuesday, January 28:
A productive day but quiet, as Houa was out sick, Baw wasn't there, and Pla dropped by to say he'll be in tomorrow.
So Heru got the full brunt of jobs today. First we continued working on the port side shower drain system. Heru removed the shower drain cups from starboard and Sue cleaned them up, but both had bolt hole problems so we'll need lots of goop (probably silicone) underneath to retain the water. Jon showed Heru which hoses to attach where, and finally we had the portside system plumbed together. Now it's Jon's job to test it electrically.
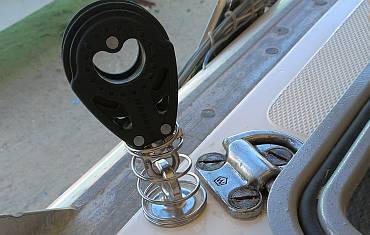 Our new jib sheet blocks, for when we're off the wind |
From there, Jon called Heru up to the foredeck and asked him to remove the two new diesel line manifolds. Jon realized he had installed them wrong the first time. From the tank, we want the vertical viewing tube (that tells us how much fuel is in the tank) before the main valve that controls flow of diesel from the foredeck tank to the main tank. As originally installed, we'd have to open the whole line to the aft tanks just to see how much fuel was in the forward tank, which is a bit silly. So Heru pulled the manifolds out, Jon rearranged the valves, and Heru put them back in again. Then they connected up the new tank vents, and Heru installed the viewing tubes, fastening them to the wall so they're nice and neat. When we fill the tanks the first time, we'll want to draw lines next to the tubes indicating how much fuel we've put in, but otherwise the new diesel tanks are finished!
One of the joys of multihulls is that the deck is wide enough that we can sheet the jib way out to the side when the wind is anywhere behind us, giving the sail a nice shape and lots of drive even when we're off the wind. Surprisingly, very few manufacturers provide the deck hardware for this, including Ocelot's designers. We've been clipping blocks to the vang pad‑eye, but today we installed a more dedicated solution: a pair of eye‑bolts with spring‑mounted blocks (to keep them from banging on the deck) just forward of the pad‑eyes. Jon cut the eye‑bolts to the right length, drilled the holes in the deck, sploobed down some 5200 to seal everything securely, and Heru tightened the nuts down below. Another minor Ocelot Improvement Project finished!
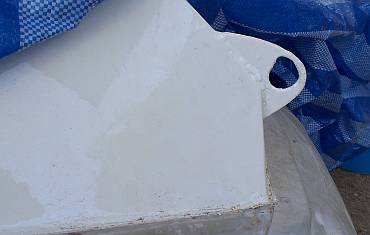 Tomcat's worn bow tang (Tomcat upside down) |
Jon got the "Finder of Lost Things" award when he opened the port aft head mirror and Behold! The missing toilet seat. Gee, we would have looked there ... someday. Someone must have put it there to get it out of the way when they were working in that head. So Sue got to spend time attaching hardware to the seat. She even got one mounted!
Late afternoon we turned Heru lose on the dinghy bow tang job. Our aluminum RIB (Rigid Inflatable Boat) dinghy has a big tang on the bow through which we've always had a swaged‑on plastic‑coated steel cable, which we use with a big padlock at dinghy docks. Over the years the aluminum tang's hole has gotten bigger and bigger, and is at risk of breaking through some day. We've decided to surround it with fiberglass so the steel cable won't be in contact with the aluminum anymore. To this end, Heru cut 2 thick (about 1/4" or 6mm) pieces of fiberglass which he shaped nicely with the grinder to go on each side of the tang. Then Jon cut out 2 fiberglass circles with the hole‑saw which Heru will put in the hole to fill in the space. Tomorrow we'll epoxy the whole fiberglass sandwich together and bolt it to the tang, being careful to keep the bolt from touching the aluminum.
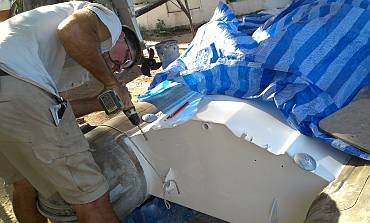 Drilling a mounting hole for Tomcat's new round zinc anodes |
While Jon was messing with the dinghy he decided to tackle the anode. We bolted a zinc anode to Tomcat's transom years ago when we noticed the stainless steel anchor chain pitting the floor where it sat, but the zinc needs replacing. The bolts were frozen solid, so Jon cut the backs off with a grinder and then used his Dremel to grind the bolts out of Tomcat's hull. The new zincs are a different shape so we had to find different places to bolt them on. Jon drilled the mounting holes, then drew lines on the (painted) hull to show where we need the paint removed before we bolt the zincs down.
Jon got in some time on the port engine, pulling wires and wire connectors. The powdery residue inside a poorly designed connector is testimony to why Jon hates wire connectors. He'll be remedying this with his soldering gun soon, but it's a difficult area to work in.
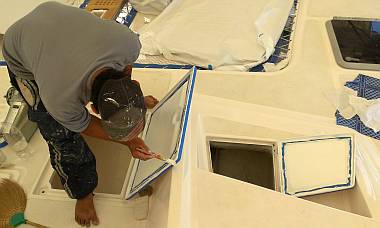 Pla painting primer on the insides of the forward locker hatches |
Wednesday, January 29:
Full crew (of 4) back today, and a busy day indeed. We checked off many small jobs that
took longer to prepare and explain than to actually complete. But no complaints.
Pla returned after a 2‑day absence and took the initiative to find those places in the bilges that needed more gelcoat. Specifically, they were places where Heru had removed either water strainers or pumps, exposing the old (yellowed) gelcoat. Pla cleaned the areas up and got new gelcoat brushed on. It won't be sanded or polished, so it was a one‑step deal.
Pla moved from gelcoating the bilges to painting Jotun HB primer onto the insides of the new tank hatches on the foredeck. He was also able to touch‑up the places we'd had to grind away the fiberglass to level the hatches.
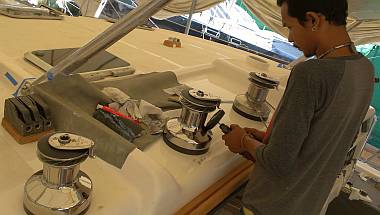 Baw taking it easy, polishing our stainless steel winches |
Baw had a sort of "worker's vacation" in that he took on the easy machine polishing of the winches (3 on deck and 2 on the mast). When they were done Sue showed him the tiny stainless steel push pin fittings that we used on the old dodger. In an effort to reuse/recycle we want to polish them and re‑mount them on the new side Sunbrella shades if possible. Baw was able to both polish and successfully remove the old fittings (the stainless pins bend around the underside fitting) so we are pleased they can be reused, as they're $7 each to buy.
The men from Thai Sailing came by for their "start work" deposit and to make more exact measurements for the dodger and the 2 side awnings. The side awnings used to be very simple, but we're changing them to also clip down to the deck so we can enclose the cockpit more thoroughly when we sail in heavy seas or inclement weather. We're also having them build us clear triangles that will join the dodger to the side awnings, which should make the cockpit much drier when conditions get grotty.
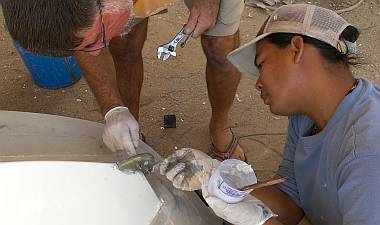 Epoxying fiberglass plates to each side of Tomcat's bow tang |
Jon and Heru's work on Tomcat, our inflatable dinghy, was the big focus of the day. First up were the anodes. Heru ground off the paint where the anodes are to go and Jon bolted them on, using waterproof lanolin grease to prevent corrosion between the zinc and the aluminum.
Then they moved to fiberglassing the bow tang, which our steel painter (bow line) has been slowly wearing away. Heru made up a pair of fiberglass plates to go on each side of the existing tang, and a couple of fiberglass disks to fill the (expanding) hole, while Jon drilled a couple bolt holes to hold it all together, drilling the aluminum over‑sized so the stainless steel bolts won't touch the aluminum. They ground back more paint, cleaned the aluminum surface of the tang, painted on wet epoxy resin which Heru sanded into the aluminum until it was silver/gray, smeared on some epoxy filler, put one plate into place, put the 2 fiberglass disks into the tang's hole, put the other plate into place, and bolted the whole thing together. The fiberglass is somewhat larger than the tang, so the excess epoxy filled the gap between the 2 fiberglass walls. When it cures we'll clean it up and drill holes through the fiberglass for the painters.
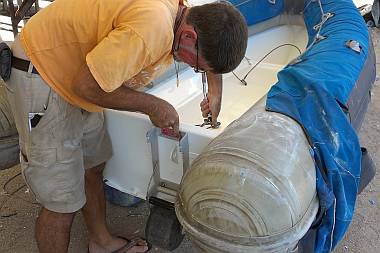 Bolting the folding wheels to Tomcat's transom |
Tomcat is a WONDERFUL dinghy, but the 25hp outboard must weigh 80 lbs (35kg) which makes the back heavy when trying to pull her up a beach to avoid a rising tide. In Darwin we bought some wonderful $250 folding wheels that are strong yet have a wide footprint so they don't sink into the sand as much. They bolt to the transom but the bottom bolts are underwater, so they need to be well sealed. So Jon used a hole‑saw to cut out washer‑sized disks of rubber from a 3mm (1/8") sheet that Houa's been saving. The center hole was smaller than the 8mm mounting bolts, which made them hold on and seal better. Jon used the rubber disks and just a dab of 5200 on the bolts on both sides of the transom as he bolted the wheels on. We're getting more mobile...
Tomcat's transom used to have some aluminum plates to which the outboard was clamped, but they were being eaten away with electrolysis so we decided to replace them with (nonconductive) fiberglass plates. Heru and Baw marked out and cut the 4 fiberglass rectangles that Jon had designed. Then, using fast‑cure 5200 adhesive, Jon and the men mounted the plates to the transom - a large one on the back, a long narrow one on the horizontal top, and a pile of 2 on the inner side of the transom for the engine clamps. They used the actual outboard as the clamp to hold the plates in position while the 5200 cured, and it was a 3‑man operation to lift the outboard into place, then slide the fiberglass plates back into position under the outboard. With much grunting and sliding and checking, they finally figured it was good to cure.
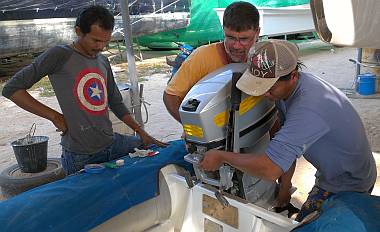 Mounting the engine to the new (brown) fiberglass plates |
We hoist Tomcat out of the water on the davits every night (when we're afloat!) , but if there's a bit of chop then sometimes the engine thumps the insides of the sugar‑scoop, leaving marks and damaging the engine cover. We've been noodling what to do about this and decided to put some foam pads on the back of the engine cover to cushion things when it bumps into the sugar‑scoop. The sanding blocks the men use are a good, firm, UV stable foam, so Sue went to the local hardware store and bought several in different colors. Since there was no blending in with Baw's silver paint job, we went with contrasty bright orange. Baw shaped the blocks and glued them together, the back of the engine cover was cleaned, and some fast‑cure 5200 was shot on and smeared into a uniform layer. The foam pads were positioned and tied on while the 5200 cured. The engine looks ... unique, but hopefully this will protect our new topsides.
Houa finished mounting the teak pads and latches for the locker doors in the heads, and got the doors themselves mounted. They look and feel very cool with their teak finger pulls and positive‑latching.
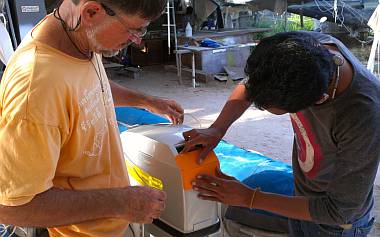 Test fitting the bright orange foam bumper on the engine |
Then he worked with Pla to mount more headliners on port side. Jon got involved to determine which wire went to what: fans, lights, etc. Jon spent a long time finalizing hoses and wires in the starboard forward cabin (ours), and we figured out where to position our reading lights again. We got the first overhead brass light mounted so we're beginning to look "put together" in some parts of the boat.
Sue wasn't happy with the job she'd done mounting the nav‑table inner shelf yesterday, so she un‑mounted it, sanded the hinge area so things fit better, and re‑mounted it. She made numerous trips to the store room to find items for the men which is great fun as it is slowly emptying out that little concrete apartment we've rented for more than a year. Lots of scooter trips, as usual, to the canvas shop for more Velcro for Houa, bolts, etc. A typical day of keeping track of projects, directing the men to new things to do and taking pictures.
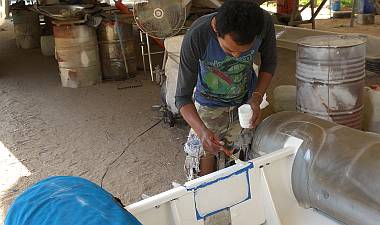 Baw painting the fiberglass plates we glued on yesterday |
Thursday, January 30:
Another day of small steps forward on Ocelot and a happy electrician Jon.
First task of the morning for Baw was to removed the outboard from the dinghy transom. We had used it to clamp the new fiberglass plates in place yesterday, but the brown fiberglass doesn't look very nice. So Baw set about painting it, first with Jotun HB primer, then with Jotun enamel top coat in the afternoon.
Another little cosmetic clean up job was to improve the look of the orange foam pieces that act as bumpers on the back of the outboard. We had mounted them so fast yesterday that we hadn't used the ubiquitous blue tape to make a nice edge. Turns out 5200 doesn't smooth down to a nice border unless you harness it inside tape. So Heru taped the area and re‑applied some 5200 as a bonding trim and now it looks much spiffier.
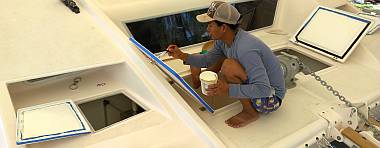 Heru top-coating the primer put on yesterday |
Up on deck, Heru put Jotun enamel top coat on the foredeck hatches, being careful not to add paint where we had had to grind it off to make the hatches fit well. We didn't get to drop the hatches into place to test them again, but we'll do that tomorrow when the paint is dry.
While the men were busy with self‑directed tasks, Jon took the time to concentrate on the wiring of the port shower drain box. With a little groveling in the bilges he was able to figure out the previous wiring (which he'd disassembled over a year ago). He extended the power leads to the new box, twisted them on temporarily, powered up the shower drain circuit, and poured a bucket of water in the shower. It dutifully drained into the new shower bilge, and the pump automagically turned on and pumped it over the side. Yay!
Further groveling in the bilges revealed the wires from the switches in the shower rooms that used to drain the showers (manually only). In the process of wiring everything up permanently, Jon wired these in as well to override the float switch in the shower sump box, should the need arise. Then he tidied everything up so it looks reasonable professional.
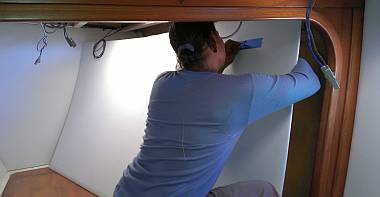 Houa fishing a wire through a headliner in a forward cabin |
With the portside shower drain system proven to work, Jon set Heru up to convert the starboard side to the new system, ripping out the 2 old, heavy pumps and strainers, and re‑plumbing the shower drains to the new sump box. The sump box was already installed but in an inconvenient place, so Heru moved it over a few inches so it's more accessible. The pumps and their associated paraphernalia were all just above the sump box, so much easier to deal with than on portside (no fridge in the way). By the end of the day Heru had all the hoses connected up appropriately. Tomorrow Jon will attack the electrical hook‑ups and test the system. Nice to have so much ballast leaving the boat.
Houa was heard thumping away with the staple gun as he cut back the plywood of the starboard forward cabin headliners, then re‑stapled the foam and vinyl to the new shape. He was up and down all day, testing and fitting. Jon got the last of the lights and the fan all connected up so the headliner can go in place with the wires for the lights hanging down through the correct lighting holes in the headliners.
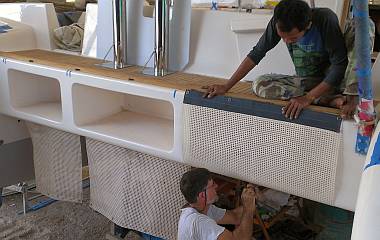 Installing the lazarette covers - we'll lower them tomorrow |
Sue has been spearheading the lazarette covers project and it finally got real attention by the engineers and technicians today. Last year our cruising friend Ju, on Lighten Up, used her industrial sail maker machine to sew up new lazarette covers for us, made from bits of our old, tough trampolines. Yesterday Baw removed the old "push‑pin" stainless fittings from our old dodger and today Sue and Baw fitted them to the lazarette covers, using a drill to open the plastic, a screwdriver to mash the cloth against the pin points, a hammer to flatten the bottom plate, and the screwdriver to bend over the stainless pins to hold the fittings in place.
The bottoms of the covers mount to a thick strip of teak under the aft‑deck, held in place by strips of high‑density polyethylene (HDPE). Baw and Sue held the tops of the covers in their correct locations while Jon and Heru screwed the bottoms (and the HDPE) to the teak. After mounting the 3 covers we started putting in the pins at the top, only to find that we didn't like how the top ended up. Tomorrow we'll probably lower the covers a bit so the pins come out horizontally and the covers don't have to wrap around the curve at the top of the aft‑deck (which is mostly filler, so not very strong).
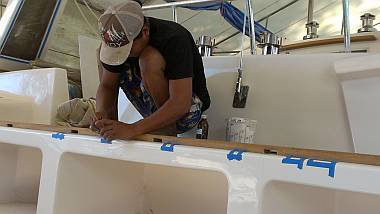 Heru repairing the gelcoat where yesterday's screws went in |
Friday, January 31:
Happy New Year of the Horse! Gong Xhi Faa Chai! We're looking forward to it being the
year of cruising again!
We had our basic contingent of 3 workers today, with Pla not there. Just as well, as things are very specific and Jon‑centric. Our first task was to lower yesterday's lazarette coverings to a more appropriate height. This of course left holes in the gelcoat where we'd (prematurely) mounted the push pin screws yesterday. Heru got them cleaned out and re‑filled with gelcoat, so tomorrow they can be sanded to blend in. With the new gelcoat up there we didn't try to mount the new push pin screws.
Houa struggled with the headliners in the starboard forward cabin. This, and port forward cabin, both got big new Lewmar hatches cut in months ago, so the headliners need to get bigger hatch openings. And the whole height of the deck changed when we converted from teak and balsa decks to gelcoat and foam decks. Not surprisingly, the headliners in these 2 cabins need lots of clever carpentry work. Houa got the 2 halves of the overhead headliner in place, but there was a small overlap, so they had to come out so one side could be trimmed down.
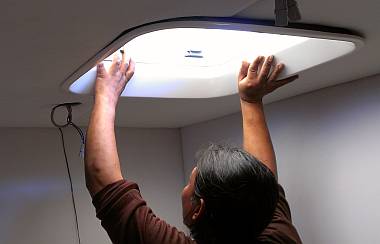 Houa fitting the new trim for the large Lewmar hatch |
Once he had the foam and vinyl stapled back on, he pushed the new custom‑made fiberglass hatch trim into place. It fits OK, but there's a gap at the aft end between the trim and the headliners. He could cut the fiberglass hatch rim down (but risk that it wouldn't fit into the narrow slot it had been made to fit) or lower the headliner to meet the trim. Houa chose Plan B, so out came the headliners again (not a trivial event!) and he changed the mounting of the plywood and Velcro so the air gap was filled. Whew. Hard work, operating overhead in a hot, confined space. But the fan got mounted, so now all that cabin needs is for the hatch trim to be screwed into place and the lights connected.
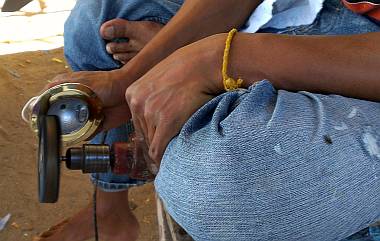 Baw polishing our overhead lights so they can be clear-coated |
Talking to Baw about our brass faced cabin lights, he suggested coating them with a clear finish. We could have used a spray can of clear but Baw said, "Not last long time, Madame!" So Sue scootered off to TOA near Phuket town to get $15 worth of clear 2K polyurethane, hardener and thinner. Baw had a meditative day, polishing the brass light fixtures once again so they'll be ready to spray in the morning.
The big push of the day was the long, 3 person helm seat in the cockpit. We started by mounting the handles for the battery hatch with screws and silicone. This let Jon lift out the hatch and climb into the battery compartment to look for the old helm‑seat mounting holes, but they'd been painted over and couldn't be found. So he used a photo of the cockpit to determine the old placement of the legs, and drilled pilot holes. As he moved up to his 1/2" (13mm) drill, he found that the edges of the teak tended to catch and begin to peel, so he switched to his Dremel to open up the teak to the 1/2", and then was able to complete the drilling of the 4 mounting holes. With Sue and Heru assisting, we got the areas cleaned up, blue taped, siliconed, and the stainless steel base of the helm seat snuggled into place on the teak. It was exciting to see the base in place in front of the helm, but that was the easy part!
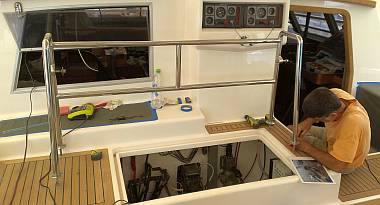 Using a photo to decide where to bolt down the helm seat base |
It took Jon all afternoon to sort out and mount the hardware that makes the helm seat swivel, lock, and unlock on that base. All 20 of the bolts were set into steel inserts in the fiberglass seat, some of which had come out, and all the holes needed cleaning out. Jon used his taps to clean out the holes, but it was slow going as he didn't want to ruin the threads. Some of the inserts were still stuck to their bolts and had to be loosened with the propane torch. Five of the inserts holding the bolts for the big pivot arms had come out, but we found that standard 10mm bolts fit the insert holes, so rather than replace the inserts Jon drilled out those positions on the pivot arms to take 10mm bolts. But that trick wouldn't work with the 4 inserts that had come out from the locking‑pin slides, so those inserts had to be replaced, causing Jon to design and build an insert insertion tool.
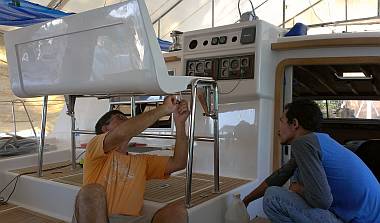 Retightening the bolts for the sliding pins on the helm seat |
With everything cleaned, Jon and Heru began mounting the hardware. There was a mild panic when we realized that one set of 4 bolts were actually 5mm and they hadn't been saved with the others. So, with silicone setting, Sue scootered out to the Chinaman's for the day's second set of bolts, and got back in time for the men to mount the sliding pin system that locks the helm seat into its UP position. Baw and Heru carried the seat up to the cockpit and we bolted it onto its base. The locking pins were a bit stiff so Jon loosened the bolts holding the sliders, jiggled things around a bit so they'd find their correct positions, and tightened things down again.
How exciting to see the helm seat, all shiny and hardware installed, mounted in the cockpit. Baw jumped onto the seat, pointed imperiously forward and said, "Langkawi. We go Langkawi!"
Soon. Very soon. But first we have a few more bits and pieces to put on the
boat! ![]()
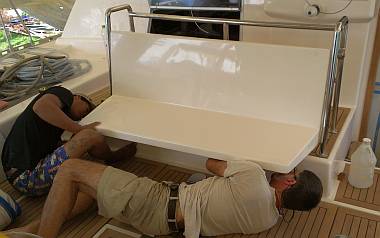 Positioning the lower support for our convertible helm seat |
Saturday, February 1:
A really good end to the week, made sweeter by the knowledge that we were going to get our first day
off in a month, as we planned to spend Sunday with friends at Sumptuous Villa in Ao Po.
First, Jon and Heru finished the helm seat. The easy part was mounting the cover plate over the sliding pins on the bottom of the helm seat. More difficult was positioning the grab‑rail that supports the seat when it's down for dining, as all the holes have been covered. They lowered the seat and positioned the grab‑rail to support the seat on the edge of the battery compartment. Jon slid underneath to mark where the grab‑rail had to mount to the back (underside) of the seat. Then the seat was raised back up and the grab‑rail was screwed permanently to the back of the seat.
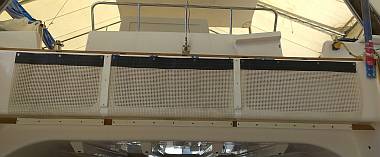 We finished mounting the 3 covers for the aft lazarettes |
The exciting job of the day was the mounting of the cockpit table. Each of the 2 big stainless steel legs for the table has a tube that sinks completely through the teak deck, a shallower rim embedded in the teak and then 4 studs that thread through the floor and get nuts underneath. The old bolt holes could be seen from underneath, so Jon drilled some tiny pilot holes to show about where the studs would mount. Then he drew out on the teak exactly where he wanted the starboard leg to mount, and cut out the big central hole for the tube and its rim. This let the studs sit directly on the teak, showing exactly where the holes had to go.
To be sure the position was correct for the portside leg, Jon mounted both legs to the teak table top, inserting the 2 swing‑out brackets that support the forward half of the table into the legs and screwing the legs into their old holes in the underside of the table. He decided to mount the portside leg to the deck a bit differently, cutting a smaller hole for just the stainless tube and letting Houa rout out the teak for the shallow rim.
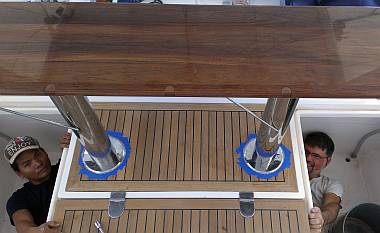 Heru & Jon in the cockpit lockers, bolting the table in place |
The 8 stud‑holes were drilled carefully, so the teak didn't pull and rip at the edges. Then came the fun of lowering the table and trying to get all 8 studs into their holes. It took several tries, and careful drilling and edge cleaning of the holes, but the table finally settled home. Then Heru masked and cleaned the mounting area while Jon covered it with the last of our silicone. The table was again lowered into place, and Heru and Jon both dove into the deck lockers and lay on their backs to wrench home the securing nuts on the studs. Voila! Cockpit table in place! The hinged, forward half of the table still needs to be mounted to its mate, but that will require Houa to rout out where the 5 hinges need to go.
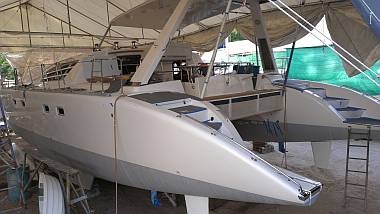 Ocelot is getting more put together every day! |
Sue started to mount the 2 locker doors on the front of the nav‑station but noticed they were disturbingly light compared to the surrounding panels. Those doors had not been stripped back to wood like the rest of the nav‑station, so they were still golden blond from the UV. We didn't really want a 2‑tone nav‑station, so Baw got another varnish job for a couple days. He started by stripping the varnish, then sanding the teak. He even got the first coat of polyurethane put on. He also sprayed 2K clear‑coat on the 22 brass LED fixtures he'd polished up yesterday.
Heru took on the small but important job of mounting new anodes onto the sail drives. He cleaned the sail‑drive surfaces, applied Tef‑Gel to the bolts, and bolted home the big round zinc anodes that protect the sail‑drives.
Houa continued his work on the port forward cabin, trimming back pieces of headliner, re‑gluing the foam inner layer, then re‑stapling the vinyl cover.
Sue spent time with the men at Thai Sailing in their shop near Home Pro, discussing the bimini shades, how we want them reinforced and where. She was also able to give them some high quality UV stable webbing straps from the States to use.
Thai Refit:
Ocelot Pages:
Top Level: Home | Destinations | Cruising Info | Underwater | Boat Guests | Ocelot | Sue | Jon | Amanda | Chris | Site Map | Make a Comment
|
If our information is useful, you can help by making a donation |
Copyright © 2000‑ Contact: Jon and Sue Hacking -- HackingFamily.com, svOcelot.com. All rights reserved.