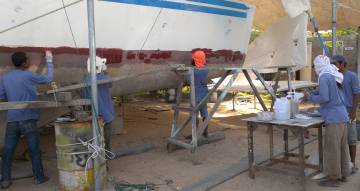
The team applying a third layer of filler to the stbd waterline
66 Fair Starboard
 The team applying a third layer of filler to the stbd waterline |
Summary: Lots more sanding and filling of the starboard topsides, but Baw mixed some of our new gelcoat with some filler and it didn't harden, so it ALL had to come off - a huge job that saw the yard contributing several power tools to us, all for free! Now we're back to filling and fairing, making the topsides smooth and uniform. The guys typically do 2 filling/fairing cycles a day. Jon epoxied in the gutter drains for the 2 new forward hatches and filled where he'd de‑cored the water‑fill holes in the deck, and he also repaired a powerful grinder and a small palm sander that we can now call our own. Baw shaped the starboard bow and then moved over to port, sanding away the old filler first. We got the mast flipped over and Sue and Amanda started polishing the port side. Our headliners came back from TMT and we talked with Doyle (China) about making us new sails. Jon and Amanda started designing the pattern for the cockpit teak, and also removed the starboard cap‑shroud chain‑plate. Our new worker, Duk, started sanding off the old epoxy filler from portside. The inside waterline of starboard hull was sanded clean and smeared with 2 layers of phenolic epoxy filler. Houa and K found problems with the steps up to the portside bunks so they did a lot of repair work, as well as making new bits of teak trim to go around the formica.
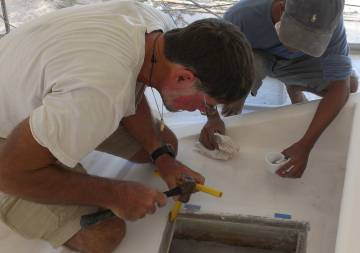 Jon & Nut tapping a new foredeck gutter drain into place |
Monday, February 4:
Back at the boatyard after a glorious Sunday Sail to Racha Island!
We were missing K today, so Houa worked alone on the cabin teak trim. By changing out the rubber "wall covering" and putting in formica, we have a small gap to fill. Houa is cutting and building teak trim to surround the formica so everything looks picture perfect. Ya gotta love the guy.
Out on the topsides and starboard hull, we had Lek, Nut, Jack and Chai all long‑boarding away. Today was 80 grit, up from 60 last week. They finished the day by adding a bit more phenolic filler at and under the paint‑line, to be sure that Ocelot has a very smooth transition from above‑water to under the water. We're concerned about this area being smooth not only from a sailing standpoint, but also wanting to be sure that when we have to scrape away seaweed and barnacles we'll have a clean, smooth hull to push against.
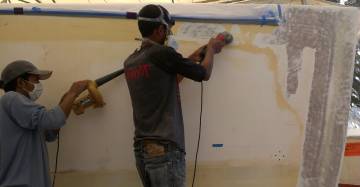 Nut & Baw sanding off old filler from the port bow |
Since the guys already had the epoxy gear out, Jon decided to get the new small PVC drain‑pipes installed in the gutters for the new foredeck lockers. He worked with Nut who helped mix the epoxy with micro‑balloons and silica to make it thicker. They also filled where Jon had de‑cored the 2 water‑fill holes on the foredeck.
Baw spent most of the day on the hulls, rather than the deck where he concentrated his work last week. He finished shaping the starboard bow, and moved right over to port to begin the process of shaping it as well. First he had to sand off the old epoxy filler that was porous and yellowed with time. He also ground back the epoxy up by the trampoline lines and down on the waterline on the inside of the port hull.
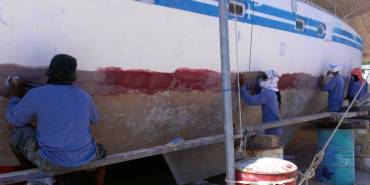 Yoong, Lek, Jack & Chai long-boarding the waterline |
We got the mast flipped over so that Amanda can begin the polishing job on the port half. After washing the mast off she and Sue discovered many little places where the old paint had not been removed, and where Amanda won't be able to reach with the polisher. So Sue and Amanda pulled out the toxic paint remover and brushed it on, left it for a couple hours, then washed it off, and scraped off any paint they could. The job isn't finished yet...
Sue put in about 3 hours of hand sanding on the forebeam, using 240 grit paper to begin the final burnishing before Nyalic. We found some small corrosions pits literally all over the surface (ones that didn't show when Amanda did the polishing) so we may have to redo some of the top surface of the forebeam before we sand any finer.
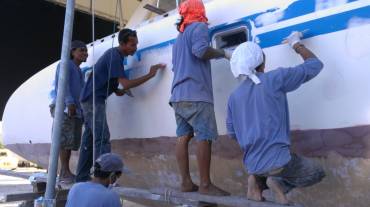 Baw & Jack (on right) applying filler to the topsides |
Tuesday, February 5:
Hot and beautiful. What else is new? Welcome to Thailand in the NE monsoon.
It was another dusty day at the boatyard. Today we had 6 guys long‑boarding the starboard hull ALL day! It wasn't until 4pm that they were ready to put on the day's quota of polyester filler in the many low spots they had found while sanding the hull. We sure hope that this is the end of the findings, but Houa came up to us at the end of the day requesting money to buy more polyester, so we suspect there will be more filler.
Amanda and Sue spent a couple hours at TMT canvas shop sorting and checking the newly finished headliners. They look great! Of course, we have yet to see them back in place. They will be delivered to the yard tomorrow, but will go directly into storage where we'll wrap them up in woven plastic tarps to keep them shiny and clean until we install them. That will be a last minute job, as there's no point in exposing them to dust and -- Heaven Forbid -- varnish drips!
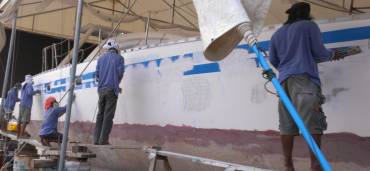 Nut, Lek, Chai, Jack & Yoong long-boarding starboard hull |
Jon and Amanda worked on designing the teak strips for the cockpit. It's not a very simple or straightforward task, as we want the teak planks to line up across borders of gelcoat and hatch edges. Of course, Houa will do the final work, but we need to have some sort of guidelines for him to follow so that we end up with the teak look that we want.
Sue got trained (by Amanda) on the polishing disk (on the grinder) and spent a few intense, vibrant(!) hours polishing the second side of the mast. Slowly, slowly, it all happens.
Wednesday, February 6:
A busy Wednesday, and a good feeling for the middle of the week.
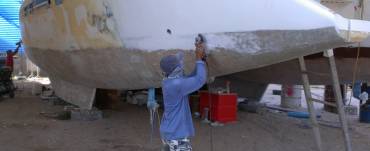 Duk (in back) & Nut, our 2 shortest guys, sanding port hull |
We got a new worker today, Duk, who was assigned the task of power sanding some of the old epoxy yellow patches on port hull. Nice to see work moving to port side! But Duk's pretty short, and much of the sanding is up high. Seemed a strange choice...
Houa's sidekick, K, seems to not be around anymore, so Houa was working on his own. He finished up a couple of the curved teak trim bits that border the new formica, and we hope to see them put in tomorrow. They will still need varnishing, of course, but that comes later.
On starboard hull we had 5‑6 guys long boarding all morning, then a surprising request for gelcoat. They said they wanted to "put some on to be sure". Okay. So this is their way of doing a final check to see if the hull is fair and smooth. After a big acetone wipe down, they smeared gelcoat mixed with filler over much of the hull. We weren't vigilant enough to stop it, and really didn't understand the point. If it was faired and sanded enough for gelcoat, why not just tell us it was ready to spray? We now have a beautiful almost all white hull, but also one more layer of gelcoat substrate. The one good thing is that they covered much of the dark blue stripes, so we won't have to spray as much.
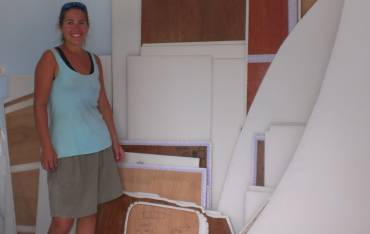 Amanda with some of our new headliners in our storage unit |
Sue and Amanda spent some quality time at the storage room sorting and piling the 80‑plus newly covered headliners that were delivered from TMT. Although we had been warned that the latest vinyl roll was a different dye lot from the first, in truth we didn't see any difference in the panels. We hope that's the case when we re‑install them.
Jon spent an hour and a half with the local reps from Doyle Sails, China. Doyle (Barbados) is the company that made the original sails for Ocelot way back in 1995, then again for us in 2001. Surprisingly, the Doyle (China) quote is about the same as what we paid 12 years ago! We are now having a long discussion with our financial selves about the pros and cons of getting new sails, and if so, which ones. Main? Jib? Spinnaker? Screecher? The old sails are actually in good condition, but after 12 years and 50,000 nautical miles, they're a bit stretched, so they don't perform as well to windward.
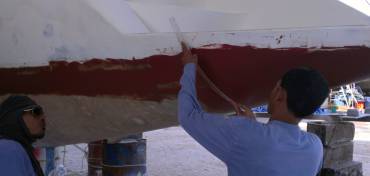 Baw screeing phenolic filler onto the starboard sugar-scoop |
On the inner side of starboard hull, the guys finished sanding the waterline and removing the old epoxy. Although it was 3pm they then prepared to put on some phenolic filler. Jon felt it was too late, but got assured that it was fine. Well, it turns out, that after rolling on the epoxy coat, waiting a bit for it to get almost tacky, then putting on a layer of phenolic (waterproof filler), which Baw screed into a nice shape, it was almost 4:30.
What needed to happen next was to wait about an hour until the filler was tack‑free, then fill in the holes left by Baw's careful screeing. By letting the epoxy‑based phenolic filler cure a bit, a second coat can be added to fill in the inevitable bubbles and gaps left from the pull of the screeing. If it's done too soon, the last layer pulls the earlier ones out of shape. It you wait too long (like until the next day) you have to sand the entire line of filler, taking it back to the depth of the bubbles before adding more phenolic. In other words, you want wet on wet. With the work day officially over at 5pm, there wasn't going to be time. Jon brought in Cris to help translate, and we finally compromised by not waiting so long for the last coat to fill the bubbles. This means that the nice shape achieved by Baw's scree was probably lost. Not ideal, but we hope they learned that they need more than 2 hours for the whole process.
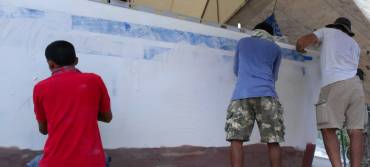 Baw, Nut & Jon scraping the bad filler off the starboard topside |
Thursday, February 7:
A disappointing, but not entirely unexpected, start to the day.
We arrived to find that the gelcoat and filler combination that was paddled onto starboard topsides yesterday afternoon never hardened. It felt rough, and looked porous. But the main thing was that it could be scratched off with just fingernails. Definitely NOT what we want under our fancy, super‑hard ISO‑2500 gelcoat. So off it came. One whole day going backwards, due to lack of conviction on our part to stop the process yesterday, and Baw's lack of experience with this gelcoat. Ah, the joys of hindsight. But, never again. No more gelcoat and filler on our boat!
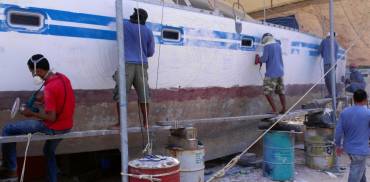 Sanding off the remaining bad filler using big polishing motors |
Before Baw arrived in the morning, the guys were reluctant to start taking off what they perceived as "Baw's" gelcoat job, so the early morning saw 3 of our 6 guys happily long‑boarding the inner hull where we'd put on the phenolic filler last night. The phenolic actually looks pretty good, despite our problems putting it on. We'll need a bit more added to smooth it out completely, but hopefully only one more application.
Jon worked with Baw to find the best way to remove the unhardened gelcoat and filler. Turns out it came off best with scrapers, not sanders, as it was chewy enough to gum up the sandpaper really quickly. After lunch Jon had the gang organized enough to get all the workers (minus Houa and K) out on the starboard topsides. The color of the bad filler is the same as our topsides, so it's difficult to know that it's all gone. But to leave any of it still on our topsides is to invite problems later on, as it will prevent a good bond. So we told the guys to err on the side of removing too much, so we could guarantee getting it all off. By the end of the day they seemed to be back where they were the day before yesterday. Tomorrow will be another day of long‑boarding and fairing.
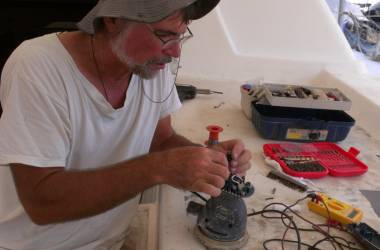 Dr. Jon performing surgery to resurrect a palm sander |
Houa had his sidekick, K, back again so we had 2 men down in the port cabins working on the woodwork. Houa is re‑making the teak trim around the steps by the bunks, and it's going to be great to have a really professional (rather than water damaged) look to that area.
Between bouts of scraping and sanding, Jon worked on re‑building the motor on a small 220v palm sander. When he gets it going it will be the replacement for the one that was stolen from Ocelot way back when.
Sue and Amanda got "aluminated" once again, with dueling polishers, humming away on the mast. Sue is the more impatient one, moving rapidly from one rough spot to the next, while Amanda is careful and meticulous, not moving until she can declare a small area "finished!" They actually work well together, as Amanda can follow up where Sue has been, and Sue doesn't have to worry about discerning the tiny pinholes and grinder lines that are so very hard for her to see.
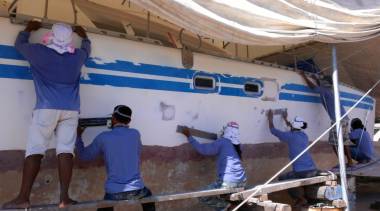 6 guys long-boarding Ocelot's starboard topsides |
The voltage at the yard is often only 160v, less than 70% of what it should be. That's low enough that the guys were constantly burning out the motors of their tools before we started using a step‑up transformer to bring the voltage back closer to where it belongs. When Sue and Amanda commandeered the 2 grinders we have, Houa produced the mortal remains of a grinder with a burned out motor, and asked for the equivalent of $25 to buy a new motor for it, because he needs to use a grinder as well. Score! A grinder for only $25 is a pretty good deal!
Friday, February 8:
Back to the good feeling of things moving forward again.
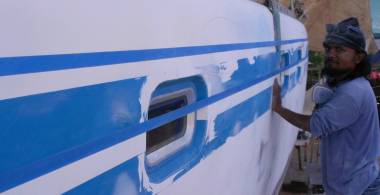 Chai using lines of blue tape to see where to put filler |
We had 6 guys on the starboard hull today. Jon lowered the awning a bit on that side to give them shade. In the morning they long‑boarded enough to find the low spots. Just before lunch they used stainless paddles to apply polyester filler. They ate, the polyester hardened, and after lunch it could be sanded with long‑boards.
Then they pulled an interesting trick - they laid strips of tape along Ocelot's topsides and sighted along them. This allowed them to see where Ocelot's hull deviated from being smoothly round, so they knew where to apply more filler, which went on just before quitting time.
Mike from AME dropped by to check on progress and try and get an estimate of when we'll be ready for another few days of gelcoating. The guys estimated that it would be late next week. But if they're able to run through 2 complete filler/sanding cycles a day, we'd think the hull would be pretty smooth sooner than that. We Shall See...
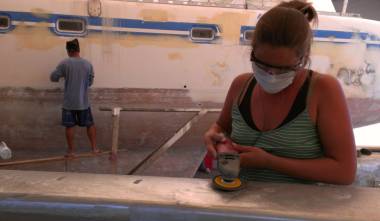 Amanda polishing the mast while Duk sands the port topsides |
Our new guy, Duk, continued sanding off the old epoxy on port hull. It seems like a bit of a lonely job, but he is un‑complaining. At least, over on the port side of the boat (the shady side for most off the day), he had the company of Sue and Amanda who continued their study of the removal of the oxidation layer on the mast and spars.
We thought that Houa was going to repair the grinder but no, he just bought it a new rotor and left the rebuilding to Jon. It still needed other parts so Jon took a long scooter trip to town, looking for wires and switches and reefing blocks. When he returned he resurrected two tools. We now have a small palm sander and a "new" grinder to add to Ocelot's stable of power tools. They both require 220v but with Ocelot's newly wired in transformer they should work OK even when driven from our inverter.
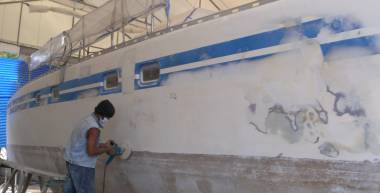 Duk cleaning up port topsides - repaired whale damage on right |
Hoau and K got more teak trim bits installed in the port cabins. Houa could be seen slithering in and out of the port emergency hatch openings, and we could hear the occasional tapping of K's hammer inside the hull.
Our big surprise was the arrival of cruising friends Bob and Deirdre, off Plane Sailing, who we've known since Brisbane in 2005. They are preparing to cross the Indian Ocean and pulled into Ao Chalong to get some boat bits. With so many friends crossing to Africa this year, our wanderlust is strong. The knowledge that there is Life After The Boat Yard keeps us going!
Saturday, February 9:
Good ending to the week, with hot sun, (slightly) cooling breezes, and lots of work done.
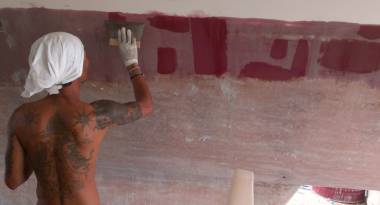 Jack and his amazing tattoos applying phenolic epoxy filler |
We had our full contingent of 9 workers today. Ah, but of course, it's payday. Houa and K spent the day in and out of the port cabins, where K finalized the epoxy repair of the forward cabin step, and Houa got the teak trim pieces sanded back (where they were dark with water damage). We are happy to have K now as a direct hire, so he reports to us and to Houa, and this saves us a few bucks each week.
Our Lone Ranger, Duk, attacked the old epoxy on the port hull once again. This is a long, slow process, especially given that he is very short, and the epoxy is up pretty high. Lots of time moving barrels and logs around to create scaffolding. Also, the old epoxy, while porous and soft, is actually a bit of a bear to sand out.
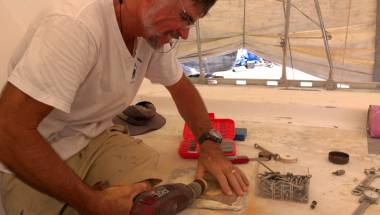 Jon making round tapered plugs with a hand-drill and sandpaper |
Sue and Amanda made good progress on the mast polishing, working in tandem, with Sue polishing first, then Amanda (with her young, good eyes) following up to be sure all the scratches are polished out.
Jon and Amanda spent time getting the starboard cap‑shroud chain‑plate removed. We hadn't thought to take the huge stainless steel plates off the hull, but by doing so we can both check their integrity, and get the hull painted underneath. They sort of fell into the "if it ain't broke" category, but with a refit of this magnitude it makes sense to polish them up and check them out thoroughly. Once the bolts were out and the plate was off, Silicone Sue attacked the mounting surface and the bolt holes with a variety of picks and blades to remove the silicone plugs.
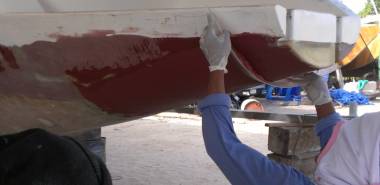 Getting a nice shape under the new sugar-scoop extension |
Annoyingly (but not too surprisingly) we found that Wauquiez did not de‑core the bolt‑holes for the cap‑shroud chain‑plates! So there's another little epoxy job for us. They also cut the bolts off in‑situ, leaving the threads all messed up. The bolts are better quality than we can get locally, so Jon spent a couple hours trying to repair the threads, but only got to 3 of the 6 bolts.
Jon also made some tapered plugs that fit into our rudder‑tube. He used an old trick learned from his father years ago - using a drill‑motor as a quick and dirty lathe to make (almost) perfectly rounded parts. We'll use these tapered plugs with some string to find the exact axis of the rudder shafts, which should help us drill the holes for the new rudder bearings more accurately.
Our 6 starboard hull workers did a lot of long‑boarding in the morning, then right before lunch they got a bit more filler put on where the hull is still low. After lunch they sanded, then put on more filler in isolated places. While waiting for the filler to harden so it can be sanded, Jon reminded the guys that there are other things they can work on while waiting. Hence, a team of 3 moved to the sanding of the phenolic epoxy under the hull. They got far enough that we put a second (and final?) layer of phenolic epoxy on the inside starboard waterline.
Thai Refit:
Ocelot Pages:
Top Level: Home | Destinations | Cruising Info | Underwater | Boat Guests | Ocelot | Sue | Jon | Amanda | Chris | Site Map | Make a Comment
|
If our information is useful, you can help by making a donation |
Copyright © 2000‑ Contact: Jon and Sue Hacking -- HackingFamily.com, svOcelot.com. All rights reserved.