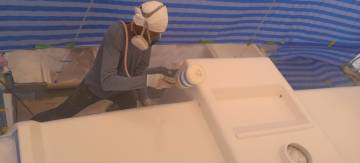
Baw spraying the helm station in his plastic tent
81 Finish Templates
 Baw spraying the helm station in his plastic tent |
Summary: On Monday we celebrated our 34th wedding anniversary - and put Amanda on a plane back to the US. We miss her already. Baw shot the front of the cockpit with gelcoat, then his team took down the masking and spent the rest of the week sanding and polishing the cockpit gelcoat. Ben joined the cockpit team once he finished sanding the helm seat. Jon and Amanda managed to finish the worst of the curved nonskid templates before she left. Houa finished the aft‑deck foot‑rail, then started building the inside trim for our 2 new hatches, making a mold from some of our other trim first, so the trim pieces should all look the same. Jon and Sue got a lesson in stainless steel from Mike and Wiwat, but we need to find out if we can get our swim ladders electro‑polished in Bangkok. Later, Jon and Sue worked on the nonskid alignment lines for the louvers, looked for appropriate plastic to line our anchor well, and removed the horizontal davit supports for Mike to get powder‑coated, replacing the supports with temporary PVC pipe. Sue continued polishing the boom and forebeam. Jon sanded and filled the chain‑locker hatches, prepared to glass on the washing machine shelf in the port fo'c's'le, repaired a broken wire on the autopilot motor and mounted the motor and reduction gear, got all the supplies to add new drains to the battery hatch gutter, and dug trenches and walls so the rainwater drains away from Ocelot. On Friday and Saturday we got some pretty torrential rains, so we're now officially in the wet season.
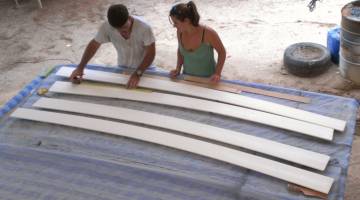 Jon & Amanda trying to fit nonskid on the curved louvers |
Monday, May 20:
An emotionally strange day, as we were celebrating our 34th wedding anniversary, and dealing with
the sad reality of Amanda's imminent departure for the States.
Baw and his Team of Two were under no such confusion, however. They dove right into masking up the front half of the cockpit with sheets of plastic to make themselves a housing in which to spray the helm area with gelcoat. Since it's a relatively small area, they also put a fan at one end to bring fresh air in and an extractor fan at the other end. Prep work took all morning, with Baw and Lek hanging and taping plastic sheets and Pla doing the last minute sanding and acetone cleaning.
After lunch Baw and Pla worked inside the housing and managed to spray on the last 6 kg of Ocelot White gelcoat. Lek worked as gelcoat assistant, measuring, weighing, filtering and mixing in the mono‑styrene down below. Then Pla added the catalyst, stirred the paint pot, and Baw did his spraying magic.
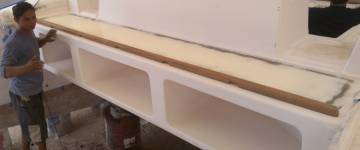 Houa testing the fit of his new teak foot rail behind the cockpit |
Amanda and Jon concentrated on getting as much done on the tricky curved templates as possible. They worked most of the morning and all afternoon on the area under the salon side windows, and on the louvers above that step as well. Long and skinny, variable curves. Tricky. By day's end they had 4 templates cut that will work on 9 places, and all the lines and sticks laid out for the 2 window step pieces.
Ben was back again, and Baw set him up to wet sand the helm seat, which he did dutifully. Perhaps too dutifully, as he spent many hours on small areas. Tomorrow we will get him speeded up, reminding him that we don't want the gelcoat to go away.
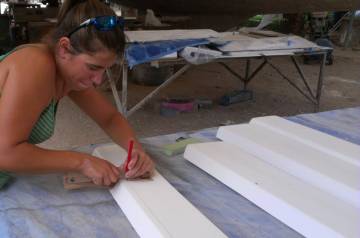 Amanda using her curve-following tool to mark template lines |
Houa used the day to build us the long solid teak foot rail that will be mounted across the aft side of the aft deck. He cut out 5 water drain slots, sanded them smooth and then sanded the whole piece. The final shaping will happen once the aft deck teak is down. As usual it is a work of art. It's now stored in the storage room until we can mount it.
Sue got in more scooter practice, not only early in the morning as she and Amanda returned from north‑eastern Phuket (Ao Po) to Chalong, but also when they went to return the rented automatic scooter. Watch out Phuket, Sue is getting more comfortable on these things! Sue and Mandy had a last afternoon coffee together at Sentai Coffee Shop (their favorite, Monton, is closed on Monday) then they put in a long day at the yard.
We went out for Thai dinner at By the Grace, a wonderful, small new restaurant less than a block from our apartment, and owned by the apartment manager's wife. Awesome food. Great prices, like 50 baht ($1.70) for pad thai gai (chicken pad thai) and only $2‑3 for seafood curries, or lemon grass soup with chicken (tom ka gai). Yum. We made a 10 pm foray to the international airport, 40 minutes away, to send Ms Mandy off on her way to Seattle, via Korea. Mew. Empty nest syndrome, big time. She has been such a pleasure to have around, to work with, laugh with, and just be with. We will miss her dearly. But we DO understand her need to be with her friends, and get on with her life and career. Can't wait to have her back!
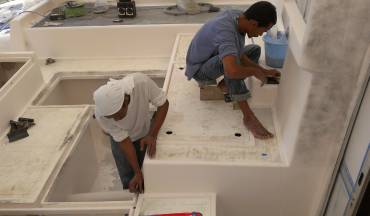 Lek & Baw start the long job of polishing the cockpit gelcoat |
Tuesday, May 21:
A quiet, low key day at the yard. Team Hacking is now back to 2, and that will take some
adjusting to...
Baw, Pla and Lek spent the entire day quietly wet sanding the new gelcoat in the cockpit. They found some thin areas from an earlier spray, so are planning to rough sand that vertical area (port side of the cockpit) and to do the small holes/craters repair on the step area plus the vertical wall on the right side of the cockpit at the same time.
Ben moved up from 240 grit sandpaper to 400 grit on the helm seat and seems to have gotten a lot done on the back of the seat.
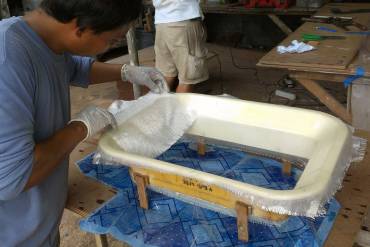 Houa making a splash mold from a piece of interior hatch trim |
Houa and Sue visited the store room mid morning to pull out the old headliners for the 2 forward cabin ceilings. These have to be re‑made to fit the new Lewmar hatches that are replacing the small Goiot hatches that were there.
But first Houa decided to build us a new fiberglass interior trim piece for the hatch (to go between the headliner and the hatch itself) as the one that was supplied with the hatch was a piece of flimsy plastic junk. So he mounted a large salon hatch trim piece on stilts, then smeared it with mold release wax. He then built up fiberglass/epoxy layers to create a new "splash" mold of the old interior trim piece. When he takes it off the mold tomorrow he will cut the straight section and keep the molded corners to use for the new trim pieces he'll be building. Clever guy.
Sue and Jon took advantage of having a car (left over from taking Amanda to the airport last night) and took the new stainless steel swim ladders and the hinges into Phuket town, back to Luk Engineering who made them. Our concern is that they have looked beautiful all wrapped in plastic wrap in the store room for 5 months, but Sue has done a "rust test" by washing them in seawater and they are not living up to our expectations. After a month sitting in a shallow bucket of Chalong Bay seawater, we had lots of rust forming on the hinge and many spots of rust on the ladder itself. When we first ordered these ladders from Luk, we specified 316L stainless steel, and they assured us they had it. What we expect of (very expensive) 316L is perfectly polished, non rusting stainless. We have many examples of it on board, like our bow pulpits manufactured for us in St. Maarten in 2002, never polished and totally rust free after 11 years of exposure to salt spray.
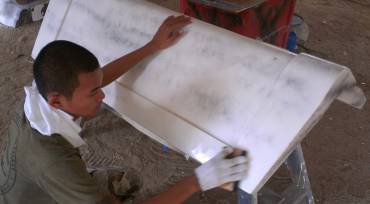 Ben polishing the back of Ocelot's helm seat |
We did not like to complain about Luk's workmanship or materials, but we felt we needed to get things straight. What was interesting is that we applied a small magnet to the stainless and got varying results. We expected 316L to be totally non‑magnetic, but even our pristine bow pulpits have areas with a touch of magnetic attraction. At Luk's shop we spoke for a long time with Luk himself, and his wife Kwan, who runs the front office and speaks a bit of English. Luk showed us the materials he used -- all labeled with 316L. Some of it was mildly magnetic. In contrast, his sheet stainless labeled 304 (a different type of stainless steel, and the bane of many a sailor) was not magnetic. Strange!
Kwan was concerned that we weren't happy. She assured us that they buy and use only 316L stainless, and are very careful to label all pieces, especially if the labeling is cut off. It soon became clear that they did not have an answer for us about why the pieces were rusting. And they would not be able to remake the pieces to our satisfaction, because they would be using the same metal as before. They offered to polish the hinges and ladders again, but we didn't think it would solve the problem.
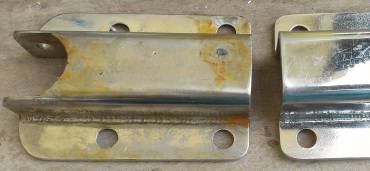 Hinge exposed to saltwater on left, new hinge on right |
We took our hinge and ladder up to AME to speak to K'Wiwat and Mike at Boat Lagoon, and learned some interesting things. First of all, there's 316 and then there's 316. The amount of carbon, nickel, etc in the steel varies greatly from one foundry to another, one manufacturer to another. There is stainless from China, Taiwan and Japan, all sold in Thailand. The Japanese material is the lowest in carbon and the least likely to rust, but it's at least 50% more expensive.
The "L" that we ask for in 316L stainless stands for "Low", indicating low carbon, hence its desirably for the marine market. K'Wiwat and Mike looked over our pieces and explained that the rusting was probably due to the tools used to manufacture the parts. For instance, the knurling machine that pressed the textured surface into the steps tends to leave tiny bits of itself behind in the stainless being knurled. Those tiny bits will leave rust marks until they rust away. The same thing happens with drills and cutting tools used to make the holes and cuts, as good quality stainless steel tools are extremely expensive. Lots of acid baths and polishing will eventually wear those tiny bits of rusting steel away and the rusting should then stop.
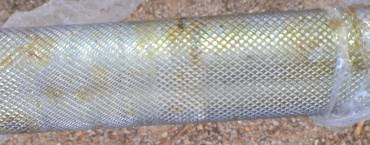 Corrosion on the knurled surface of a swim ladder step |
We were feeling a bit depressed about now, thinking that the rust was just going to have to be part of our lives until we cleaned it away enough (in the case of the knurling) or lived with it, around the bolt holes. But K'Wiwat had a solution: electro‑polishing. This is a process that removes the residual rusting steel and leaves the stainless steel item rust free and polished far better than anyone could obtain with normal machine shop polishing. It even removes residual carbon from the surface of the stainless steel, making it more stainless. It is apparently quite cheap (priced by volume, not weight) but the transport costs to Bangkok and back adds a bit, as there are no electro‑polishers here in Phuket. We will investigate further...
Wednesday, May 22:
How can we be half way through the week already? Must be that time flies when you're
having fun.
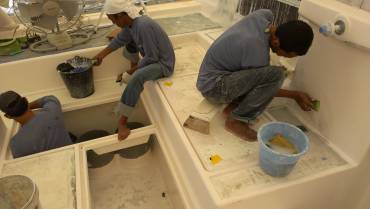 Pla, Lek, and Baw patiently smoothing the cockpit gelcoat |
Baw and his trusty Team of Lek and Pla were once again ensconced in the cockpit, knocking back the gelcoat bumps from Monday's spray, using 240 grit sandpaper and lots of water. We discovered that water pools a bit under the helm station, and spent some time with both Baw and Houa deciding what to do about it. Jon will add a couple drain holes inside the gutter on the battery hatch, and Houa will make the teak a couple millimeters thicker at the low spot to encourage the water to run the other way.
Ben worked under the boat sanding the helm seat with 400 grit. He finished the back half, and he and Sue flipped it over and he got much of the "up" seat sanded as well. Once he has finished with 400 grit, Baw will be doing minor gelcoat repairs, filling in the little pinholes or the insect tracks where bugs flew into the wet gelcoat.
Jon and Sue worked together on finding the fore/aft alignment lines for the salon side louvers, and for the bottom step on each side under the window. This is a bit tricky, as the areas are very curved, and they all curve differently, and the steps are not parallel! Although we used a tool fairly successfully to transfer the alignment lines on the deck up to those louvers, the louvers actually slope forward relative to the deck, which messes things up. Then we tried doing it by eye, sighting along the lines from the front, but there's too much of an optical illusion with the louvers curving in and confusing our eyes.
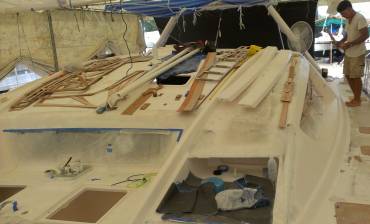 The organized pandemonium of the Ocelot work-boat |
We finally ended up by laying a long strip of thin plywood on each of the steps and louvers, then looking down on them from above and adjusting them to make sure all were exactly parallel. Then we could draw the lines on the louvers, and transfer those lines to the templates, so Mike can make sure the diamond pattern in the nonskid all lines up correctly between the different sections.
Sue also put in some quality time on the forebeam, alternating between hand sanding with 400 grit paper and using the power grinder to polish the aluminum so that the sanding looks nice and smooth. Besides needing to get out as much of the corrosion as possible, we also have to try and remove the deep scratches made by last year's workers who took an aggressive power grinder to the spars to remove the old paint. Note: best to remove paint from aluminum spars with chemicals! Sure would have saved us a lot of time and person‑power.
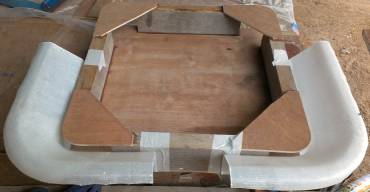 Houa's model of the new hatch, & the new trim going around it |
Houa continued working on making us new internal trim pieces for our new hatches over the forward bunks. The cheap plastic part that Lewmar supplied with these ($1,000) hatches is so floppy and useless that we're amazed Lewmar even bothered to include them with the hatches! Houa is using one of our existing (fiberglass) trim pieces as a mold to make good, fiberglass trim pieces for the new hatches. They'll need some work afterwards, since the new hatches are a different size, but the new trim pieces should look very similar to our 13 existing hatch trim pieces.
Today Houa popped yesterday's fiberglass out of our existing internal hatch trim piece. The mold release wax he'd applied before the layup allowed the new part to come out easily. Then he laid up another "splash" as he'll need parts from both splashes to make a correctly sized mold for the new trim. He worked on the wooden model for the new mold, and cut yesterday's fiberglass pieces in the middle of each straight edge, ready to re‑glass onto the new model. And yes, he does plan to check it all with the actual hatch before declaring it finished!
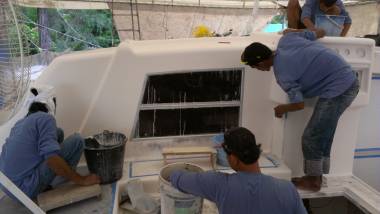 All 4 guys were smoothing gelcoat in the cockpit this afternoon |
After Houa had finished his epoxy layup, Jon asked for the extra epoxy, which he syringed it into 4 bolt holes near the mast that will we not be using. These holes were for a pad‑eye that we never used, and don't plan on re‑installing, but we needed to fill the holes. Details, details. They seem never ending. But we ARE moving forward!
Thursday, May 23:
Hot and sweaty, but more progress. Touch wood, still forward.
Ben finished his lone sanding adventure under Ocelot. He has now got the whole helm seat sanded with both 240 and 400 grit. At this point it needs to be checked for gelcoat blemishes and get touched up. We were happy to see him up on deck with the other 3 workers, where we hope he'll have more fun, and maybe learn a bit. He is, after all, our youngest and least experienced worker.
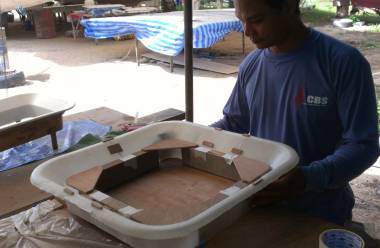 Houa's assembled mold for making internal hatch trim pieces |
Baw, Pla and Lek all worked under the cooling influence of 2 big fans. They continued the 240 grit wet sanding of all the locker rims and the vertical walls of the cockpit. Baw was up above the cockpit most of the day, working on the big flat spaces above the helm (near the compass) and to the sides. They have sprayed the gelcoat with flat black spray paint, sort of misted over to help them see where they have and have not sanded.
Jon found another small epoxy job. Today he scraped, sanded and cleaned the round indents in the tops of the chain and anchor locker hatches. These used to have teak on top, and the original big bulky (locking) handles needed that teak. Now, with thinner, lighter hatch covers, we don't need (and can't use) the big hardware. So Jon filled in the old indents, ready to embed the new (lighter, smaller) handles.
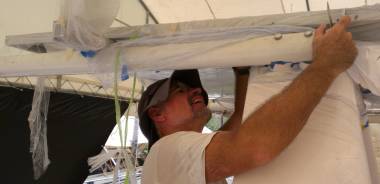 Jon wrestling with a horizontal davit bar, bolted to the targa-bar |
Jon also worked on taking down the horizontal davit bars that support the solar panels. These are aluminum tubes which we want to have powder‑coated, same as the vertical davit supports on the aft deck. We had thought to put the vertical supports up first, then find a way to support the solar panels on them, but Jon had a better idea. He bought 2½" (7 cm) PVC pipe, cut it into 5' (1.5m) lengths and drilled bolts holes to match the existing aluminum support bar bolt holes. Then with a bit of sweat, Sue and Pla supported the solar panels with a stick while Jon unbolted the horizontal bar, and fitted the PVC substitute in its place.
Having seen the risks of this operation, Baw pointed out the possibility of using rope to hang the solar panels from the tent supports. A bit of hilarity ensued with Jon, Baw and Pla all climbing on the tent and step ladders, fishing the rope over the tent bars and back to the panels. With the port side of the panels hung, it was much safer and easier for Jon to remove that support bar and replace it with a blue PVC pipe.
Just as we finished, Mike from AME drove up. Just the man we wanted, as he is able to deliver the bars to the powder coating operation which is right next to Boat Lagoon.
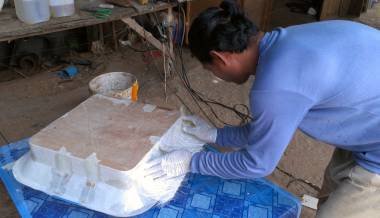 Houa glassing up his first internal hatch trim piece |
Mike has a problem, as all of his laborers are busy on other projects and he isn't able to bring a team to lay down our nonskid. We spent some time with Mike discussing various plans for when, how, and with whom we will begin to lay the new nonskid. There are schemes afoot for early next week, so stay tuned.
Sue buzzed her ears off down in the snake field, giving the boom a nice machine polish. This is relatively easy, but dirty and noisy work, and takes a lot of head twisting and back maneuvering to be able to see the deep grinder scratches that have to be polished out. Young, non‑glasses wearing eyes are best for this. Amanda was a star at it, but Sue is managing. Basically, she polishes a big area, then gives it a fast wet sand with 400 grit which brings out any remaining scratches. With the scratch lines visible again, she is able to polish once more, but in more specific places. The boom is very visible to us while on deck or in the cockpit, so we'll want to get it nicely finished.
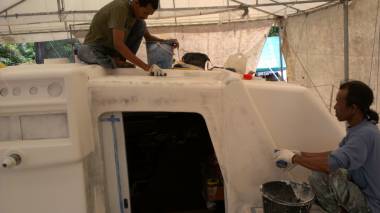 Baw and Lek wet-sanding the front of the cockpit |
Houa worked on the fiberglassing the new Lewmar hatch internal trim pieces. He arrived in the morning with a huge green leaf, which is in fact from a teak tree. But we teased him that is a leaf from the fiberglass tree, as this week he is not a carpenter but a fiberglasser. He is putting on 7 layers of glass to give us good strong internal hatch trim pieces.
Friday, May 24:
In like a lamb, out like a lion. Today's weather went from beautiful to torrential.
Jon and Sue Scootered into Phuket Town in the morning to search for some tough plastic sheet for the inside of our anchor well. We were looking for something like 1/8" (3 mm) ultra high density polyethylene or even just polycarbonate, but all we could find is acrylic, which is a bit brittle and doesn't like the impacts it's likely to get as the anchor comes up. We may just leave the aluminum polished (and Nyalic‑ed), and see how it goes. Most times, the anchor shaft and the chain don't even touch the anchor well, as they are held up on the rollers.
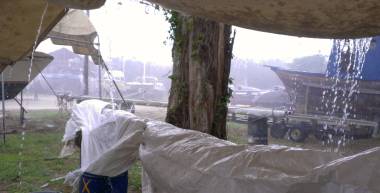 Nice to have our big extended tent when it buckets down |
We still had our Contingent of Three on the cockpit sanding project: Baw (who arrived at mid‑day, without brother Ben), Pla and Lek. Looks like things are getting close to finished with 240 and 400 so that they can start on the little gelcoat repairs. Waiting, waiting. Patience.
Houa worked on the fiberglassing and assembling of the second piece of interior hatch trim for the new forward cabin hatches. They look huge, but that's OK. He has checked their size. Also, the way they sweep outward from the hatch allows more air to flow to those of us sleeping underneath, and also lets in more light.
It started to rain at lunch time, and just got wetter and wetter all afternoon. Sue got some time in with the power grinder, polishing the boom in preparation for wet sanding and applying Nyalic. But when the rain blew in and she was standing in puddles, she quit that. Hand sanding with a glove and wet/dry sand paper was a pretty good use of the wet afternoon.
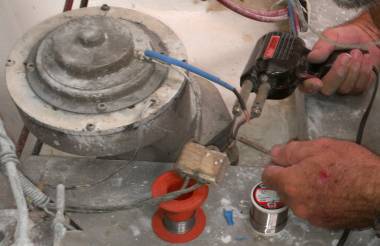 Soldering a broken wire on the autopilot drive system |
Jon worked on a number of small jobs today. We have a number of projects that get to the 80% point and then stop for some reason, and this happened to the autopilot drive system. So today he (finally) soldered the broken wire and bolted the motor and reduction gear in place. We can't test it yet, but at least we progressed. He also sanded down the chain‑locker hatches where the new handles will go. Unfortunately they are a bit concave, so they may need a bit more filler. The PVC pipes that we put up while the davit supports are being powder‑coated got reinforced. Finally, he worked on positioning the shelf for the washing machine in the port fo'c's'le, but by that time the rain had started so it was too wet to do any epoxy work (the next step).
When it was obvious that the rain was here to stay, Jon played civil engineer, just like he does on mountain trails. At least here he has a rake to help him terraform the sand around the boat to channel the rainwater away from Ocelot and away from Houa's workshop! Welcome to Asia's Southwest Monsoon aka The Wet Season.
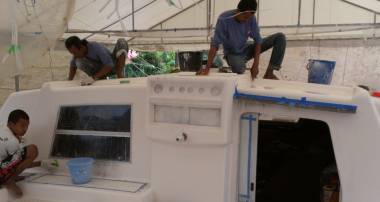 Lek and Baw finished the aft cabin-top to 1500 grit! |
Saturday, May 25:
A long, slow day at the yard. Probably because it's Saturday, payday, and the end of the week.
There was the now normal frenzy of sanding going on in the cockpit, with Baw, Ben, Pla and Lek. Pla was down in the entryway all day, working with 240 grit sandpaper to get the area ready for a quick re‑spray early next week. The gelcoat is a bit thin here, and we can already see through it with the first level of sanding.
Baw and Lek worked up on top of the companionway and near the helm and compass. These are big horizontal surfaces that will not get nonskid. We were happily surprised when, at the end of the day, Baw asked if it was OK to cover that area in vinyl. Why? Because he and Lek had already sanded it up to 1500 grit, and it was looking very shiny, indeed! And here we just thought it was wet! There are still many little areas of the cockpit that need "repairs" to the gelcoat, and Baw assures us he will do them right away next week. But we think there will be some re‑spraying first. The guys ended the day with a major wash-down of the whole cockpit.
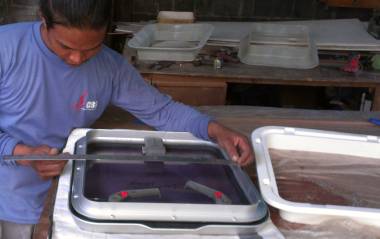 Checking size. New trim in back, junk from Lewmar on right |
Further to the nonskid situation, we decided to not put nonskid on the two big "benches" beside the cockpit. These areas are always covered in closed cell foam covered in plastic mesh, so we don't step up there on the "naked" gelcoat. Not putting nonskid there has 2 advantages:
|
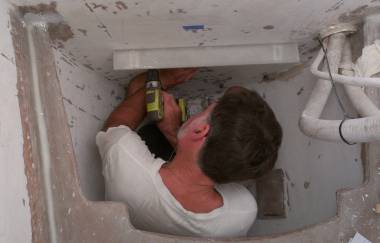 Fitting the washing machine shelf in the port fo'c's'le |
Luckily Houa still has things to keep him busy since the cockpit is not yet ready for the teak flooring. Today he popped the second piece of fiberglass hatch trim off his mold, sanded it down, and got some filler on. Jon had a hunch that these pieces of trim are a bit too big, so we retrieved the actual hatch form the storage unit, and sure enough, the inner dimension is about 1/8" (3mm) too big. Houa was not worried, and said he would put another layer of fiberglass inside, and the gelcoat will further fill the space.
Jon spent the morning in the port fo'c's'le preparing the surface on the bulkhead for the new washing machine bracket which he will glass in place. He got everything ready, and the glass cut, but then it was lunch time, and the afternoon degenerated into rain squall after rain squall, some of them quite violent. Not the best weather for epoxy. So he switched gears, and rode to the local hardware store (5 minutes away) between rain clouds, to get the bits and pieces needed to create drains in the corners of the battery hatch gutters. With the new teak in place, we will be seeing water draining aft from under the helm into the battery compartment, and we want to direct it down holes, not just over the edges and onto the batteries. As with all engineering projects (large and small) in Thailand, you have to go to the store to see what's available before you make your design.
Sue spent the morning communing with aluminum struts like the forebeam and the boom. Still alternating between power sanding and hand sanding. The noontime downpour and windstorm put an end to the power sanding once again.
Thai Refit:
Ocelot Pages:
Top Level: Home | Destinations | Cruising Info | Underwater | Boat Guests | Ocelot | Sue | Jon | Amanda | Chris | Site Map | Make a Comment
|
If our information is useful, you can help by making a donation |
Copyright © 2000‑ Contact: Jon and Sue Hacking -- HackingFamily.com, svOcelot.com. All rights reserved.