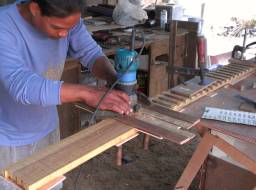
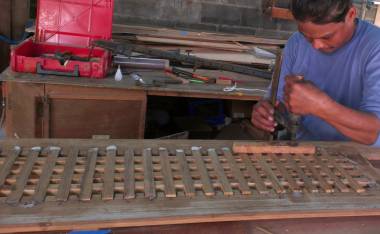
Houa finishing the slots in the long pieces
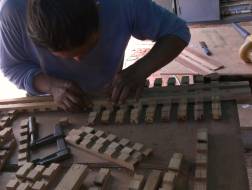
Assembling the short pieces onto the longs
76 Teak Chain Lattice
Summary: Houa finished most of the hard work on the teak lattice that goes between Ocelot's trampolines - cutting out the teak strips, routing them out, fitting them together, and epoxying them into their frame. He also added more teak and ash (no holly here) to one of our floorboards. Baw and Pla prepared much of the cockpit for gelcoat, sanding and filling all the many fiddly bits. Jon found that some serious work was needed on the floor of the cockpit lockers so Baw and Pla ground off the bad gelcoat, then removed and replaced some delaminating glass. Lek sanded the helm seat and the engine hatches, getting them ready for gelcoat. Then he built up and painted the edges of the cockpit hatches, to better support the teak that will go on top of them. Lek and Pla spent some time on the cabin‑top, filling dips and sanding chipped edges smooth. Amanda rough polished the anchor support, boom, and forebeam, but then a grinder attacked her so she moved over to help Jon on the mast. They untangled and rearranged the halyard chaser lines in the mast and pulled all of the main PVC wiring conduit sections up the mast. Our new Dynex Dux diamonds need special mast fittings, so Jon opened up 8 thimbles to put over spreader‑tips. With the changing monsoon, Jon reinforced our tent supports for SW winds. Sue dug out our mast bits and started cleaning them up, helped rough polish the spars, and also helped Jon with the mast wiring conduits.
Monday, April 15:
The WindGuru website predicted
heavy rain all day - but we were glad that they were (once again) hopelessly inaccurate.
Problem is, there aren't many other weather forecasts for Phuket. But we did have heavy rain
all last night, so the sand at the yard got compacted, which is good for scooters and painting
(keeps the dust down).
 Houa finishing the slots in the long pieces |
 Assembling the short pieces onto the longs |
Houa made great progress on the chain lattice. He finished cutting the notches out of the long pieces, lined up all the short pieces, made a test assembly of the whole lattice, took off 2 of the 4 long pieces (leaving 2 to hold all the short pieces in the correct position), smeared a bit of epoxy glue on the relevant surfaces, replaced the 2 long pieces he'd removed, tapped them down carefully, and finally used some big C‑clamps to squeeze them down completely. Tomorrow he should be able to glue the final 2 long pieces into the mesh.
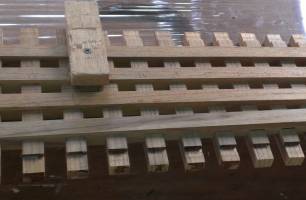 Test assembly screwed down, then 2 longs removed |
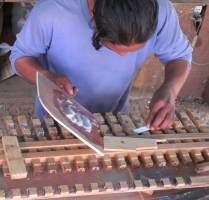 Epoxy glue spread in the notches |
Jon and Amanda lasered in Ocelot's paint line on the outside of the port hull, but the high humidity made it risky to do our big epoxy project on the bottom, so we assigned the men to other jobs.
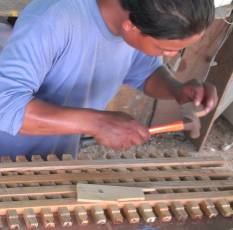 The 2 long bits are tapped back in |
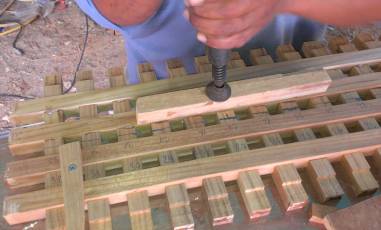 And finally they're clamped all the way down into place |
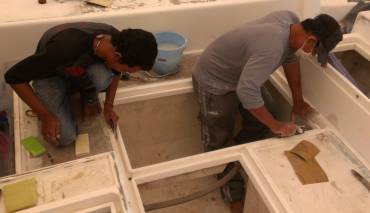 Baw and Pla working on the rims of the cockpit lockers |
Baw and Pla spent the day up on deck. They filled in the last drain hole from the battery compartment that Nut had missed on Friday. Then they put filler on the port big "seat" of the cockpit where the gutter will split the two pieces of nonskid. This is a "repaired" area, so we hope this attempt at filler is better than the last.
Baw and Pla both finger sanded all the rims of the cockpit lockers. Mike's agreement with us is that his team will clean and prep the cockpit, but his folks are pretty busy and have not done the locker rims, so we decided to do them. The guys were very careful not to step on the clean, white, sanded areas around the lockers, but it becomes a bit of a dance. Pla also spent time cleaning and sanding some places he found up on the cabin top that still needed attention.
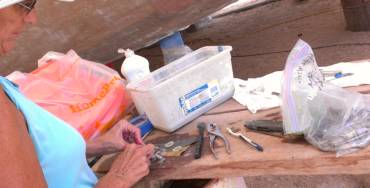 Sue cleaning up mast hardware, preparing for reassembly! |
Lek worked under the boat all day, sanding the helm seat to get it ready for gelcoat. He wrapped it in plastic when he was done. Then he moved on to sand the edges of the engine hatches with 120 grit so that they are ready for their nonskid and next coat of gelcoat.
Amanda was the grinder queen today, getting the anchor bracket all machine polished except for the internal area that needs to visit the metal shop to have some recalcitrant screws taken out.
Sue spent the day tending to a gazillion stainless steel cotter pins, sheaves, sheave pins, split pins, washers and bolts. We now have another 3 bags of clean and organized mast hardware. It's going to be so fun to actually put some of this stuff back on!
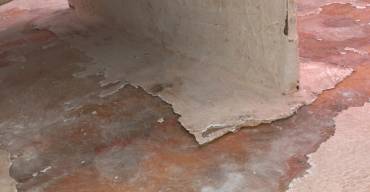 Poorly adhered glass & gelcoat - floor of the cockpit lockers |
Jon went up on deck in the afternoon to see how Baw was doing, and got drawn into a discussion of the broken up floor of the cockpit lockers. Turns out not only is the old (thick) gelcoat in those lockers broken and chipping off, but some small sections of fiberglass that hold up one of the floor supports are delaminated as well. These bits are not structural, but they should be fixed. The delaminating gelcoat and fiberglass appears to be due to inadequate preparation of the fiberglass floor of the deck‑lockers when Ocelot was built. It's "nice" to know we're not the only ones with these problems!
Undaunted, Jon and Baw began chipping away, then cleaning up to see just how bad it was. The good news is that chipping the gelcoat off let us see that the foam of the bridge‑deck appears to be in good condition. Bad news is that 3 sections of glass about 4" (10cm) wide and each about 4' (1.2m) long need to be repaired. We'll cut back the old glass, rough up and clean the area thoroughly, and re‑glass it. We'd also like to figure out how to do the floor surface so that the water that gets past the rim drains doesn't just pool in the center like it used to do, although now that we have 2½ times as many rim drains, we shouldn't get much overflow into the bottom of those lockers anymore.
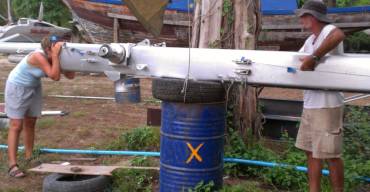 Peering into the mast to see how the lines are crossed |
Tuesday, April 16:
Another day with massive rain showers forecast, but nothing until a mid‑afternoon 30‑minute deluge.
Jon and Amanda had a long, fun, frustrating, and ultimately satisfying day working on the mast lines. In order to re‑string all the halyards for the 2 spinnakers, jib, screecher, topping lift and mainsail, we have run small nylon "chaser" lines up the mast so the big lines can be pulled through again when we're ready. Problem is, some of the chaser lines somehow got in a bit of a schmozzle. We really don't want lines chafing against each other inside the mast, but untangling lines in there can get very difficult. The mast is 60' (18m) long, with very few places for light to get in and several aluminum plates going across the mast, so it's very difficult to see anything (the tangs for our diamond stays are not just welded to the outside of the mast - they go all the way through the mast).
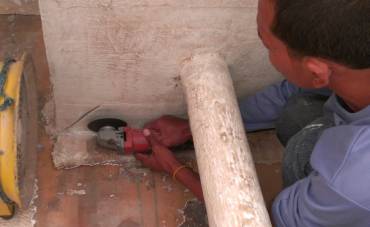 Baw cutting away delaminated fiberglass in the cockpit lockers |
So the morning progressed with Jon and Amanda taking different ends of the mast, calling directions back and forth to each other as they pulled on lines and tried to untangle them. They thought through it some more over lunch and in the afternoon came up with a plan. The lines usually exit the mast above the winches and spinlocks, 6‑9' (2‑3m) above the bottom of the mast. They pulled all 3 culprit lines together out the bottom of the mast, then Amanda (with her young eyes) was able to peer up the mast while shifting the lines around to see how they had woven themselves together and braided themselves into the mess they were in. Finally, a yell of excitement went up. High Five! Jon helped Amanda verify that all of the lines were running straight and clear and not affecting any other lines. Then they pulled them back out the sides of the mast, at their normal exit locations.
While they were at it, they decided to rearrange which lines exited the mast where. Originally, we organized the lines based on what we have to do with them when, so each line would always have a winch available when needed. But that still left considerable flexibility. As a result of the above exercise, we decided that it was also important that lines exit the bottom of the mast in a similar orientation to where they exit the mast at the top. At the bottom of the mast, the 6 halyards exit 3 on each side, with the exit slots positioned towards the front, middle, and back of the mast on each side. At the top, the jib and screecher halyards exit the mast at the front in the middle, near the hounds (not all the way at the top). The 2 spinnaker halyards come out the top front of the mast, one on each side. Similarly, the main halyard and the topping lift come out of the mast at the top but at the back, one on each side. So we arranged where the halyards came out at the bottom to be similar to how they're arranged at the top, to minimize the chances of interaction.
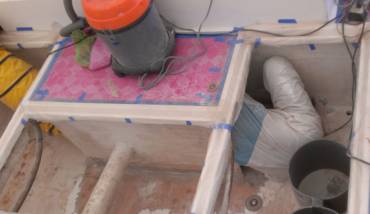 Pla grinding gelcoat in impossible positions under the cockpit |
So at the bottom of the mast we moved the jib and screecher halyards to exit at the front of the mast, one on each side (which side doesn't really matter). The 2 spinnakers come out of the middle slots, one on each side as oriented at the top of the mast, and the main and topping lift exit at the rearmost slots, on their appropriate sides. It all sounds simple after the fact, but like many things, if you've never done it before, it takes time to work out the optimal solution.
Up on deck in the morning, Baw and Pla started masking off the cleaned up rims of the cockpit area in anticipation of the day's mess. And mess it was, but good work. Jon arrived to supervise the cutting of the delaminating fiberglass on the floor of the cockpit lockers. Good thing, too, as Baw had drawn borders around a MUCH bigger area than what we needed to cut! Jon demonstrated how he wanted the cutting to be done (careful not to cut into the substrate fiberglass which is in great shape), and then Baw demonstrated to Pla, and between Baw and Jon, they got the job done while Pla looked on, all dressed in his white bunny suit and pretending to be the boat owner!
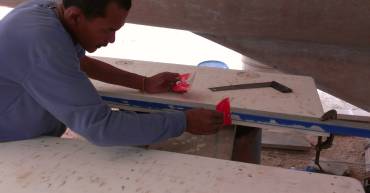 Baw squaring up the edges of our cockpit hatches |
But Pla got his chance to use that bunny suit, all day. He was the unlucky one to get to grind back the old gelcoat and fair the fiberglass on the cockpit locker floor. The guys set up the big extractor fan, and Baw very cleverly attached a running hose to the exhaust end so that the fiberglass dust was washed into the ground as it came out, rather than blowing all over. By 4:45 Pla had finished sanding and cleaning up almost all of the locker, and we gave him a hazardous pay bonus for the day. He will, unfortunately, have to jump back into it tomorrow to finish.
Baw and Lek worked on giving our cockpit hatches better edges. The hatches used to have rounded edges, such that the teak on top was not well supported, especially the bits on the edge. Some even hung out over thin air, and after several years, some teak just broke off. Houa seemed to think that this small overhang was not a problem, but he doesn't live on the boat. We asked for filler to better support the teak, so that's what we're getting. Baw used blue tape and a long aluminum straight edge to create a perfect flat surface to mold the filler against. They should look great.
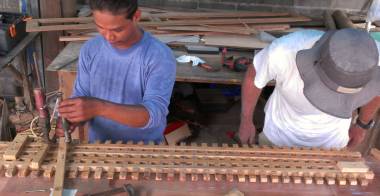 Houa finishing up the assembly of our teak lattice |
Houa continued to play with his lattice. He chiseled the epoxy glue out of the square holes between lattice pieces. We were surprised that the glue wasn't real hard, but he explained that he chiseled it while it was only partially cured, otherwise it was too difficult to get out and was likely to tear away some of the teak. Clever carpenter. He also routered out the insets where the lattice will go on the chain support frame, so maybe we're getting close to seeing this finale.
Sue did her bolt clean‑up job once again, then went in search of the 10 missing plastic sheaves from the boom. Hmmmm, wonder if they "walked off" with someone long ago? They were not found in the storeroom, but she did bring back the stainless steel propane tank which was in desperate need of a polishing. She also located the aluminum sail tracks used to hold the trampolines, and brought 2 back to the yard. Each tramp requires 4 supports, and 2 of those are the new PVC pipes that are glassed onto Ocelot's bows, but the other 2 supports need to get bolted back onto the forebeam and anchor support, but finding which one goes where is difficult.
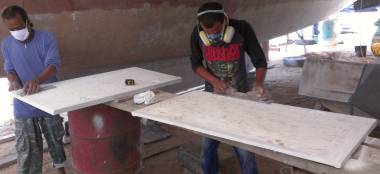 Lek and Baw sanding the big cockpit hatches smooth |
Wednesday, April 17:
Mid‑week and all is well. Mostly.
The overcast day gave us a respite from the heat but made us leery of epoxy work. But no worries. We still had enough for Baw and Lek to do on the cockpit hatches. They did an excellent job finishing and fairing the newly filled edges. Then they asked about rounding the corners, which at first we thought was counter productive to the whole point (which was to get filler out to the squared off corners on each hatch so the teak wouldn't crack). But Jon went up on deck with Baw and they checked the rims, compared them to the photographs that we use as reference, and realized that the battery hatch needs all corners rounded, the 2 side hatches need 3 of their 4 corners rounded, and only the middle hatch can have all 4 corners left square. So we told Baw to leave one hatch with square corners and to round off all the other corners.
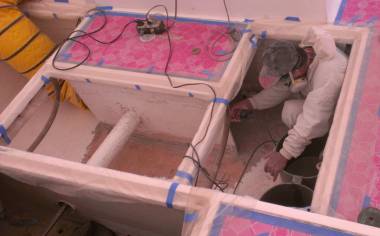 Pla grinding off gelcoat inside the cockpit lockers |
Pla spent the day in his white bunny suit again, grinding off the old gelcoat of the cockpit locker area. Although he thought he was finished after lunch, Jon asked him to do more sanding with the machine (grinder) to get out all the old dips and valleys that have made that locker so very difficult to keep clean. By end of day (and lots of noise and dust!), a white‑coated Pla emerged to vacuum up the mess and clean everything off. We now have a very white, clean locker. We will probably spray gelcoat in there, but we're undecided on which type. The Thai white gelcoat is certainly cheaper than the ISO 2500, but water often sits on the bottom of those lockers. We're hoping that less water will get down there now, but it might be worthwhile to make those lockers more waterproof.
We had hoped to see Houa's lattice inserted into the anchor chain frame today, but obviously there were many small details to attend to, as every time we saw Houa he had chisel in hand, working to make it all fit like a glove. Maybe tomorrow? Houa's next (and biggest) job on Ocelot is the teak decks in the cockpit and aft deck, but we need the gelcoat sprayed on the rims first, and that still needs to be scheduled. Meanwhile, there are still more small teak jobs to be done, like deck hardware mounting blocks (which were originally made from plywood!), the "eyebrows" over the companionway and the galley window, and the thick trim surrounding the companionway.
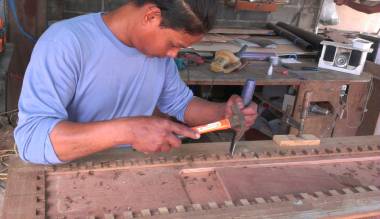 Houa working on the teak frame that will hold his teak lattice |
Sue sanded her fingers to the quick again, and she won't be having a manicure anytime soon. Today's project was the hardware (bolts, washers, pins, screws and slides) for the trampoline tracks and the forebeam. Lots of scraping, sanding, washing, rubbing. But now several satisfying bags of clean, ready to install hardware.
Amanda began the day with the grinder, working on tricky things like the mast step. Unfortunately, the grinder caught an edge and flew at her, wrapping itself in her shirt and stalling. But not before it cut her hand and gave her a nasty couple bruises and abrasions on her chest. The shirt may be toast as well. Scary. Needless to say, that was the end of her grinding for the day. She moved on to more mundane tasks like running scooter errands, walking bits and pieces to and from the storage room, and finally working with Jon on the mast.
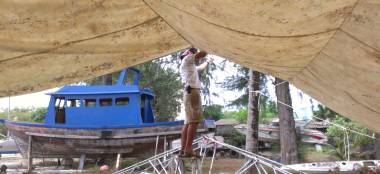 Jon balanced precariously, adjusting the lines for our awning |
Jon spent the morning attending to our tent. It has been braced for strong winds from the NE, but now that the monsoon is switching, we need to check the bracing for winds from the SW. This also allowed Jon to better support our huge 20'x50' (6x15m) awning that extends south from our tent, giving us a lovely big covered area where we can work on the mast, boom, and other spars in relative comfort. This awning has no frame supporting it (except for our tent on the north side) so it all depends on ropes. Jon reinforced several places, but SW monsoon can bring strong winds and torrential rains, and the awning has already torn in a few places. The (frame) tent over a neighboring boat has already ripped, and friends on the north end of Phuket have already had their brand new frame tent collapse a couple of times.
After lunch, Jon and Amanda attacked the mast wiring conduit. Months ago, Jon and friend Kim created a wonderful long, multi‑section PVC pipe conduit that was ready to slide up into the mast to contain all the wires. For many reasons it has not been installed yet, so the job fell to Jon and Amanda. The conduit slides up a T‑track that is punctuated by the mainsail track bolts every 10 cm (4"). So the PVC has been split (to go up the T) and has diamond cutouts every 10cm to go over the bolts. But the bolts significantly impede the PVC so one change in the last few months is that we decided NOT to attempt to push the entire track up in one go (which would require a force of over 600 lbs/300 kg) but to take it up in sections. One downside of this is that the wires can not be tied into the PVC beforehand, and have to be pulled up after the PVC is in place. This means that the wires can't be supported by the PVC - they have to hang from the top, which is certainly not ideal, especially for delicate wires like coax or the tiny wires for the wind instruments.
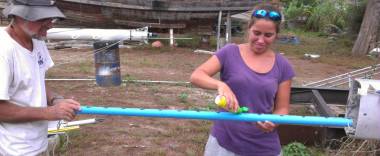 Lubricating conduit with detergent before pulling it up the mast |
Jon started out by lubricating the T‑track, using detergent. He got a short section of the PVC mast conduit, tied ropes to each end, slathered up the slot in the PVC with liquid dishwashing detergent, slid it onto the T‑track, and pulled it up the inside of the mast to the top and back down again. He did this several times in an attempt to distribute the detergent all along the T‑track.
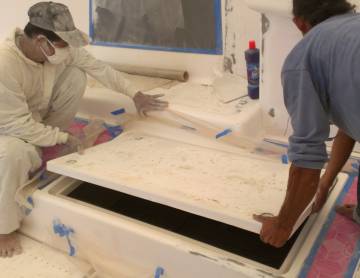 Pla & Lek check the fit of newly contoured cockpit hatches |
Jon and Amanda were originally going to use 3 ropes inside the mast: 1 to pull the PVC section up the mast, another to pull it down if the PVC got stuck (which sometimes happens) and to pull down the up‑haul line once the PVC section was in place, and a 3rd line to trip the knot that held the first 2 lines to the PVC. But testing revealed that they couldn't make a knot that was both reliable under the heavy load and vibration of pulling the PVC sections over the bolts AND could be made to release reliably once the PVC was in place. So they eventually decided to use a small disk tied to a line that could push the PVC up. This had the advantage that we didn't need to actually tie anything to the PVC, but it had the disadvantage that we can't pull the PVC out again if it gets stuck, which has happened to us a few times. Hmmm...
Something else that was revealed by our testing is that pulling long sections through the mast is difficult. The PVC comes in 4m (13') sections, and trying to pull those long sections through the mast bruised Jon's hand, even wearing leather gloves. So we decided to cut each section in half. It means twice as many pulls, but with a bit of luck they'll go pretty quickly.
 Houa pressing the new teak lattice into its frame |
Finally, testing also revealed that the mainsail halyard and the topping lift (which holds up the end of the boom) chaser lines may be crossed inside the mast. Tomorrow we'll have to pull those lines down to the bottom of the mast and play with them a bit to make sure they're not tangled.
Thursday, April 18:
Amanda's Birthday! And she had a choice - to hang out (alone) in the apartment or join us at
the yard. The yard it was, so we got a lot done, but on full tummies from a birthday breakfast
of bagels, lox, cream cheese, grapefruit juice, tangerine juice, fresh coffee, and pastries from
Flint's. Yum.
After that delicious breakfast we actually accomplished a fair amount, even without Baw. He'd left after lunch on Wednesday and didn't come in today at all. Turns out he was helping EU on a paint job somewhere else. Sad that no one thought to tell us, his direct employers, but that seems to be the Thai way. But Baw could not have done the fiberglass job in the cockpit lockers that we need to do because Pla was not yet finished sanding those lockers. In fact, Pla spent all day, once again, in his white Tyvek suit and face mask sanding back the rough and broken gelcoat in our big cockpit lockers so that we have a smooth surface, and the job's still not quite done. When the sanding is finished we want to smooth the floor and walls with some filler, then we'll probably put on some strong epoxy paint. The smooth walls will make it much easier to keep that area clean and looking nice.
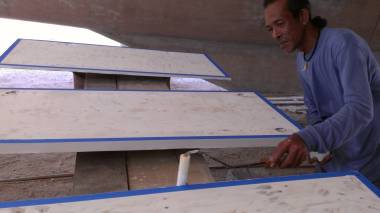 Lek rolling epoxy paint on the edges of our big cockpit hatches |
Lek worked quietly alone down under the boat, putting new edges on the cockpit hatches with polyester filler. Then we asked him to check that they fit up in their places in the cockpit. They do, but we'd told Baw that we wanted one hatch to have all 4 corners squared off, and all the other hatches to have rounded corners. Instead, we got 3 hatches that each have 3 rounded corners and one squared off corner! Not sure how that happened, but it shows some of the translation problems we have here. Two of the hatches can be oriented so their squared off corners are OK, and the center hatch we sent back to get all 4 corners squared off. Lek put on filler to square the corners just before lunch. After lunch he got them sanded square and then got several coats of our white epoxy paint rolled on.
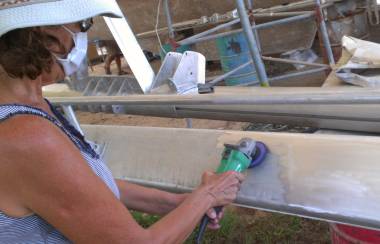 Sue rough-polishing the remaining side of the boom |
Sue fiddled a bit with hand sanding, then really got into the 400 grit scene on the forebeam. She found a few places where we had missed taking out the really miniscule dots of corrosion so they'll get hit again with the polishing grinder. Since they DO come out, it's best to go ahead and grind them out now, rather than to wait for more corrosion to form. Then Sue set up the power grinder and spent the rest of the afternoon coarse sanding/polishing the remaining side of the boom.
Amanda and Jon spent the morning trying to work out what was wrong with the chaser lines for the mainsail halyard and the topping lift. It seemed like they were crossed somewhere, but it's very difficult to see up inside the dark mast. Amanda eventually worked out how the lines were twisted and managed to untwist them. They then spent a considerable amount of time verifying that the lines were OK and clear of other lines and obstructions, as this sort of job is virtually impossible to do once the mast is mounted.
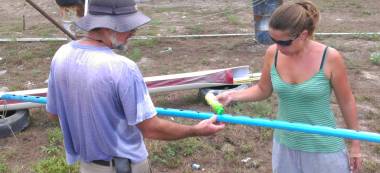 Amanda lubing the slot in the PVC mast conduit with detergent |
Amanda and Jon spent the afternoon pulling PVC wiring conduit up and down the T‑track inside the mast. They'd lubricate the slit in the PVC with a generous line of dishwashing detergent, start it up the track at the bottom of the mast, and then Jon would pull it up to the top of the mast ... and then pull it back down to the bottom again. Pulling it repeatedly makes it slide more easily over the bumps of the mainsail track bolts, and helps distribute the detergent along the length of the T‑track. Jon wore leather gloves but the 1/8" (3mm) line still cut his hands cruelly. Then Amanda remembered that we'd wrapped the puller lines around a section of PVC pipe the last time we'd done this, and that worked much better. But even the PVC pipe had grooves worn into it by the end of the day! Better the pipe than Jon's hands...
Once the PVC conduit was sliding happily they'd tie the down‑haul to the up‑haul, pull the PVC up into position, and disconnect the hauling lines from the PVC (they'd made that line long enough to stick out the top of the mast. By the end of the day they'd got the top 2 sections of PVC, each 4m or 13', wrestled into position. Pulling those sections up and down is hard work, and Jon's now complaining of a sore lower back, so Sue got him some Tiger Balm patches.
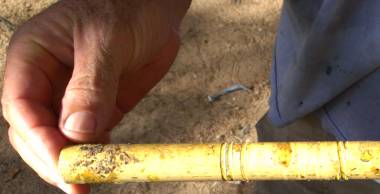 Pull-rope grooves in Jon's PVC handle - better than in his hands |
The remaining sections won't have so far to be pulled up the mast, but we won't be able to do them the same way. Since the PVC sections will be in the middle of the mast, we won't be able to untie any lines, so no lines can be tied to the PVC. So instead of tying the up‑haul line to the PVC, they'll have to attach the up‑haul to a small disk that will push the PVC up. For practice runs they'll attach a down‑haul to the PVC, but for the final positioning they won't be able to have a down‑haul, as there'd be no way to disconnect it from the PVC. This means they won't be able to free the PVC if it gets stuck part way up, as has happened several times already.
Houa finally got his teak lattice work imbedded in the teak frame! Yay! It's gorgeous, of course, but still needs a few days of finish work. But enough was done that Houa and Sue had a long talk about the next projects! One was pulled out of the little storage space at Houa's workshop: a small section of Ocelot's floor from one of the cabins. Houa had started working on it months ago, and then Golf had told him to work on Ocelot's fiberglass instead. Now Houa can finally return to that project.
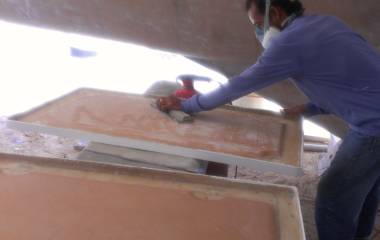 Lek hand sanding the underside of our big cockpit hatches |
Friday, April 19:
Hot sunny day, and low on workers but big on work!
We have decided go ahead and epoxy paint the insides of the cockpit locker hatches. Right now they are just bare epoxy and biaxial fiberglass over the foam reinforcing panels we added. They're sort of an orange‑brown foam color, and all neat and clean. But given how rough the biaxial glass surface is, it wouldn't be long before they'd be dirty and awful looking with grease and rust from tools and projects. So we set Lek to sanding the insides of the hatches.
Pla brought the long louvers over from their hide‑out under the neighboring boat, and began sanding them to get ready for another gelcoat spray and some nonskid.
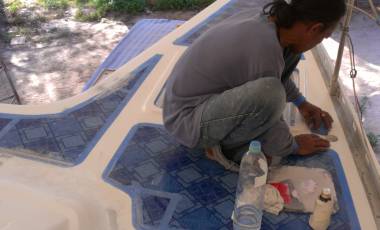 Lek sanding and filling bits of the deck |
Houa started the day sanding the lattice work in the chain/anchor support. Then he turned it over and scarfed in a new teak piece on the bottom side. While that epoxy glue was curing he worked on the small teak and holly floor section that was water damaged. He cut out the bad teak veneer and fashioned a new piece out of much thicker teak. Then he planed and cut a section of local white ash wood (there is no holly here) and fitted the pieces together snuggly, and glued them into place. Tomorrow he'll router out another section of the new teak and place another thin piece of white ash in there to keep all the floor strips the same width.
About 10am we realized that Baw was not going to show up today. He didn't answer his phone, but we know he wasn't with E‑U because E‑U was at the yard. Houa suggested that Mr. Baw was fishing. Well, he didn't say the word fishing, he just gestured, like charades of tossing a line and reeling it in. There are worse addictions. We just really could have used his work today. Especially since all morning it had to be hand work, as there was no power.
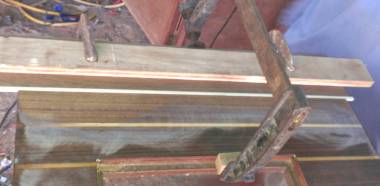 Houa gluing a piece of teak & an ash strip into a floorboard |
As it turned out, we did OK without Baw, as it meant we took Pla and Lek off the louver and hatch projects and asked them to work on the deck. The next job up there is to repair all the gelcoat that peeled up too easily. Baw and Nut and Yoong had all spent a week up there chipping and sanding. Then Baw laid down blue vinyl cloth over the places that were NOT to be sprayed again, and we've all been trying to walk only on the blue vinyl to keep the edges (areas to be re‑sprayed) clean. But with 2 new pairs of eyes up there, Lek and Pla were able to improve the sanding and cleaning of the re‑spray surface even more. It must be human nature: you work at a repetitive job long enough you want to say "Finished!" and move on. With new eyes, both Pla and Lek found areas that needed more attention, plus they were very willing to sand places that Amanda and Sue pointed out as needing more work. In fact, they sort of enjoyed pointing to something and saying "No good."
Sue and Amanda were gone most of the morning for a final x‑ray and doctor check on Sue's broken wrist. All seems to be healing well, and Sue has almost full motion back and is climbing the scaffolding with impunity. Thank you International Hospital, Phuket. On their return, Sue cleaned up some more deck hardware, and Amanda worked on a (last, we hope) spot on the deck where the gelcoat is peeling up, due to poor cleaning of the fiberglass and epoxy underneath. This is back on the aft end of starboard deck, a place that we thought had been well prepared. Yikes. Sometimes it feels endless. Tomorrow that new area will need to be sanded, maybe filled a bit, and made ready for repair.
Jon took a much needed break from the hand‑ and back‑breaking mast conduit‑pulling job, although he did cut longer diamonds in the 4 remaining PVC conduit sections, in the hopes that this will make them slide over the bolts more easily. He drilled the holes for all the hinges and latches and handles for the 4 cockpit locker hatches. He wanted to finish that before the hatches were painted, as then he'd lose all his markings of where the hardware goes.
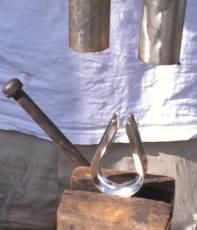 Clamping in a vise spreads ends |
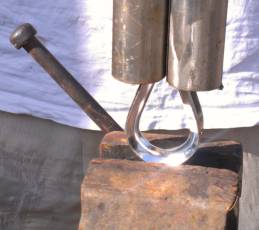 Slip strong pipes over thimble arms |
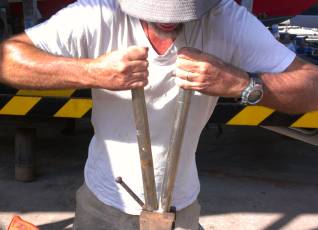 Pull the arms apart until they're the right width |
Jon also worked on the new rigging and managed a small victory. We used to have rod rigging for our 8 diamond stays (the standing rigging that holds the mast in column) but now we will be using Dynex‑Dux, a modern synthetic line heat treated and stiffened so that it is stronger than steel and much lighter. But to rig it to the existing mast and spreaders, we need different hardware than we did for the rods. Part of that is that the Dux doesn't like to kink, so we want it to go over something rounded at the tips of the spreaders.
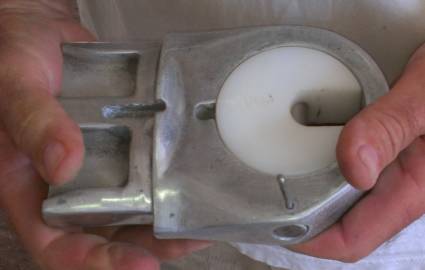 One of our spreader tips. Diamond stay goes through slot in plastic insert |
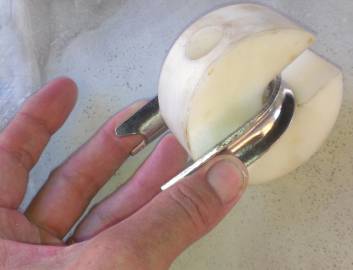 Spread thimble to round the path of the new Dux diamonds |
When we were last back in the States we got some thick stainless steel thimbles for this, and today Jon worked with a big vise and 2 carefully chosen steel pipes at the yard workshop to bend the legs of the thimbles open so they can go over our spreader‑tips. They still need a bit of work (they're currently too long) but the difficult work should be finished - and it was easier than Jon thought it would be. Jon also ground open the tips of our forward spreaders so they can take the new thimbles.
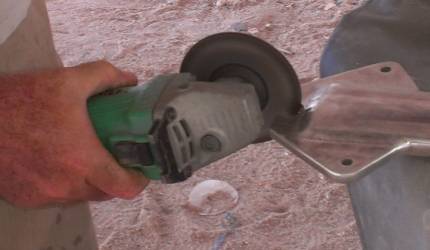 Jon grinding open the tip of 1 of our 2 forward spreaders, so thimble fits |
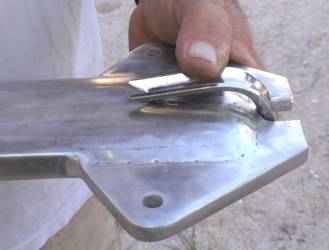 A newly spread thimble over the tip of a forward spreader |
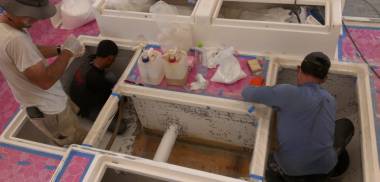 Jon mixing epoxy for Baw & Pla in Ocelot's cockpit lockers |
Saturday, April 20:
Thank Goodness It's Saturday! And Thank Goodness we have Baw back.
Baw also arrived with his younger brother, Ben, in tow. Ben did some work for us about a year ago, and he approached us directly to see if we had work for him. We set him up to work side‑by‑side with Lek on hand sanding the insides of the 4 big cockpit locker hatches. We were pleased that he stuck with this pretty menial job all day. Together, Ben and Lek finished one hatch completely, and got most of the way to finishing 2 more. This is really fiddly work, needing finger sanding of the areas between the fiberglass threads.
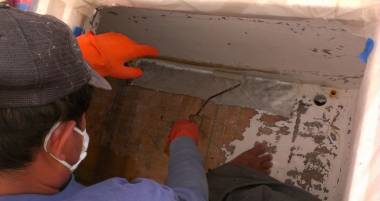 Pla laying a strip of biaxial glass on the back wall of the cockpit |
Baw and Pla worked on the cabin top and decks, doing some more sanding and cleaning of the areas to be re‑sprayed. They also got pretty far into masking off the areas to NOT be sprayed. It's quite complicated now, with places to be gelcoat repaired, and places where the gelcoat is well adhered. In some places Mike will just have to spray over well‑adhered gelcoat, as the repair areas are very odd shapes.
Amanda did a bit more gelcoat chipping on starboard aft deck, then cut more fiberglass cloth for the cockpit locker project. She took the afternoon off, enjoying the quiet of her air con room and internet.
At 11:20 Jon pulled Pla and Baw off the cabin masking to get their help replacing the fiberglass we peeled off a few days ago, down deep in the cockpit lockers. It was a great 3‑man effort, with Jon pumping and mixing the epoxy resin (and filler as needed) with Pla and Baw hunched down on the floor of the locker. They got 3 layers of cloth on both the front and back sides of the dividing wall, and the same again where the aft wall meets the floor. Then they smeared some epoxy with a bit of fillers in it (sort of a soupy consistency) onto the top of the fiberglass, to leave a smooth finish. They finished well into the lunch hour, but we were pleased (and surprised) to see the guys back at work when we returned from our 1 hour break on the beach.
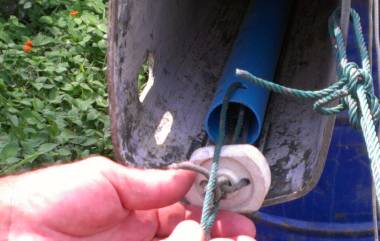 Our pusher disk, up-haul & downhaul lines for the mast conduit |
Sue played grinder lady again, sanding and polishing the forebeam. It's hard to know just how far down to grind to get rid of corrosion. You sort of want it all gone, but that means grinding away aluminum, which means there is less structure there. If we leave any pock marks, we will be sure to clean them well, dry them, and get lots of anti‑corrosion Nyalic in them.
After lunch Jon and Sue took on the mast conduit project once again. Sue was the "line handler" while Jon wore the big leather gloves and pulled the sections up. Actually, we pushed them up with a plastic disk attached to the pulling rope since we could no longer tie anything to the PVC (no way to untie anything in the middle of the mast). We were working in the bottom half of the mast so we looped a line through a hole in the bottom of each PVC section as our emergency downhaul, in case things got stuck. They never did, but we had to pull each section up until it ran into the one above it. Having a downhaul let us pull the section back down an inch or so until it nestled happily around the bolts on the track. The final 3 sections were short, and on the last one could just be hand pushed into place. Woot! The first mast wiring conduit installed! And the second one will be MUCH easier. The only "gotcha" was that when we tried to pull the wire lead strings down the mast, they got stuck. All we can figure is that one of the PVC conduit sections jumped the track and is sticking up, about 16' (5 meters) from the top. What this means is that we can only pull strings and wires UP the mast, not down, or they will snag. Oh well. This is boats.
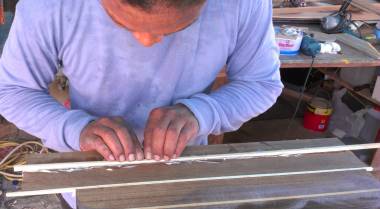 Houa putting a second strip of ash in our teak-&-holly floorboard |
Houa worked on 2 projects today. He built a small teak frame to rim the lattice on the anchor chain support underside. We had thought he was finished with the support/lattice, but this last effort gives us a much stronger piece of wood, as the lattice will be enclosed in a frame to be sure it doesn't break through. Not that it's easy to imagine 1" (25mm) teak pieces just breaking. Hoau also finished the repair to the teak and "holly" (ash, here in Thailand) floor section, so that's looking beautiful. All it needs now is a new rim for the floor hatch (it got water damaged), and some varnish work.
Mike from AME was planning to come down so we could schedule the next gelcoat work, but he got swamped and called to say he couldn't make it. He's scheduled his team to come down next Wednesday and Thursday, but we're not sure if that's for more preparation work (of which there's still plenty to do) or for actual spraying. We Shall See...
Thai Refit:
Ocelot Pages:
Top Level: Home | Destinations | Cruising Info | Underwater | Boat Guests | Ocelot | Sue | Jon | Amanda | Chris | Site Map | Make a Comment
|
If our information is useful, you can help by making a donation |
Copyright © 2000‑ Contact: Jon and Sue Hacking -- HackingFamily.com, svOcelot.com. All rights reserved.